Why Docker
You might ask yourself why should I use Docker to run Wagtail CMS, especially because a normal installation of Wagtail CMS entails about 7 lines of (actual) code, which will get you up and running. Well, let me tell you why. Docker is a containerization tool used for running isolated, reproducible application environments. Although Docker containers work a little like Virtual Machines (VMs), they have many advantages. You can use Docker to launch your container on any server (including cloud) or any local machine (e.g. developers computer) you want. It will run everywhere in exactly the same, predictable way. Moreover, Docker allows you to set up your environment in such a way that it runs in exactly the same manner as it will in production (e.g., the same operating system, with the same environment variables, and all the dependencies required). Have you heard of the famous developers’ excuse “It worked on my machine”? With Docker there are no more excuses.
Prerequisites
Before we begin, ensure the following is installed to your system:
That's it. No need for Python, Pip, a database (e.g., PostgreSQL, or MySQL), or npmjs. This will all be installed in our Docker containers.
Building the Docker containers
For our development environment we will build two seperate containers. The first container will contain the environment for Wagtail CMS and the second container will contain a PostgreSQL database. We will use Docker Compose, a tool that was developed to help define and share multi-container applications, to manage our containers. Let's start with our file structure:
my-project/
├── website/
├── .env.dev
├── .gitignore
├── docker-compose.dev.yml
├── Dockerfile
├── requirements.txt
└── wait-for-it.sh
As you can see, for our development environment we have a docker-compose.dev.yml config file and a Dockerfile. To build the containers for a production environment we would also need a docker-compose.prod.yml config file. The dockerfile contains every detail to build the container (e.g., which packages and dependencies to install, creating users for the container). The Wagtail application will be installed in the website folder. We also have an .env.dev file where all the environment variables (e.g., database credentials, API keys) are stored. I usually prefer a .env file because this allows you to exclude the environment variables from your git repository and still add the docker-compose config file to your git repository. We have a requirements.txt file in which all Python package are listed. Finally we have a wait-for-it.sh script which determines if the PostgreSQL database container is up and running or not. The wait-for-it script is a pure bash script that will wait on the availability of any host.
Docker-compose configuration
The Docker containers are configured with the docker-compose.dev.yml config file:
version: '3.8'

services:
  wagtail:
    build:
      context: .
      dockerfile: Dockerfile
    container_name: wagtail
    volumes:
      - ./website/:/usr/src/app/:consistent
      - ./wait-for-it.sh:/usr/local/bin/wait-for-it.sh
    ports:
      - 8000:8000
    command : wait-for-it.sh db:5432 -- python manage.py runserver 0.0.0.0:8000
    env_file:
      - ./.env.dev
    depends_on:
      - db
    networks:
      - website

  db:
    image: postgres:13-alpine
    restart: unless-stopped
    container_name: wagtail-db
    volumes:
      - postgres_data:/var/lib/postgresql/data/
    ports:
      - 5432:5432
    env_file:
      - ./.env.dev
    networks:
      - website

networks:
  website:

volumes:
  postgres_data:
The main advantage using a docker-compose config file is that you can build and link more than one container at once. The networks parameter at the bottom configures a network for your application and each container that shares that network is reachable by the other containers within the same network.
The docker-compose config file configures two services or containers. We have a wagtail container which is where we run Wagtail CMS and we have a db container where we run a PostgreSQL database. Take a note of the service names (i.e., wagtail and db), because we need these names to make a connection between both.
Caution
I highly recommend to use Wagtail CMS together with PostgreSQL. Although Wagtail CMS and Django can work for example with MySQL, it lacks support for transactions around schema alteration operations, meaning that you might run into migration problems. Wagtail CMS uses SQLite by default, but never run and migrate SQLite in a production environment. It is slow and buggy, and there is very little support for schema alteration operations.
Wagtail container
Let's examine each part in the wagtail container. The first part specifies how the container should be created. The container is build with a Dockerfile located in the current directory.
build:
  context: .
  dockerfile: Dockerfile
The . denotes that the Dockerfile should be existing in the current directory (i.e., in the same folder of the https://docker-compose.dev.yml/ file). Next, we specify volumes for data persistence. Normally when you shutdown a Docker container you would lose all data that is stored inside this container. However, if we specify one or more volumes we can keep the data inside these volumes, even if this container is deleted.
volumes:
  - ./website/:/usr/src/app/:consistent
  - ./wait-for-it.sh:/usr/local/bin/wait-for-it.sh
For the wagtail container we specify two volumes. The first volume stores the entire Wagtail CMS project in the local website/ directory. The second volume allows us to run the https://wait-for-it.sh/ script from within the docker-compose config file.
ports:
  - 8000:8000
We assign port 8000 for our Wagtail CMS project, which means that we can access our project on port 8000 and this is forwarded to port 8000 within the Docker container.
command : wait-for-it.sh db:5432 -- python manage.py runserver 0.0.0.0:8000This part is a bit more complicated, but it basically does two things. First it checks if the db container is available on port 5432 (i.e., default port for PostgreSQL). If Wagtail CMS can't connect with the database it will give an error and consequently the wagtail container will shutdown. Although our docker-compose is configured to wait for the db container to be up and running:
depends_on:
  - db
Unfortunately this does not mean that PostgreSQL is ready to handle requests. This is exactly what the https://wait-for-it.sh/ script does. When the https://wait-for-it.sh/ script determines that PostgreSQL is ready to handle requests, it will start the Django development server.
Finally, the env_file specifies which file we should use for all our environment variables.
env_file:
  - ./.env.dev
Environment Variables
In the environmental variable file (i.e., .env.dev) we store all settings and senitive data for easy management. In our example I only specify the database variables, but you can specify many more (e.g., secret key, API keys):
# The Wagtail variables
SQL_ENGINE=django.db.backends.postgresql
SQL_DATABASE=wagtail
SQL_USER=wagtail
SQL_PASSWORD=wagtail
SQL_HOST=db
SQL_PORT=5432

# These are for the configuration of PostgreSQL container
POSTGRES_DB=wagtail
POSTGRES_USER=wagtail
POSTGRES_PASSWORD=wagtail
Note that we have used the service name db for the SQL_HOST. Normally you would specify an IP address (e.g, 127.0.0.1) or hostname (e.g., localhost) to connect to a database, but in this instance we want to communicate with the PostgreSQL container and not an external database.
Caution
Add your environment file (i.e., .env or in our case .env.dev) in a .gitignore file. This environment file is typically used for the configuration of your application, which often includes sensitive information like database credentials and API keys. Even if your Git repository is not public, it is best practice to exclude this information from your repository.
Dockerfile
In the docker-compose config file we can build a container with a published image (see below, for the db container), or with a dockerfile. We use a dockerfile for the wagtail container because we want to specify which packages and dependencies we need.
FROM python:3.9.5-slim-buster

# set environment variables
ENV PYTHONDONTWRITEBYTECODE 1
ENV PYTHONUNBUFFERED 1

# create the app user
RUN adduser --system --group website

# set work directory
WORKDIR /usr/src/app

# install system packages required by Wagtail and Django.
RUN apt-get update --yes --quiet && apt-get install --yes --quiet --no-install-recommends \
    nano \
    build-essential \
    gettext \
    libpq-dev \
    libjpeg62-turbo-dev \
    zlib1g-dev \
    libwebp-dev \
    python3-dev \
    libpq-dev \
    gcc \
    musl-dev \
 && rm -rf /var/lib/apt/lists/*

# install dependencies
RUN pip install --upgrade pip
COPY ./requirements.txt .
RUN pip install -r requirements.txt

# copy project
COPY ./website .

# chown all the files to the app user
RUN chown -R website:website /usr/src/app

# change to the app user
USER website
Let's examine most important parts in the dockerfile. Most Docker images aren’t built from scratch. Instead, you take an existing image and use it as the basis for your image using the FROM command in your dockerfile. In our case we use python:3.9.5-slim-buster, which is basically a much smaller image than a the normal Debian Buster image. Because Docker containers typically run with root privileges by default, we want to run processes with a non-root user. Therefore we create a user who gets control of the project, but nothing else. We set the working directory and install all system packages required for Wagtail CMS and Django.
Next, we copy the requirements.txt file which contains all the Python packages required for our project:
Django>=3.2,<3.3
wagtail>=2.13,<2.14
psycopg2==2.9.2
Finally, we copy the local website/ directory to the working directory in the container, we change the user and/or group ownership of this directory, and switch to non-root user.
PostgreSQL Container
This container is much simpler. We just pull a published image postgres:13-alpine and we use a Docker volume instead of specifying a path like we did for the Wagtail container. In addition, we want the container to restart whenever it shuts down.
Pro Tip
Always specify a version number for the image that you want to use to build your containers (e.g, postgres:9.6.24). Often it is possible to use the 'latest' tag (e.g., postgres:latest) or no tag at all (e.g., postgres) to get the latest release, but this could cause conflicts in case of new releases. Everytime you rebuild your container it will use the latest release. If you specify the version number you can be sure that your application works in your environment.
Build the Wagtail Container and install Wagtail CMS
Now that we have configured the Docker containers we can finally start building. Go the to root (i.e., where your docker-compose config file is located) of your project and run the following command:
$ docker-compose -f docker-compose.dev.yml build
Text Highlight
Note that we specify the docker-compose config file here with the -f flag. If your file is called docker-compose.yml you don't have to specify this and you would just run:
$ docker-compose buildBut I always prefer to distinguish between development and production environments and name each file accordingly.
When your Wagtail container is build, we are finally ready to install Wagtail in our Docker container. In this example we called our project website.
$ cd website
$ docker run --rm -ti -v ${PWD}:/usr/src/app my-project_wagtail wagtail start website .
This will create an empty skeleton of Wagtail CMS that needs to be configured further. We can now start the application in detached mode:
$ cd ..
$ docker-compose -f docker-compose.dev.yml up -d
If you want to see all the logs outputted by the containers you can run:
$ docker-compose -f docker-compose.dev.yml logs -f

wagtail    | wait-for-it.sh: waiting 15 seconds for db:5432
wagtail    | wait-for-it.sh: db:5432 is available after 0 seconds
wagtail    | Watching for file changes with StatReloader
wagtail    | Performing system checks...
wagtail    |
wagtail    | System check identified no issues (0 silenced).
wagtail    |
wagtail    | You have 122 unapplied migration(s). Your project may not work properly until you apply the migrations for app(s): admin, auth, contenttypes, home, sessions, taggit, wagtailadmin, wagtailcore, wagtaildocs, wagtailembeds, wagtailforms, wagtailimages, wagtailredirects, wagtailsearch, wagtailusers.
wagtail    | Run 'python manage.py migrate' to apply them.
wagtail    | November 29, 2021 - 07:39:53
wagtail    | Django version 3.2.9, using settings 'website.settings.dev'
wagtail    | Starting development server at http://0.0.0.0:8000/
wagtail    | Quit the server with CONTROL-C.
To stop viewing the logs you press the CTRL + C. To verify if your containers are running use:
$ docker ps

CONTAINER ID   IMAGE                COMMAND                  CREATED          STATUS              PORTS                                       NAMES
6394721512be   my-project_wagtail   "wait-for-it.sh db:5…"   11 minutes ago   Up About a minute   0.0.0.0:8000->8000/tcp, :::8000->8000/tcp   wagtail
8cbeb3bef8ce   postgres:13-alpine   "docker-entrypoint.s…"   11 minutes ago   Up About a minute   0.0.0.0:5432->5432/tcp, :::5432->5432/tcp   wagtail-db
When the containers are running smoothly we need to add a DATABASE variable in the settings/dev.py file:
# Database PostgreSQL
DATABASES = {
  "default": {
    "ENGINE": os.environ.get("SQL_ENGINE", "django.db.backends.sqlite3"),
    "NAME": os.environ.get("SQL_DATABASE", os.path.join(BASE_DIR, "db.sqlite3")),
    "USER": os.environ.get("SQL_USER", "user"),
    "PASSWORD": os.environ.get("SQL_PASSWORD", "password"),
    "HOST": os.environ.get("SQL_HOST", "localhost"),
    "PORT": os.environ.get("SQL_PORT", "5432"),
  }
}
Wagtail CMS now knows that it should use the environment variable that we specified earlier. We can now migrate the installation to the PostgreSQL database container:
$ docker-compose -f docker-compose.dev.yml exec wagtail python manage.py migrateFinally, we create an admin user which has full access in Wagtail CMS:
docker-compose -f docker-compose.dev.yml exec wagtail python manage.py createsuperuser
That's it. If everything worked, http://127.0.0.1:8000 will show you a welcome page:
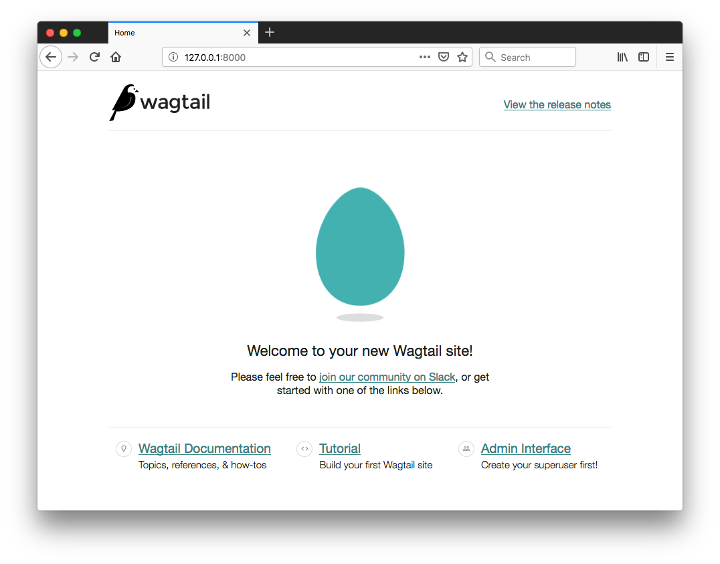
You can now access the administrative area at http://127.0.0.1:8000/admin
Conclusion
At first glance you might think that this is much work for a Wagtail CMS installation, but I do hope that you can see that advantages of Docker and that you now have a basic understanding of how to work with Docker. I will soon be publishing one more article on deploying your Wagtail container to a production environment.