Portainer stands out as a remarkable open-source tool designed to streamline and enhance the management of containerized environments. This powerful tool is designed to simplify and optimize the deployment, monitoring, and maintenance of containerized environments, making it a go-to choice for professionals working with Docker. Portainer's standout feature is its intuitive graphical user interface, which demystifies complex container management tasks. Whether you're dealing with container stacks, networks, or volumes, Portainer's interface ensures that these tasks are more accessible and manageable, even for those who are relatively new to Docker. Here's a brief overview of its key features:
- Multiple Docker Environments: Users can manage multiple Docker environments, such as Docker hosts or Swarm clusters, from a single, unified interface.
Container Management: Users can deploy, stop, start, and manage containers directly from the Portainer dashboard. This includes viewing logs, stats, and managing container settings.
Stack Deployment: Portainer allows for the easy deployment of stacks using Docker Compose, which is useful for managing multi-container applications.
Volume and Network Management: The tool offers management capabilities for Docker volumes and networks, simplifying the process of creating and maintaining data storage solutions and network configurations.
Registry Management: Users can manage Docker registries, ensuring secure access to images.
Resource Management: It offers insights into resource usage, like CPU and memory usage, helping in the monitoring and optimization of container performance.
Templates: Portainer comes with a set of predefined templates for popular applications, simplifying the deployment process.
These features collectively make Portainer a comprehensive tool for managing containerized environments, simplifying various aspects of container deployment, monitoring, and maintenance.
In this comprehensive blog post, we will guide you through a series of essential Portainer functionalities. Starting with a step-by-step installation process, we'll move on to the details of configuring multiple Docker environments, and delve into container management — including creation, editing, log monitoring, performance tracking, and shell access. We'll also cover the deployment of stacks, the management of volumes and networks, as well as handling images. This post aims to equip you with the knowledge to proficiently navigate and utilize the full spectrum of Portainer's capabilities.
Prerequisites
Before diving into this tutorial, ensure that you have Docker and Docker Compose installed on your system:
While this guide is compatible with most operating systems (e.g., Windows, macOS, and Linux), it's important to note that for a production environment, whether on-premise or in the cloud, setting up everything in a Linux environment is highly recommended. Linux is the preferred choice due to its inherent stability, security, and performance benefits, as well as its widespread adoption in server infrastructure.
Installation
In this section, I'll walk you through the process of installing Portainer, ensuring you have an efficient and seamless way to manage your containers and other Docker resources. I'll be using a docker-compose.yml file to simplify the setup of Portainer.
$ mkdir portainer
$ echo "" > docker-compose.yml
The docker-compose.yml file outlines the necessary configuration for our Portainer instance, including the latest Portainer Community Edition image, container name, restart policy, security options, network connections, volume mounts, and port mappings. Notably, the configuration includes a bind mount for the host's Docker socket, which allows Portainer to manage the Docker daemon on the host. Additionally, an external named volume called "portainer" is defined for storing Portainer's configuration data.
version: '3'
services:
portainer:
image: portainer/portainer-ce:latest
container_name: portainer
restart: unless-stopped
security_opt:
- no-new-privileges:true
networks:
- web
volumes:
- /etc/localtime:/etc/localtime:ro
- /var/run/docker.sock:/var/run/docker.sock:ro
- portainer:/data
ports:
- 9000:9000
volumes:
portainer:
external: true
networks:
web:
external: true
name: webThe Portainer container will use an external volume named "portainer" and it will connect to an external network named "web," which must both be created beforehand.
$ docker volume create portainer
$ docker network create web
With this configuration in place, we can create our container.
$ docker-compose up -dThis will set up Portainer in detached mode, enabling you to manage your containers and other Docker resources with ease. Open Portainer by navigating to http://localhost:9000 (or the appropriate IP address of your host) in your web browser. If everything worked you can now finish the installation and login to Portainer.
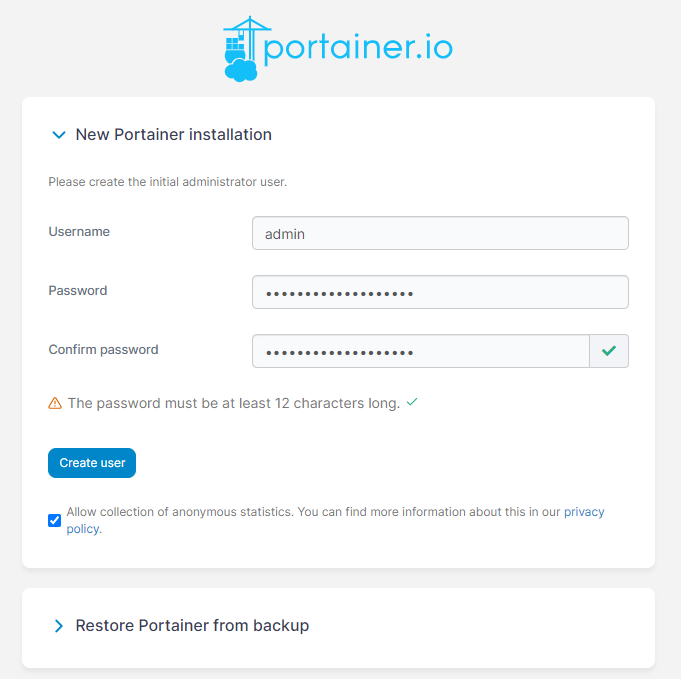
When you updated or created a user you get redirected to the main dashboard.
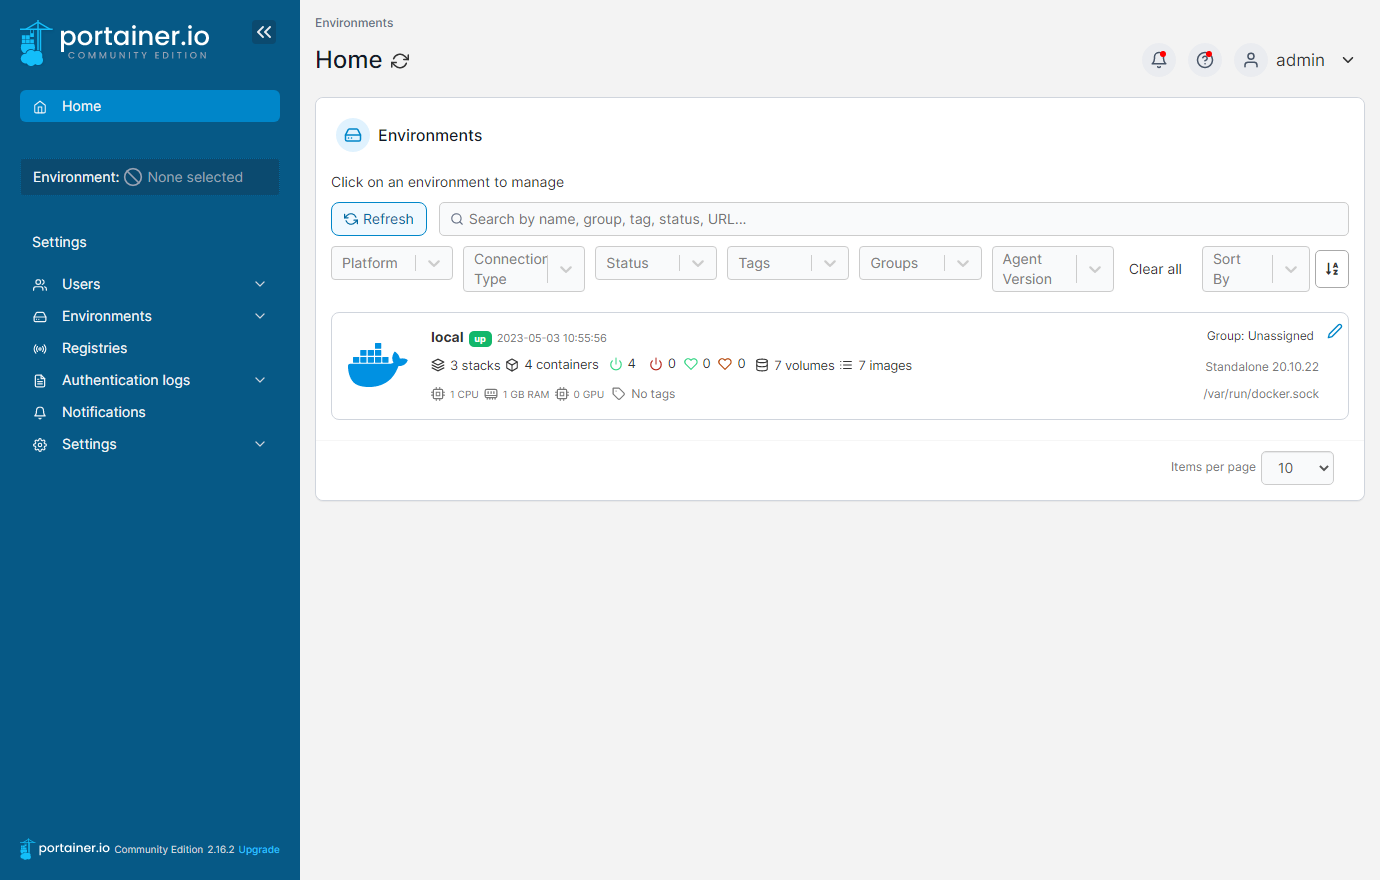
Now that we've successfully installed Portainer, let's explore some of its powerful features, which range from user-friendly container management to advanced functionalities like stack deployment, volume and network management.
Multiple Docker Environments
Managing multiple Docker environments in Portainer offers significant advantages, such as centralized control and monitoring of various Docker hosts or clusters from a single dashboard. This approach allows you to control, for example, your development, staging, and production server under one hood. This also allows, for example, Department A to have have access to one environment and Department B to another.
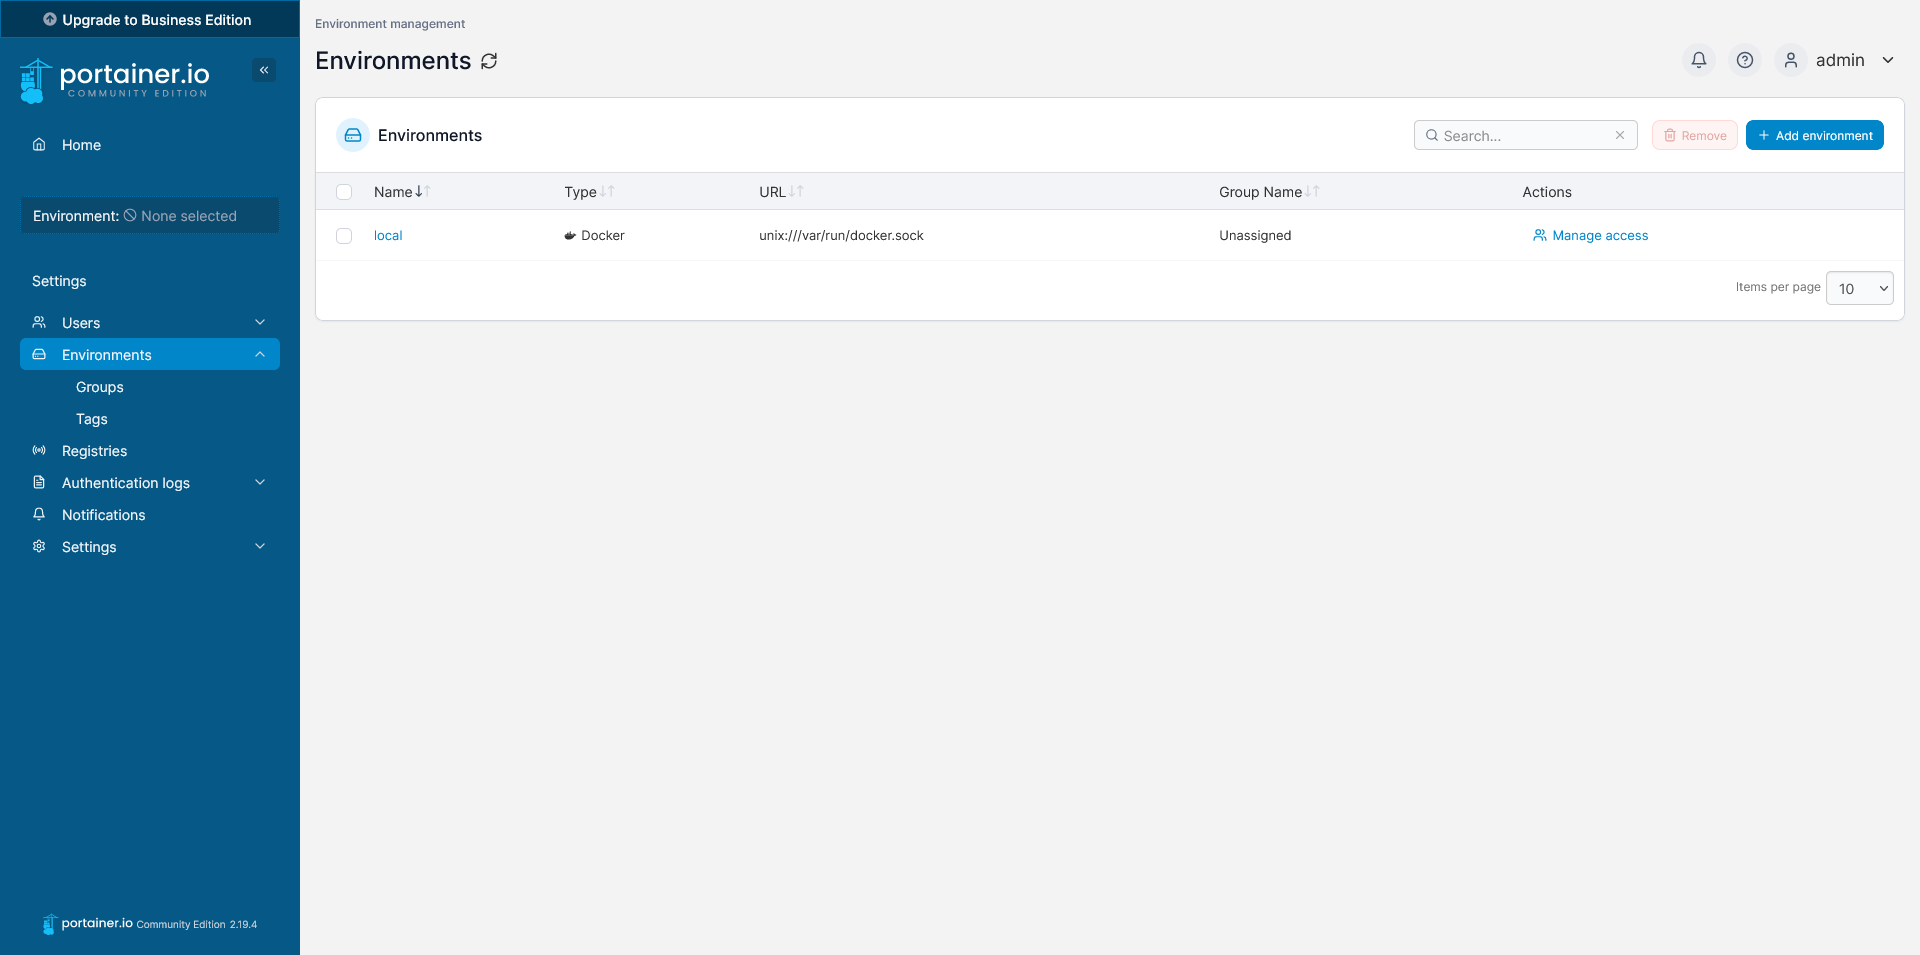
To add an environment in Portainer, choose "Environments" from the left menu, then click on the "Add environment" button in the top right.
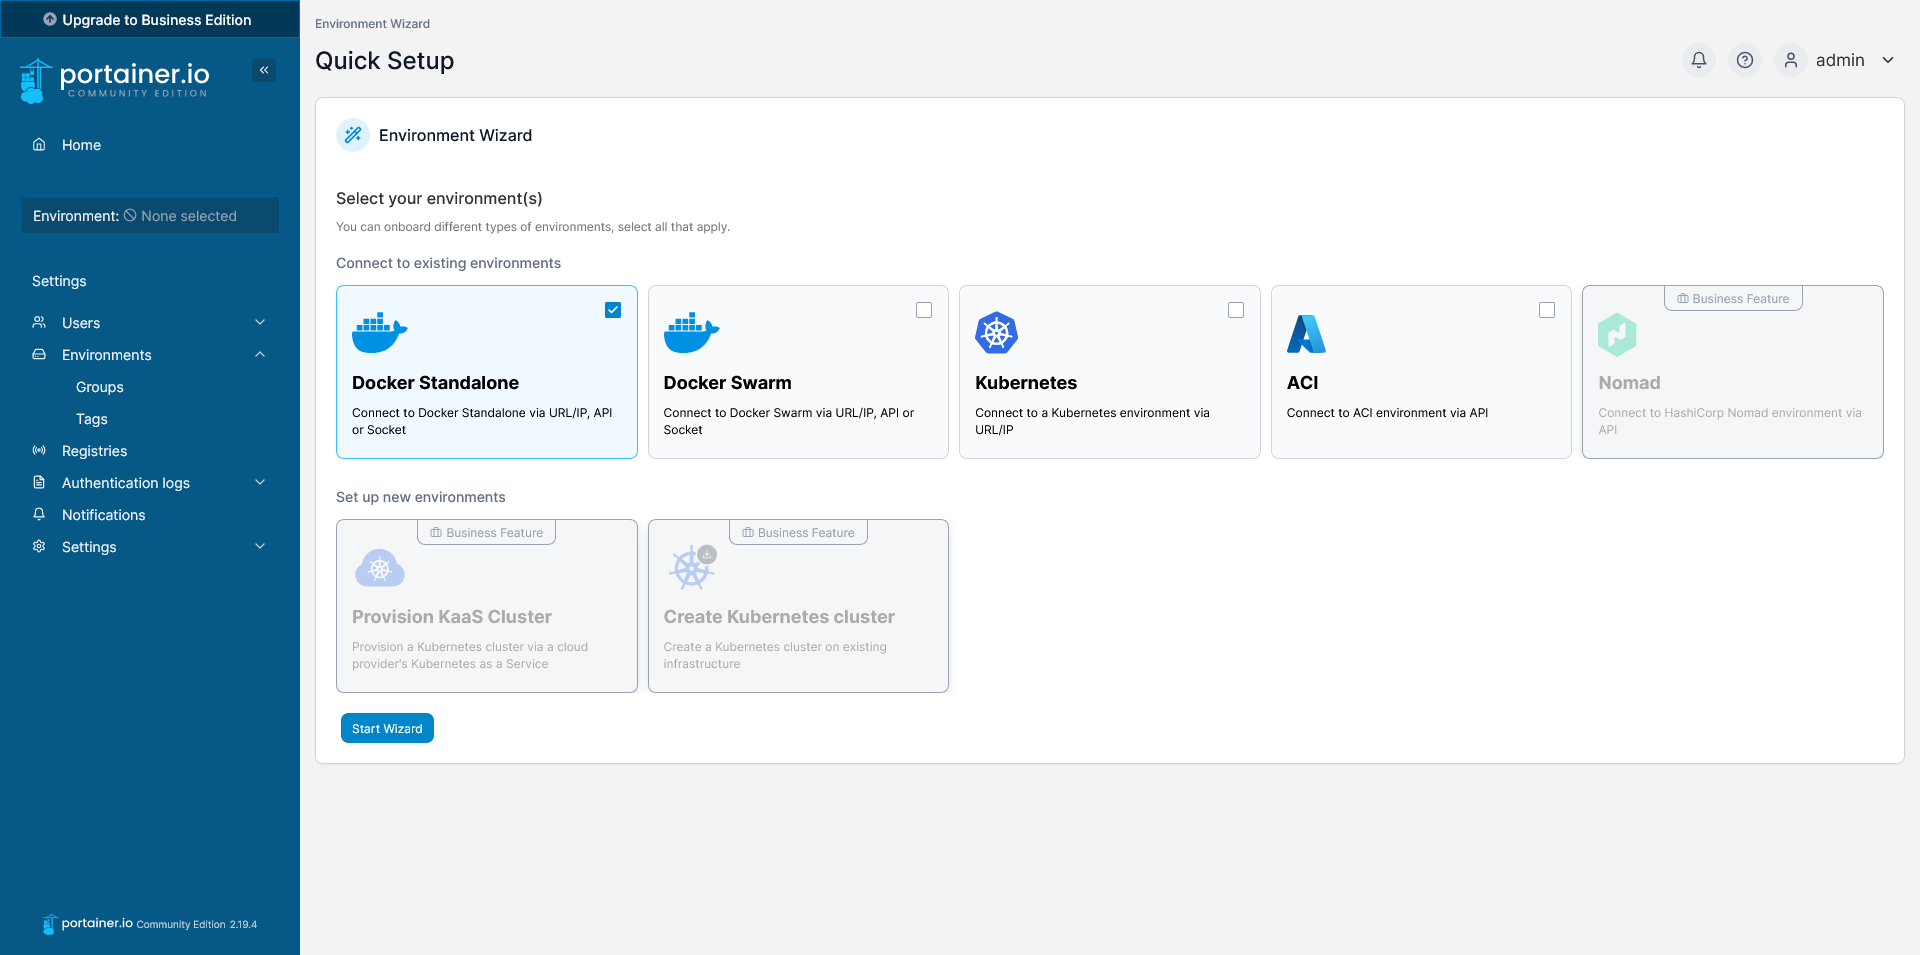
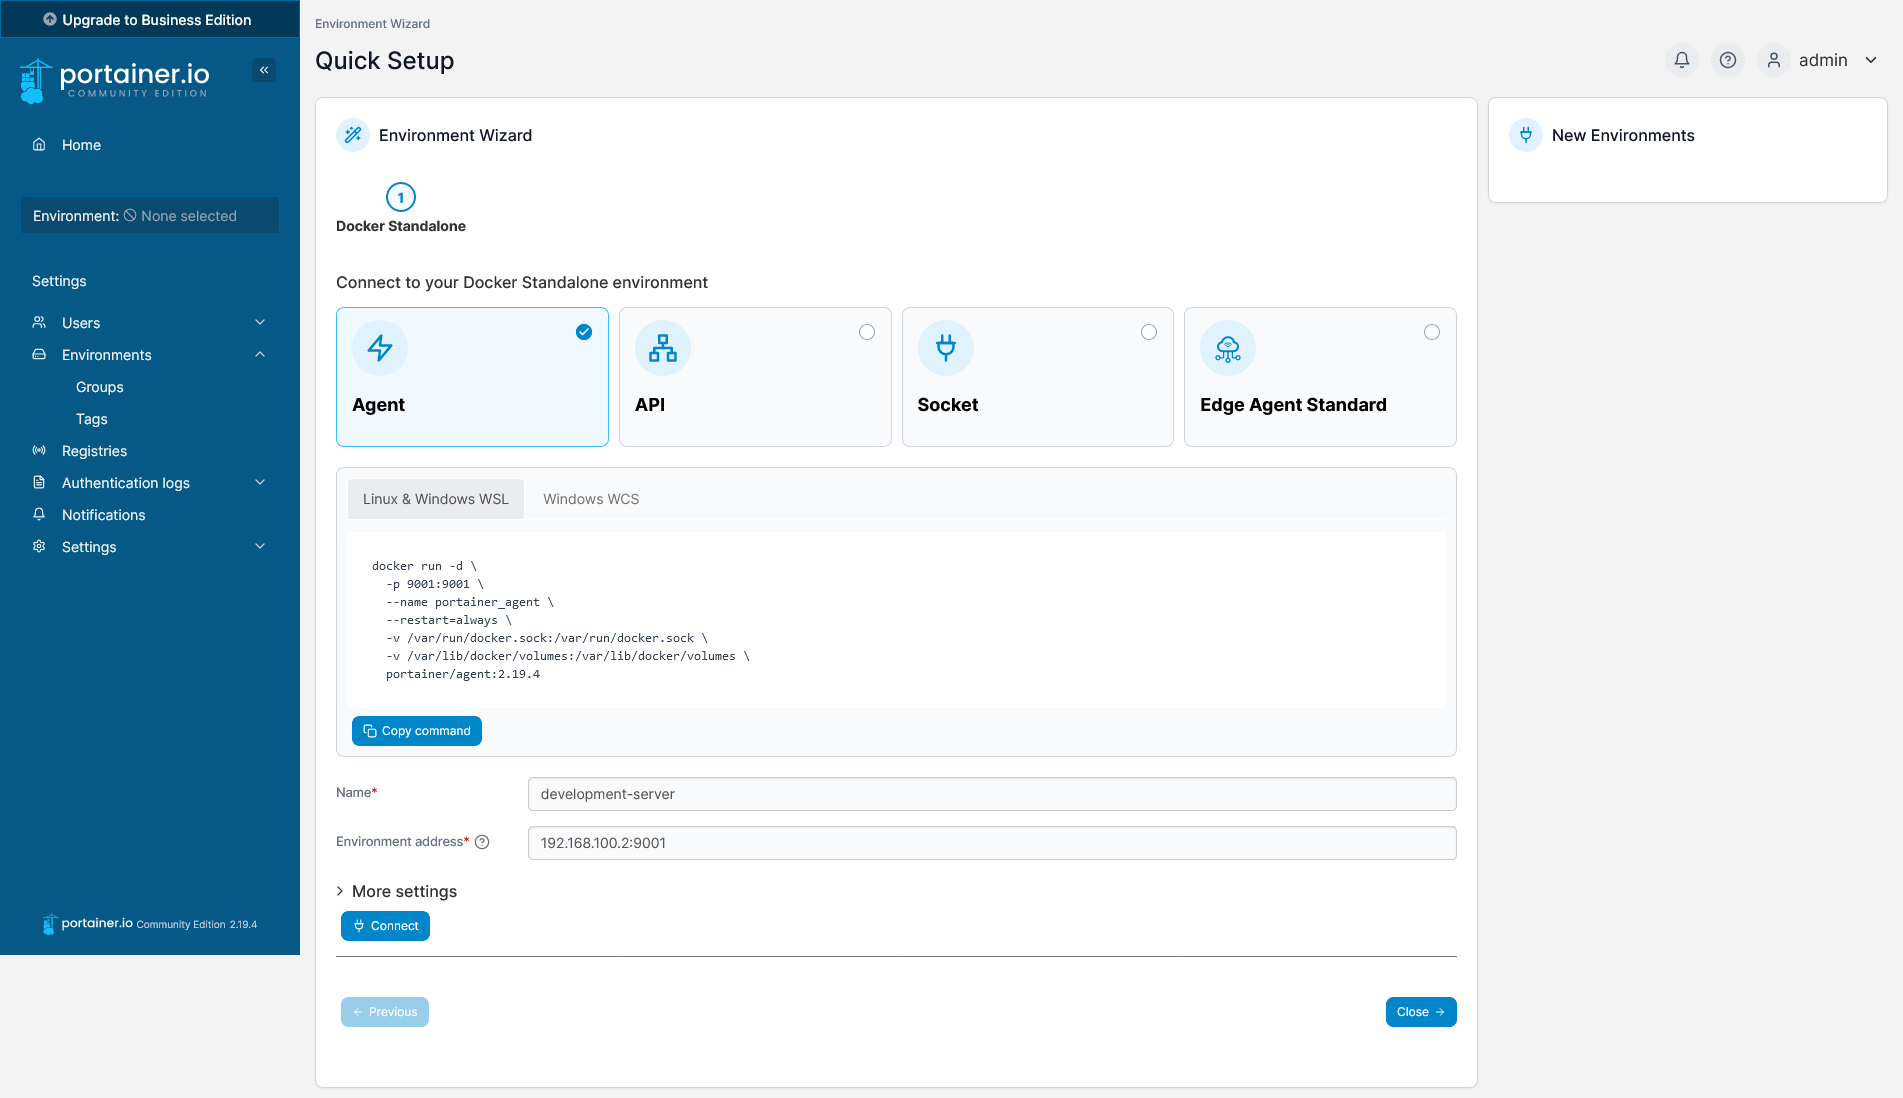
For this tutorial we will use "Docker Standalone". Click on "Start Wizard" to configure your environment.
Start by entering a preferred name for the remote Docker environment in the 'Name' field (e.g., development-server). Then, in the "Environment address" field, input the server's IP address appended with ':9001', which is the port number. To establish the connection, click on the "Connect" button.
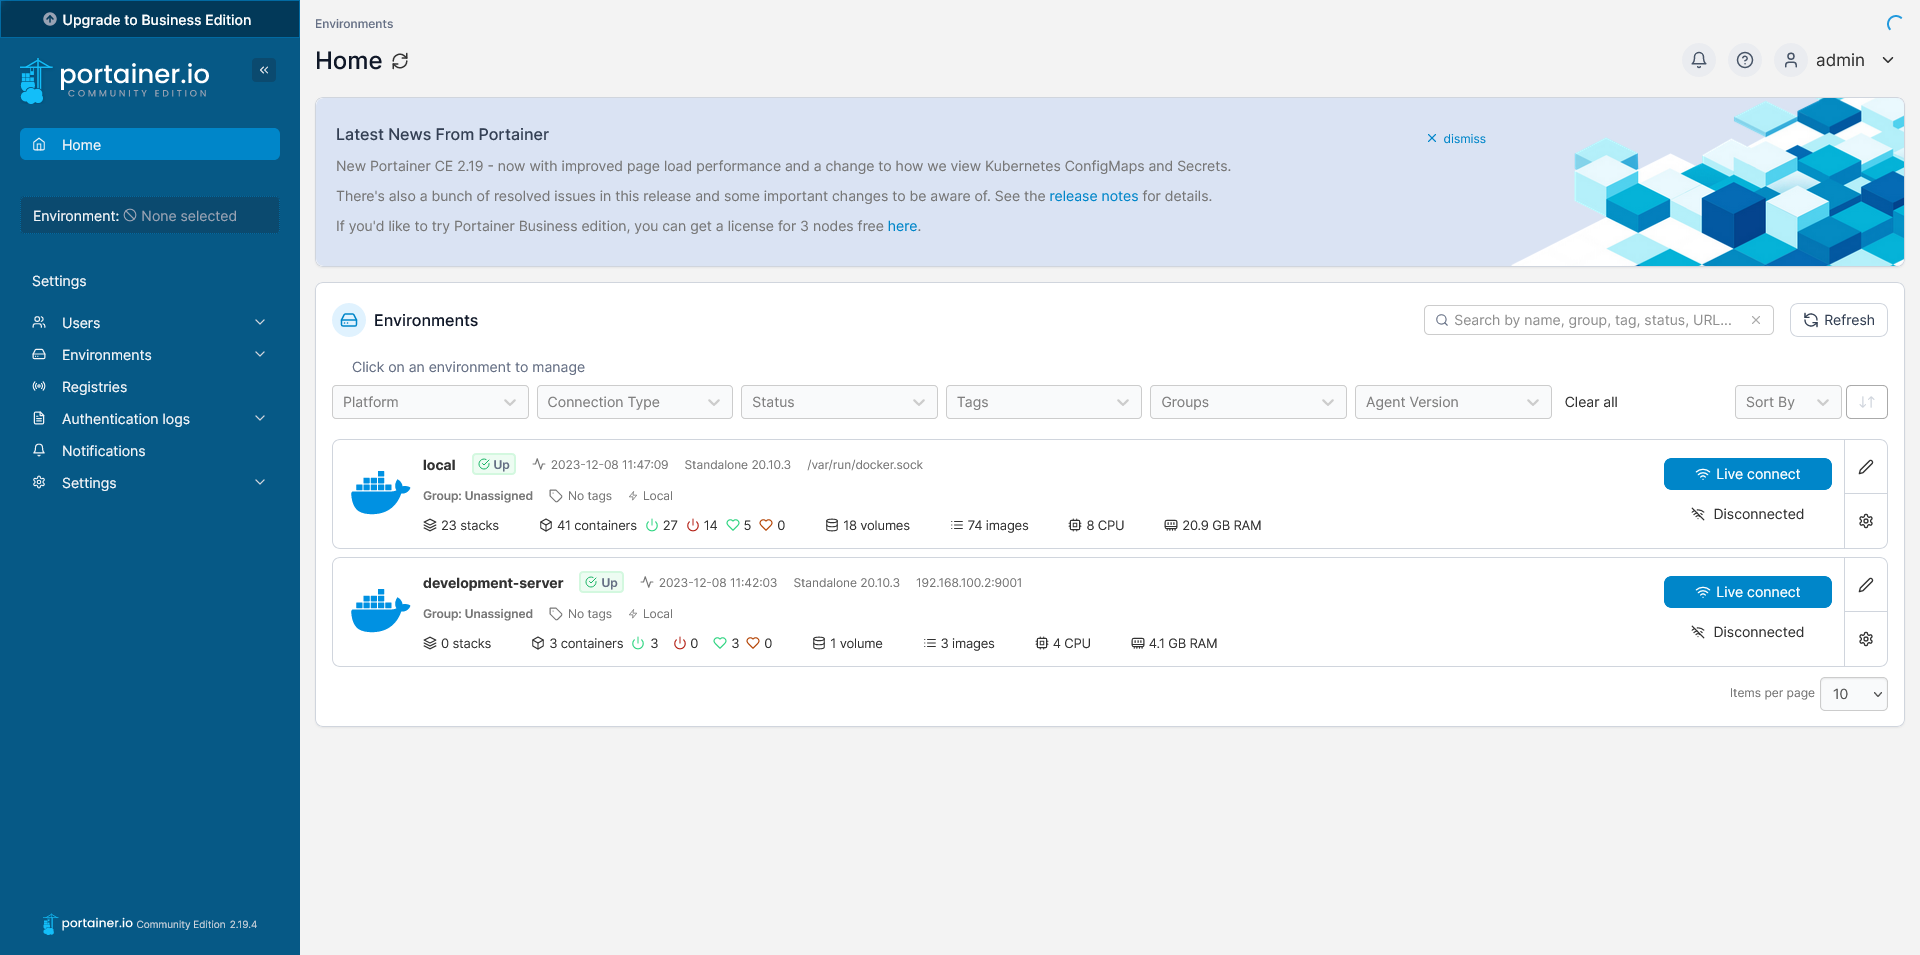
Once the connection is successful, you'll receive a confirmation message. To go back to Portainer's dashboard, simply click on the logo located in the upper left corner.
You now successfully added your new remote environment to Portainer, which allows you to manage your remote Docker environment via Portainer with the same ease and functionality as your local environment.
Now that we have an additional environment configured in Portainer, it's time to manage access for different groups. For this tutorial I will grant Department A access to the local environment. To add a new team in Portainer, choose "Users" from the left menu, then click on "Teams".
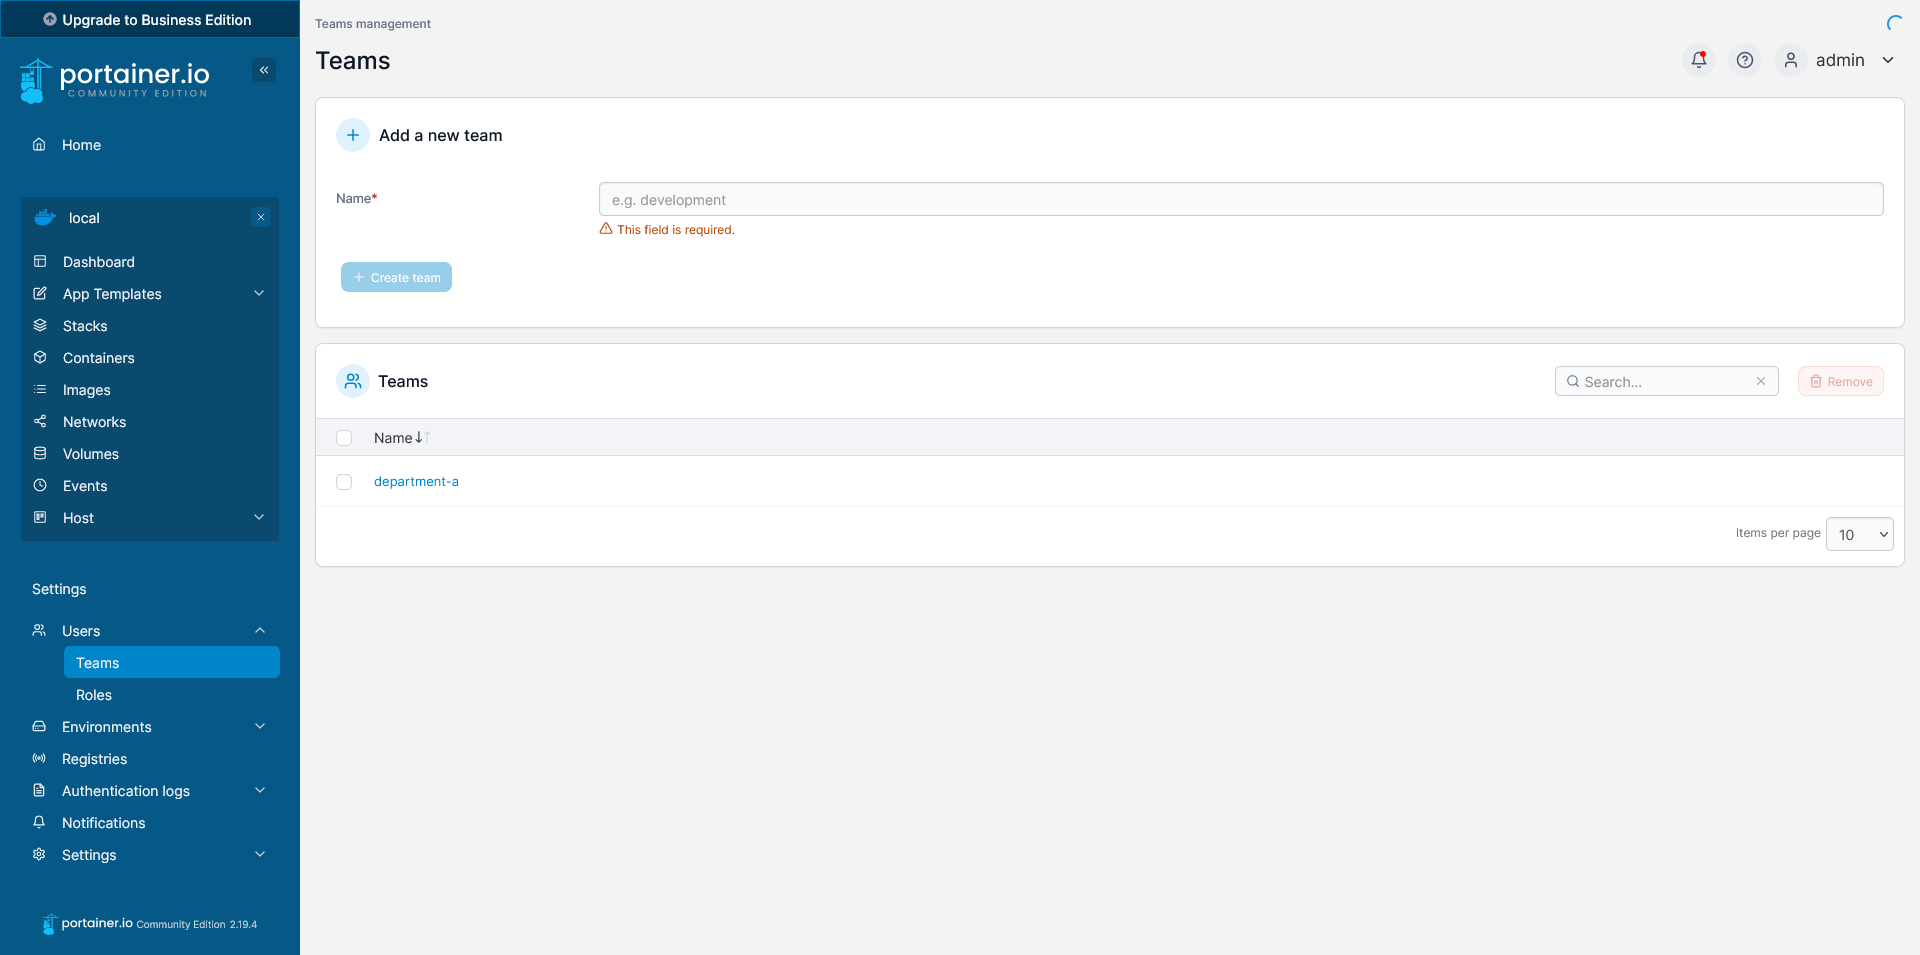
Start by entering a preferred name for your team (e.g., department-a) and then click on "Create Team". Your team should show up in the list of teams. If you click on the created team you can assign users to this team.
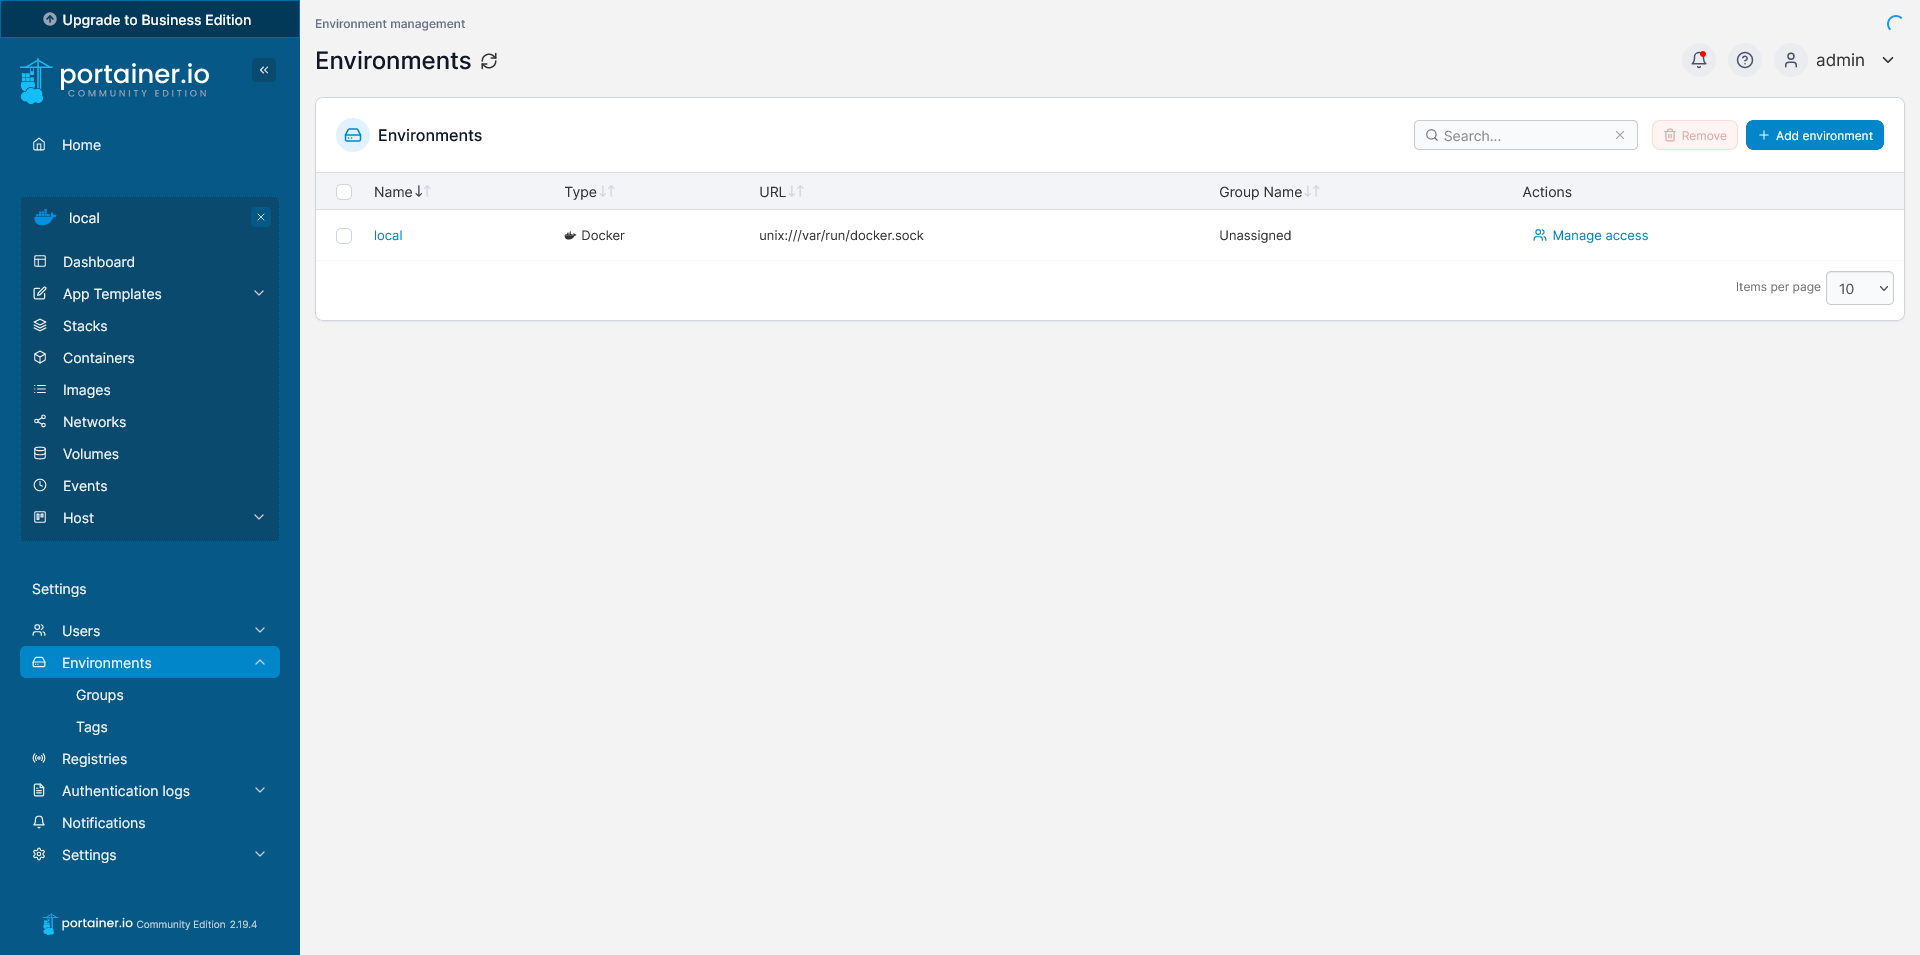
Now that we have created a team, let's configure the local environment and assign this team by clicking on "Environments" in the left menu, and then click on the "Manage access" button for the environment.
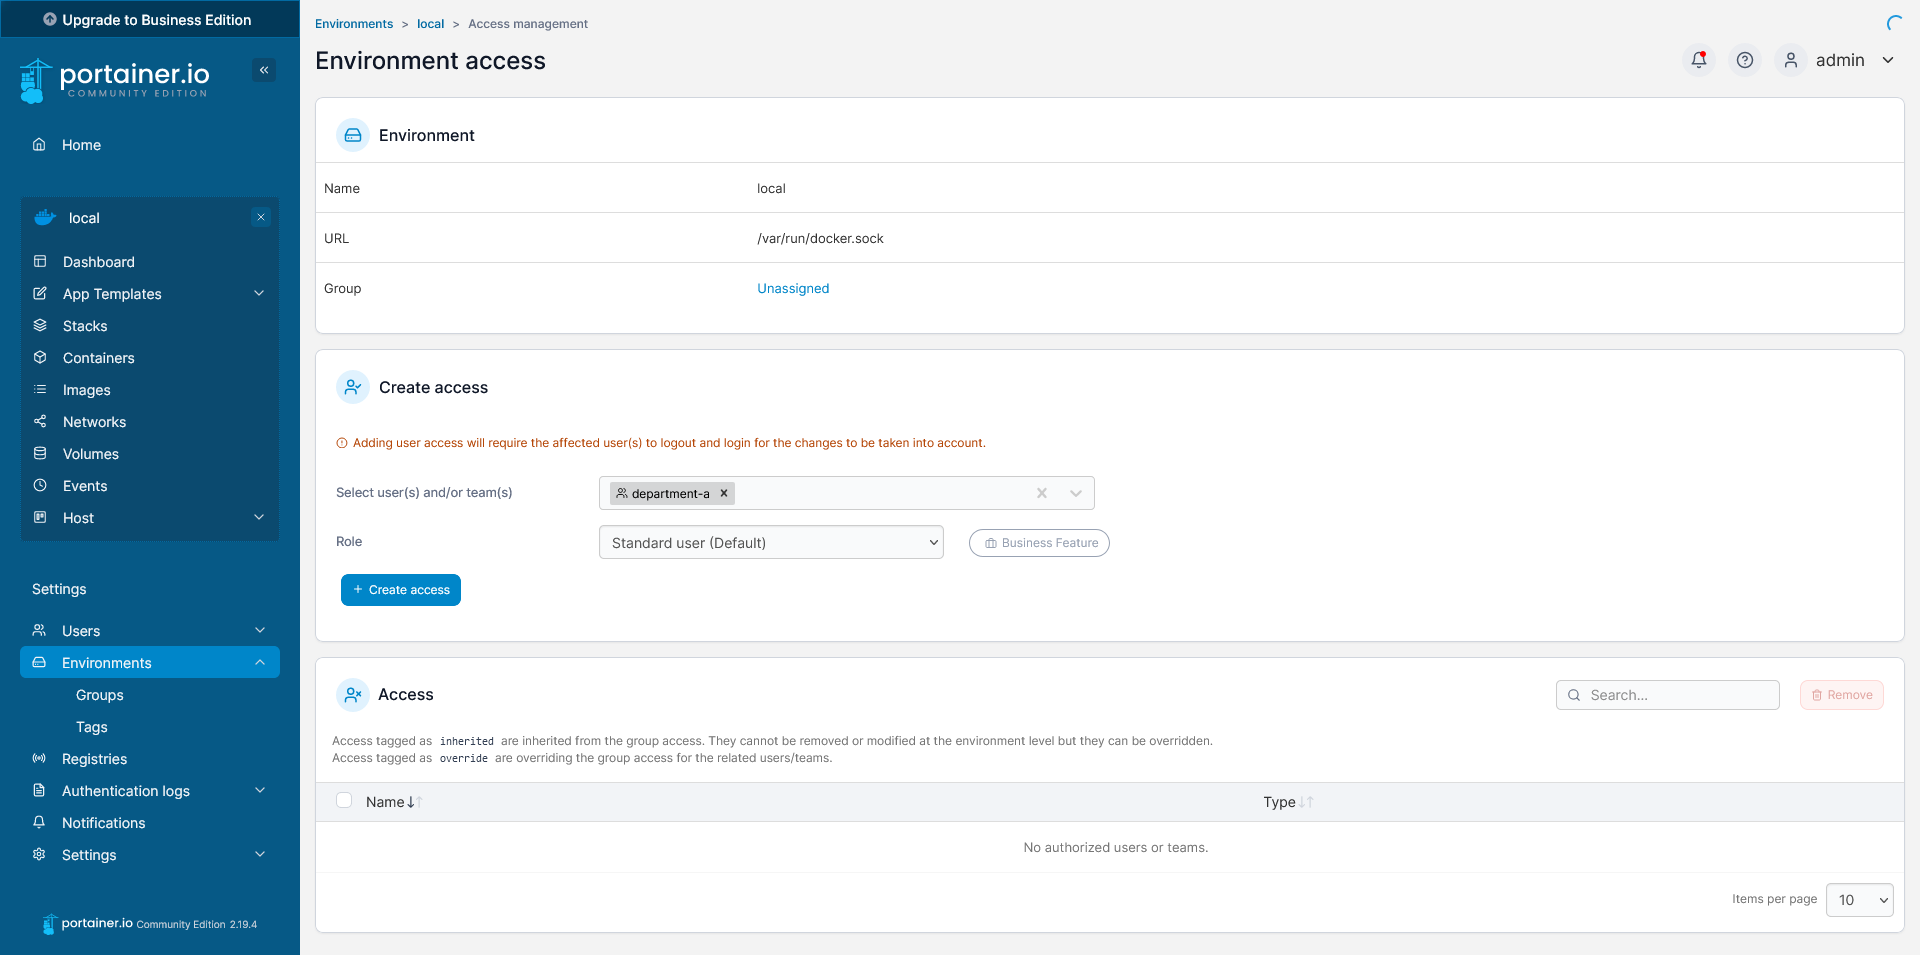
In the "Create Access" section you can give access to multiple teams or individual users. Click on "Select user(s) and/or team(s)" and select the team we just created and then click on "Create Access". That's it, now only users from Department A will have access to the local environment.
Having explored the management of multiple environments in Portainer, let's now shift our focus to container management. This section will delve into how Portainer simplifies the process of creating, editing, and monitoring containers, offering a deep dive into its robust container management capabilities.
Container Management
In essence, a container is an executable version of an image. Since containers don't store persistent data, they can be freely destroyed and recreated whenever necessary. In the following sections, we will delve into how you can create, modify, and manage your containers with Portainer.
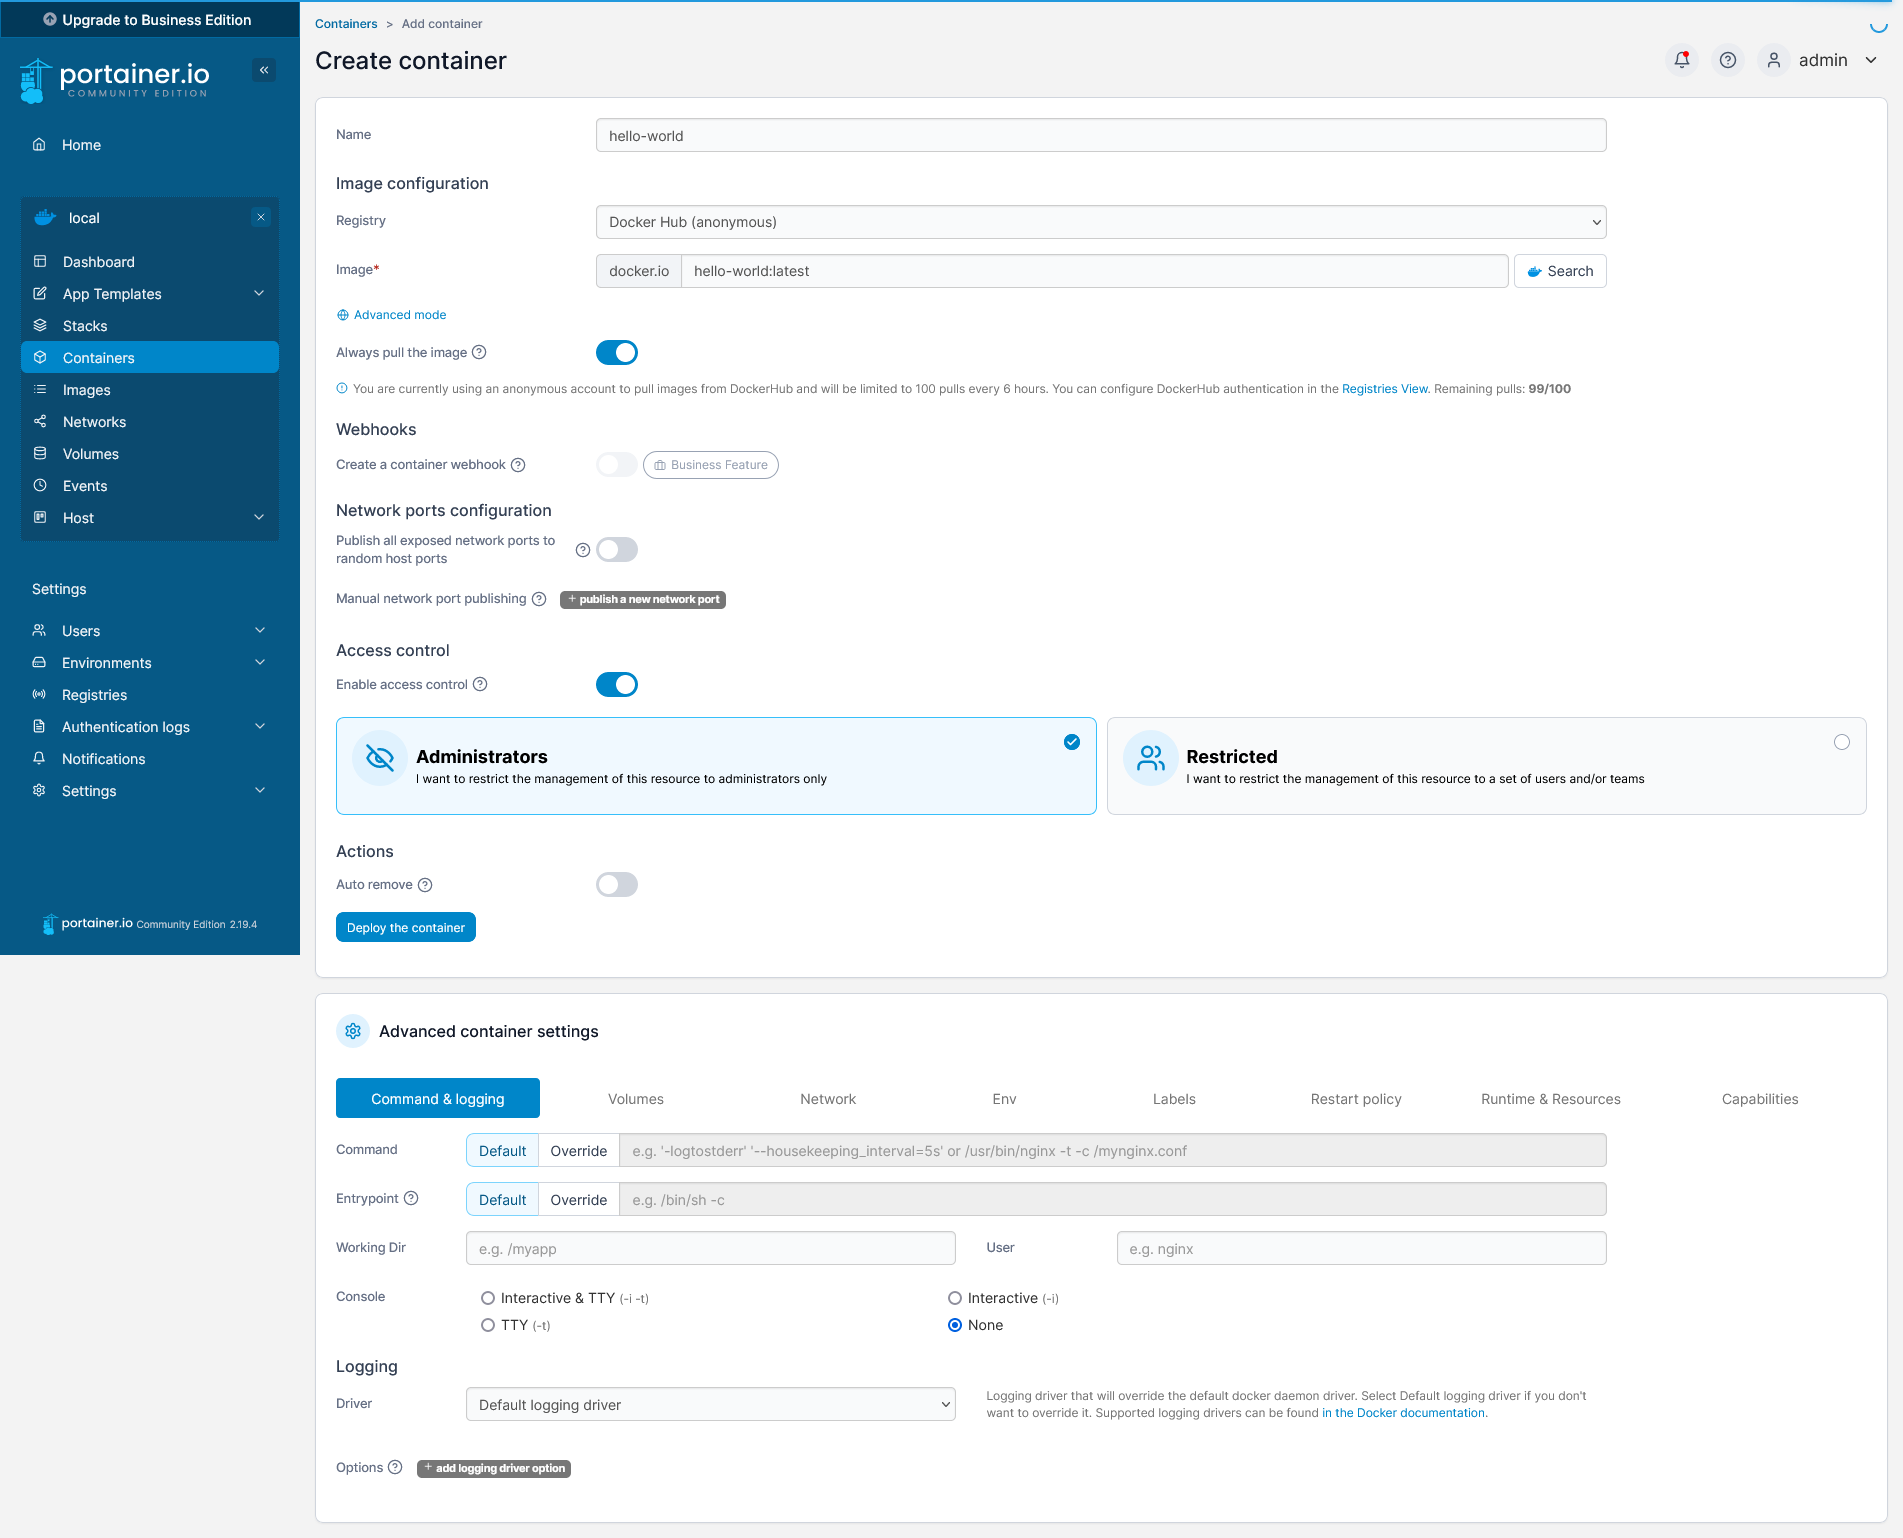
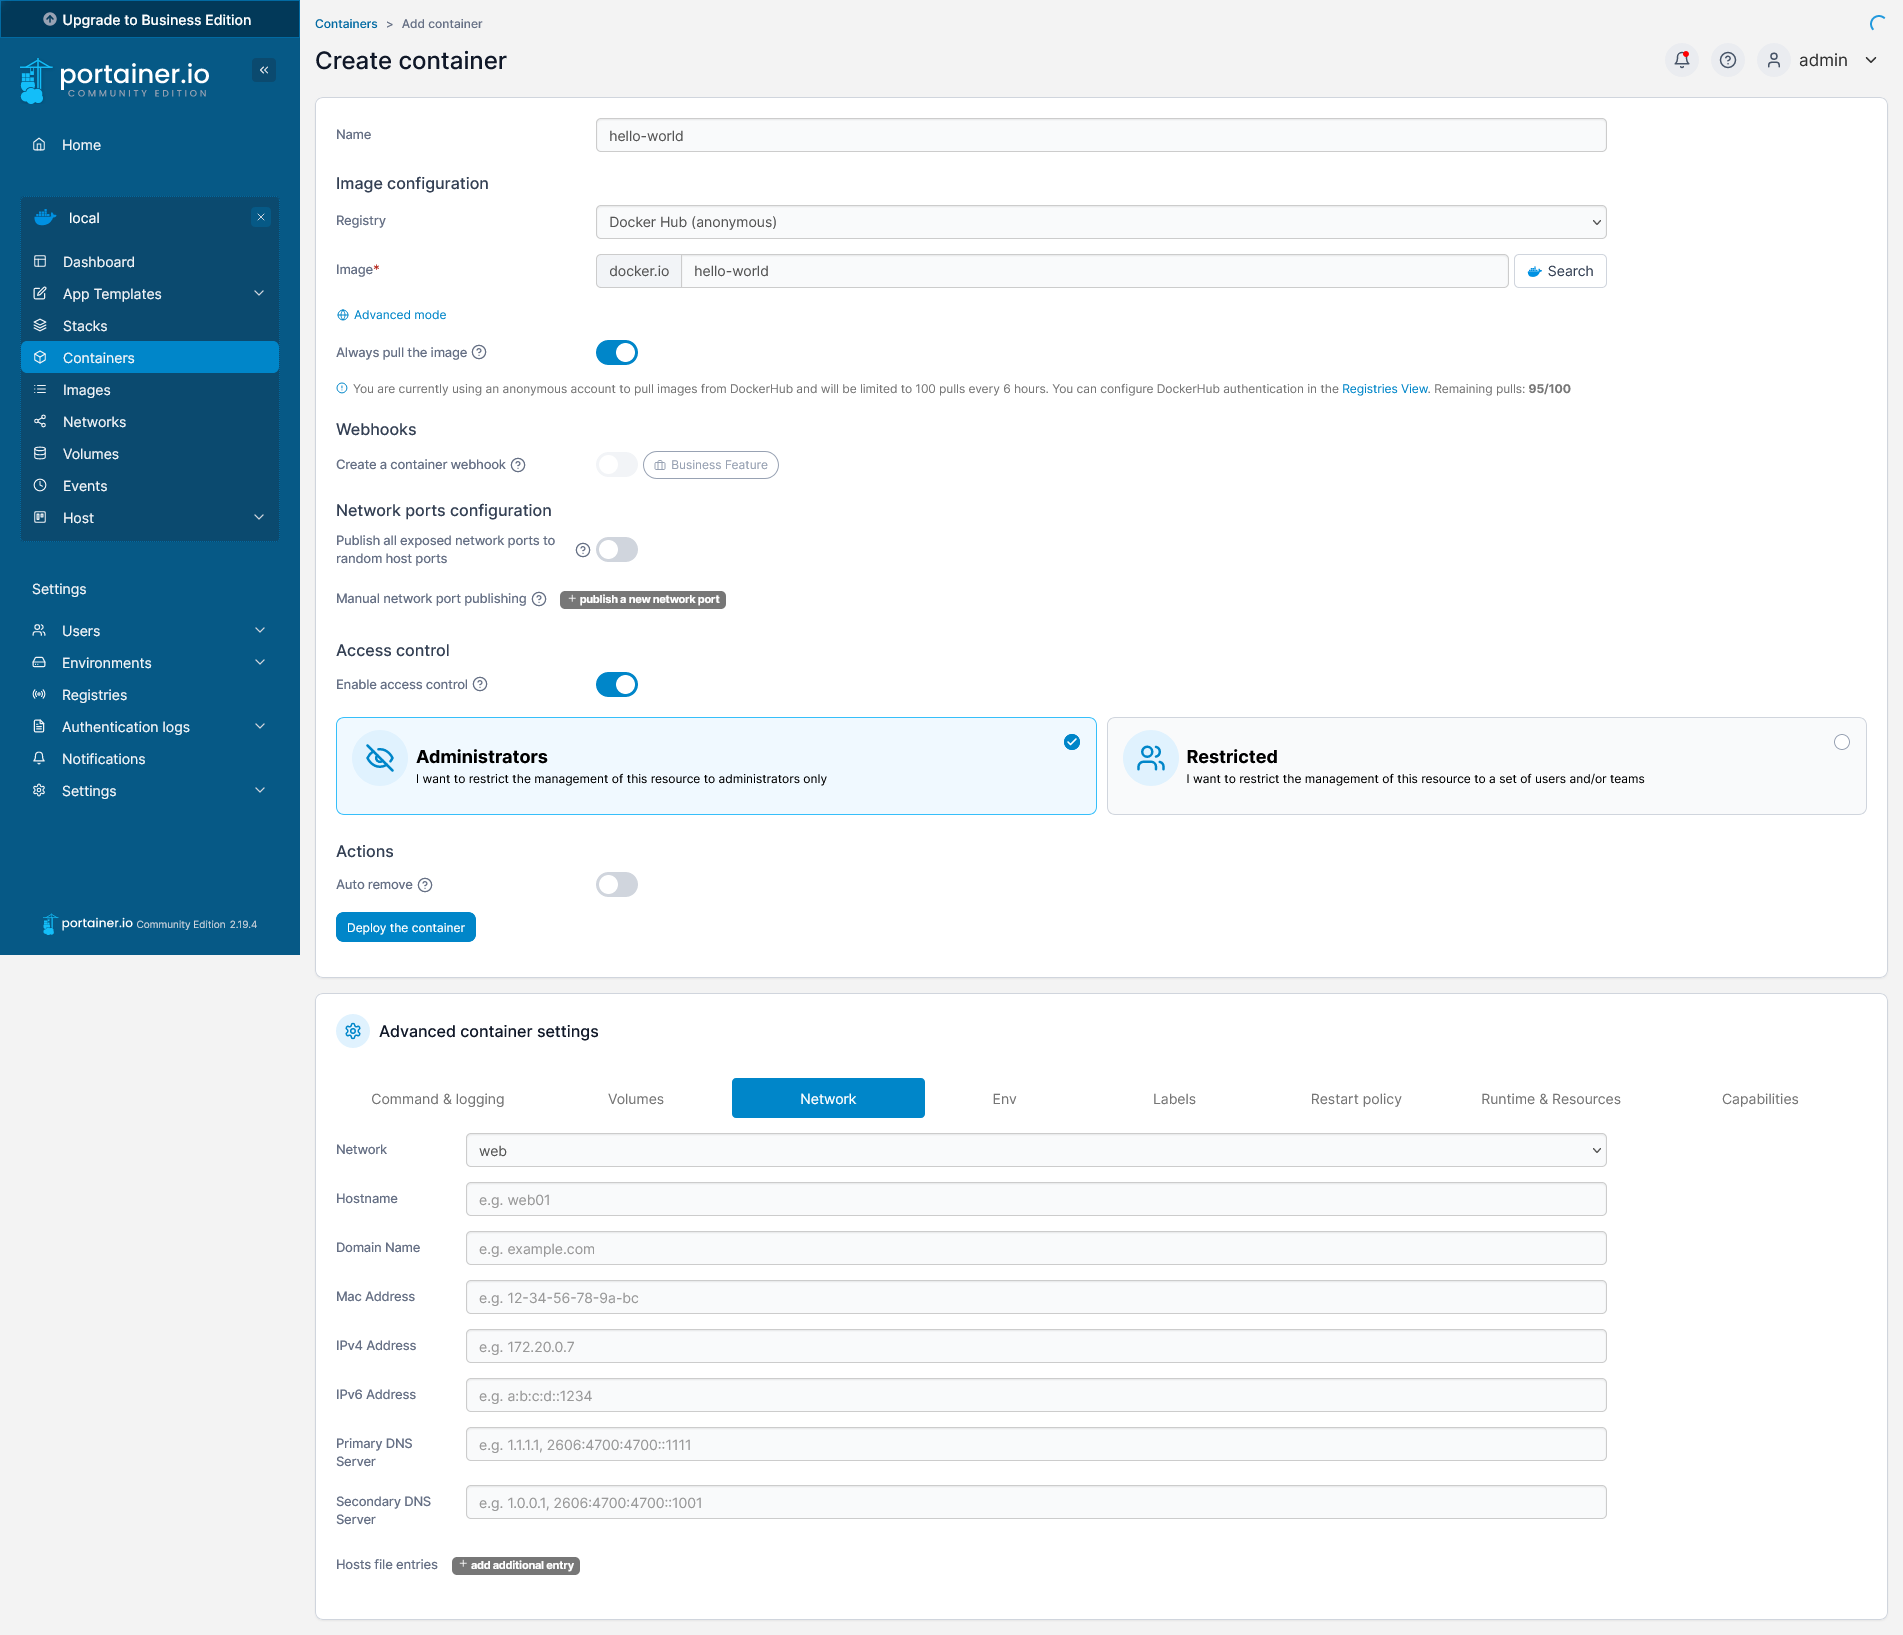
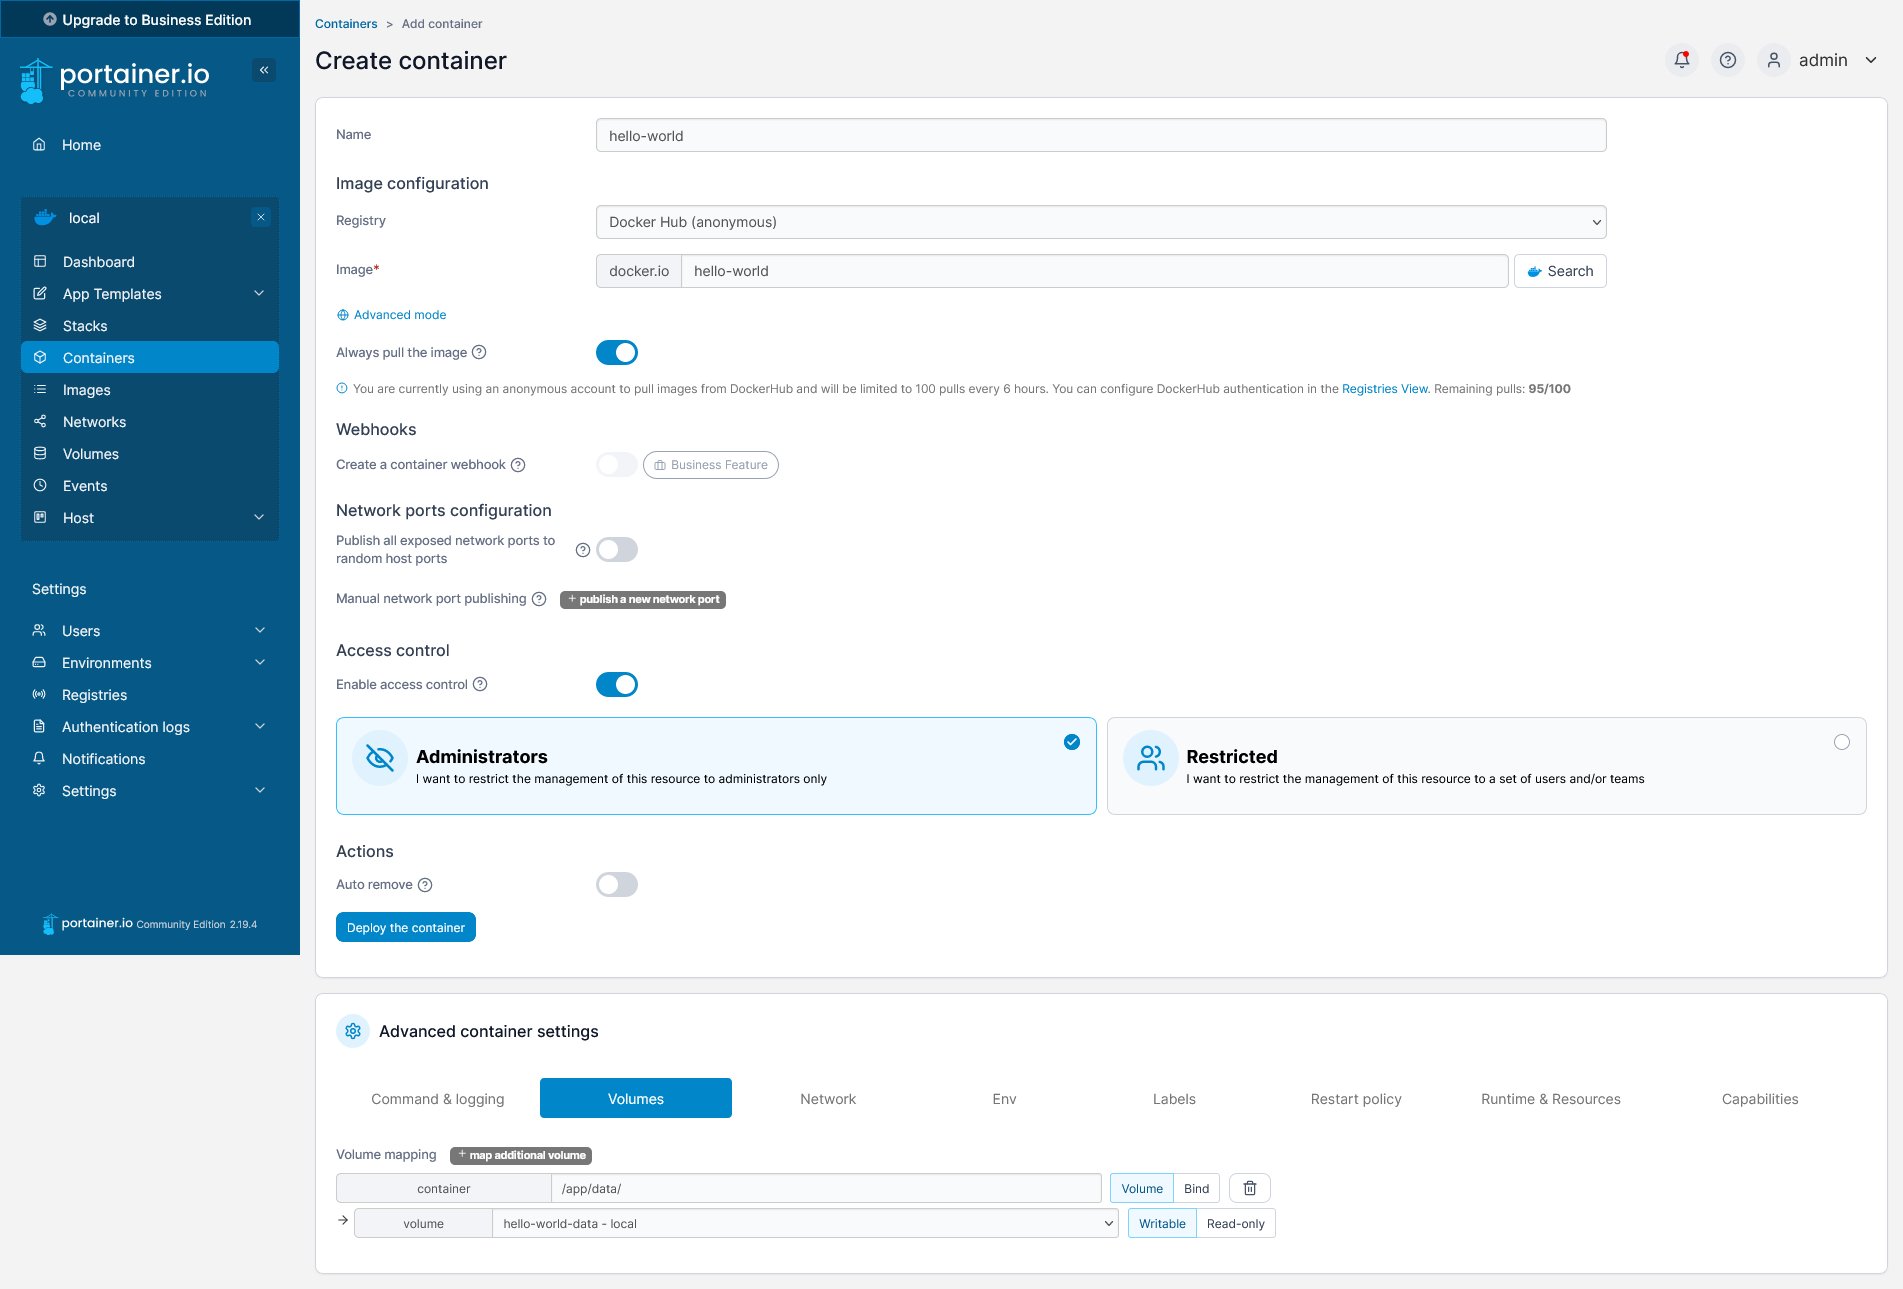
To start, select "Containers" in the left menu, and then click on the "Add container" button. In the 'Create container' overview, you have to give the container a unique name and specify the image. By default, Portainer uses the Docker Hub to pull the image from, but you can also add your custom build images, as we will explore later. For this tutorial we will use the hello-world image. This image consists of nothing but a single static binary which prints some text to standard output. Besides the container name and image, you can specify many more parameters required for your container (e.g., ports, networks, volumes, environmental variables), but this is not required for this image and beyond the scope of this blog post. Once complete, then click "Deploy the container".
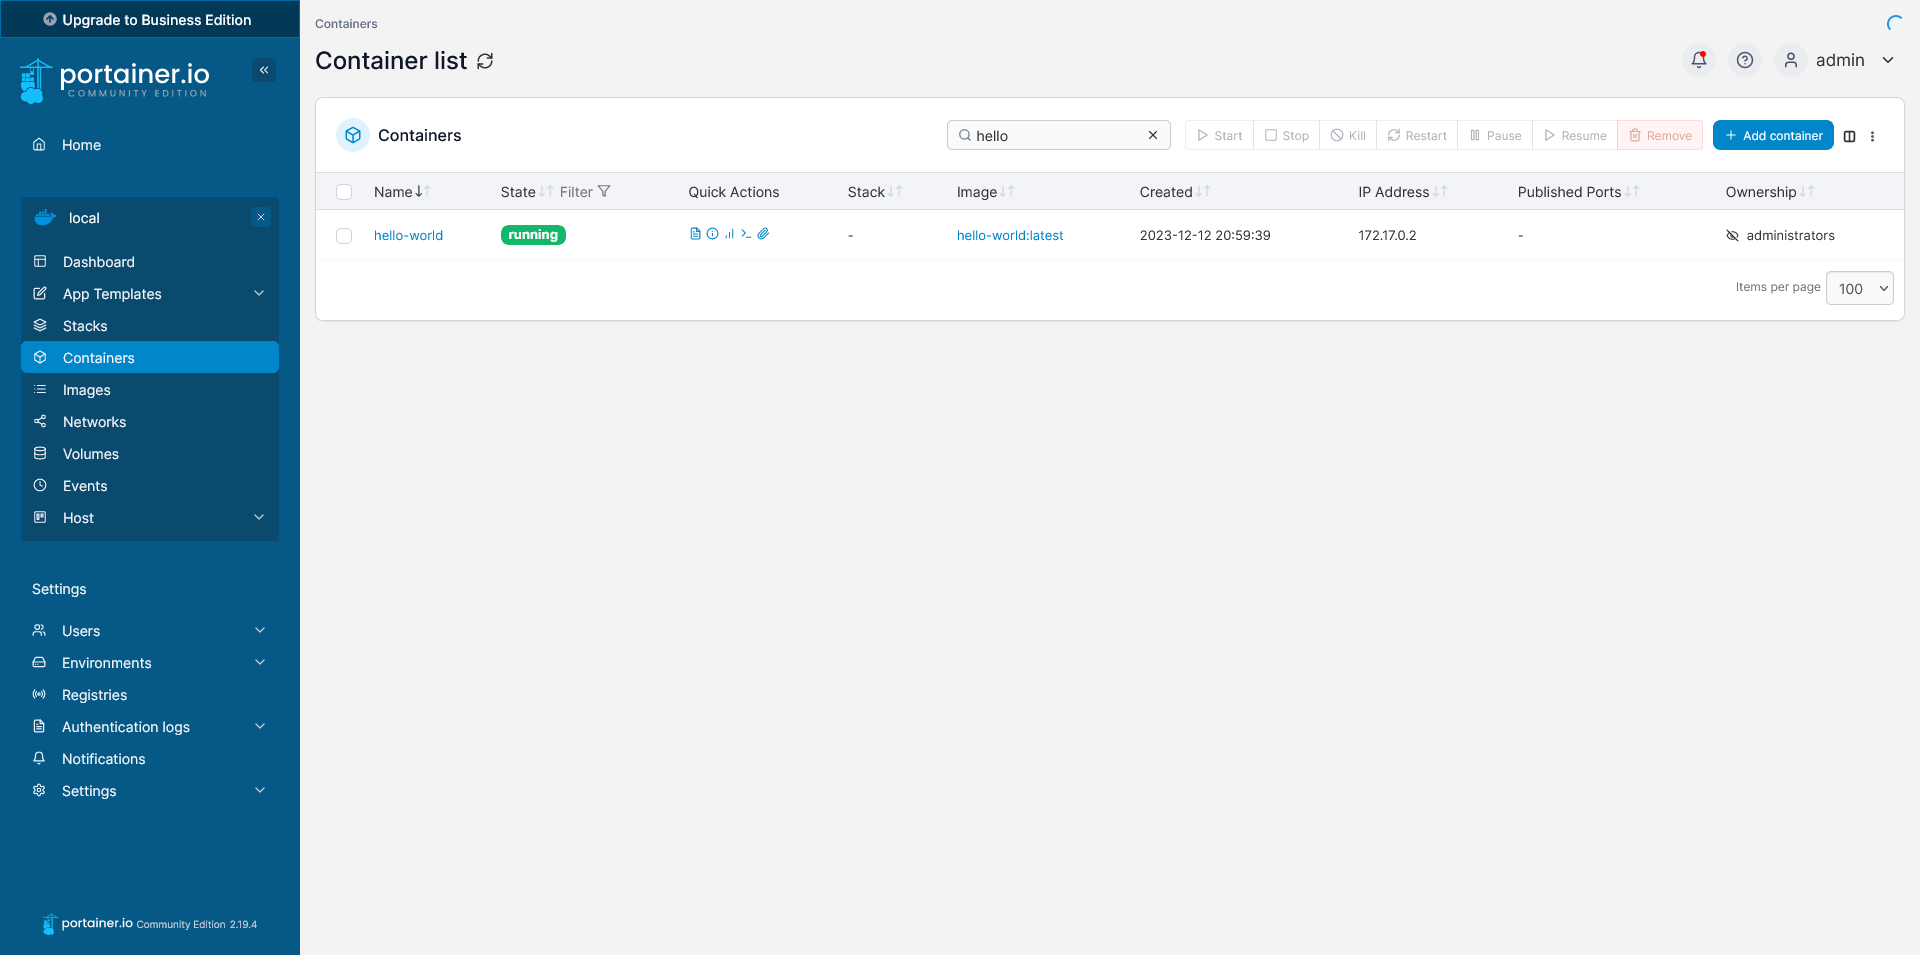
If the deployment was successful your container will be shown in the container list. You can now click on the container to access the container details.
In the "Container details" section, you can see various details about the container, such as its current status, port settings, environment variables, labels, connected volumes and networks, among others. Additionally, you have options to start, stop, delete, or duplicate/edit the container as needed. You can also view the container logs, inspect the container's configuration, view container performance stats, and access the console.
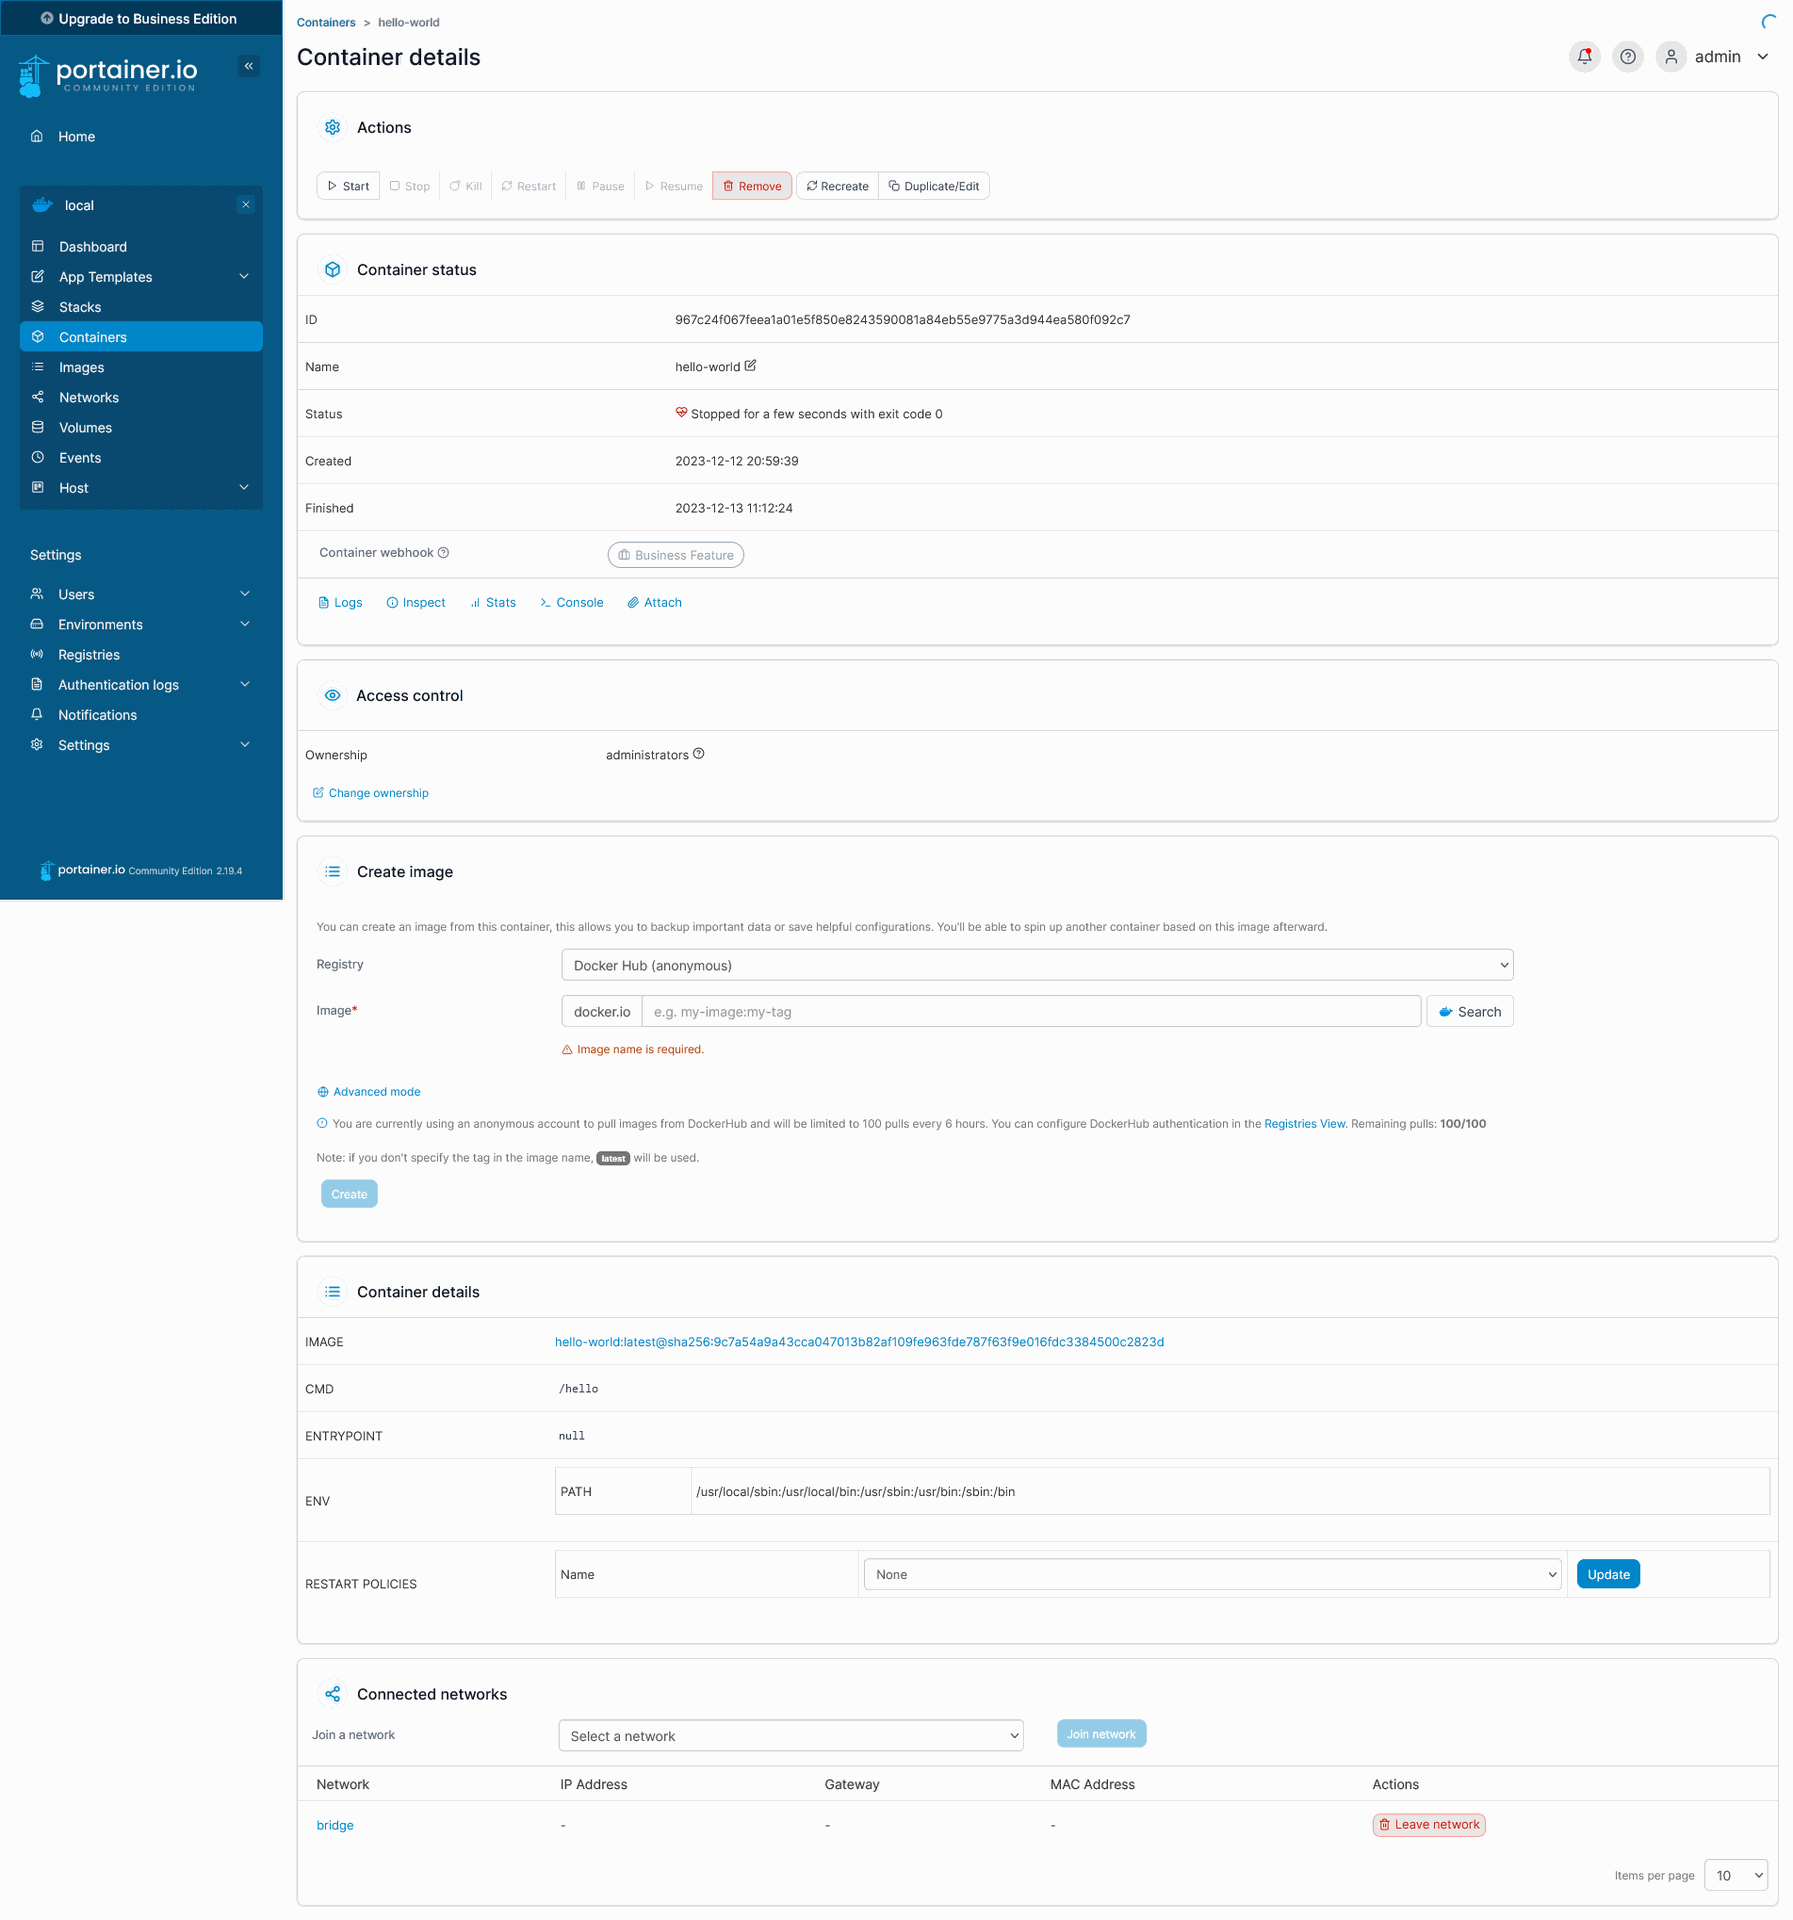
Note that the status of our hello-world container is "stopped". If we click on the "Logs" link we can find out why our container stopped.
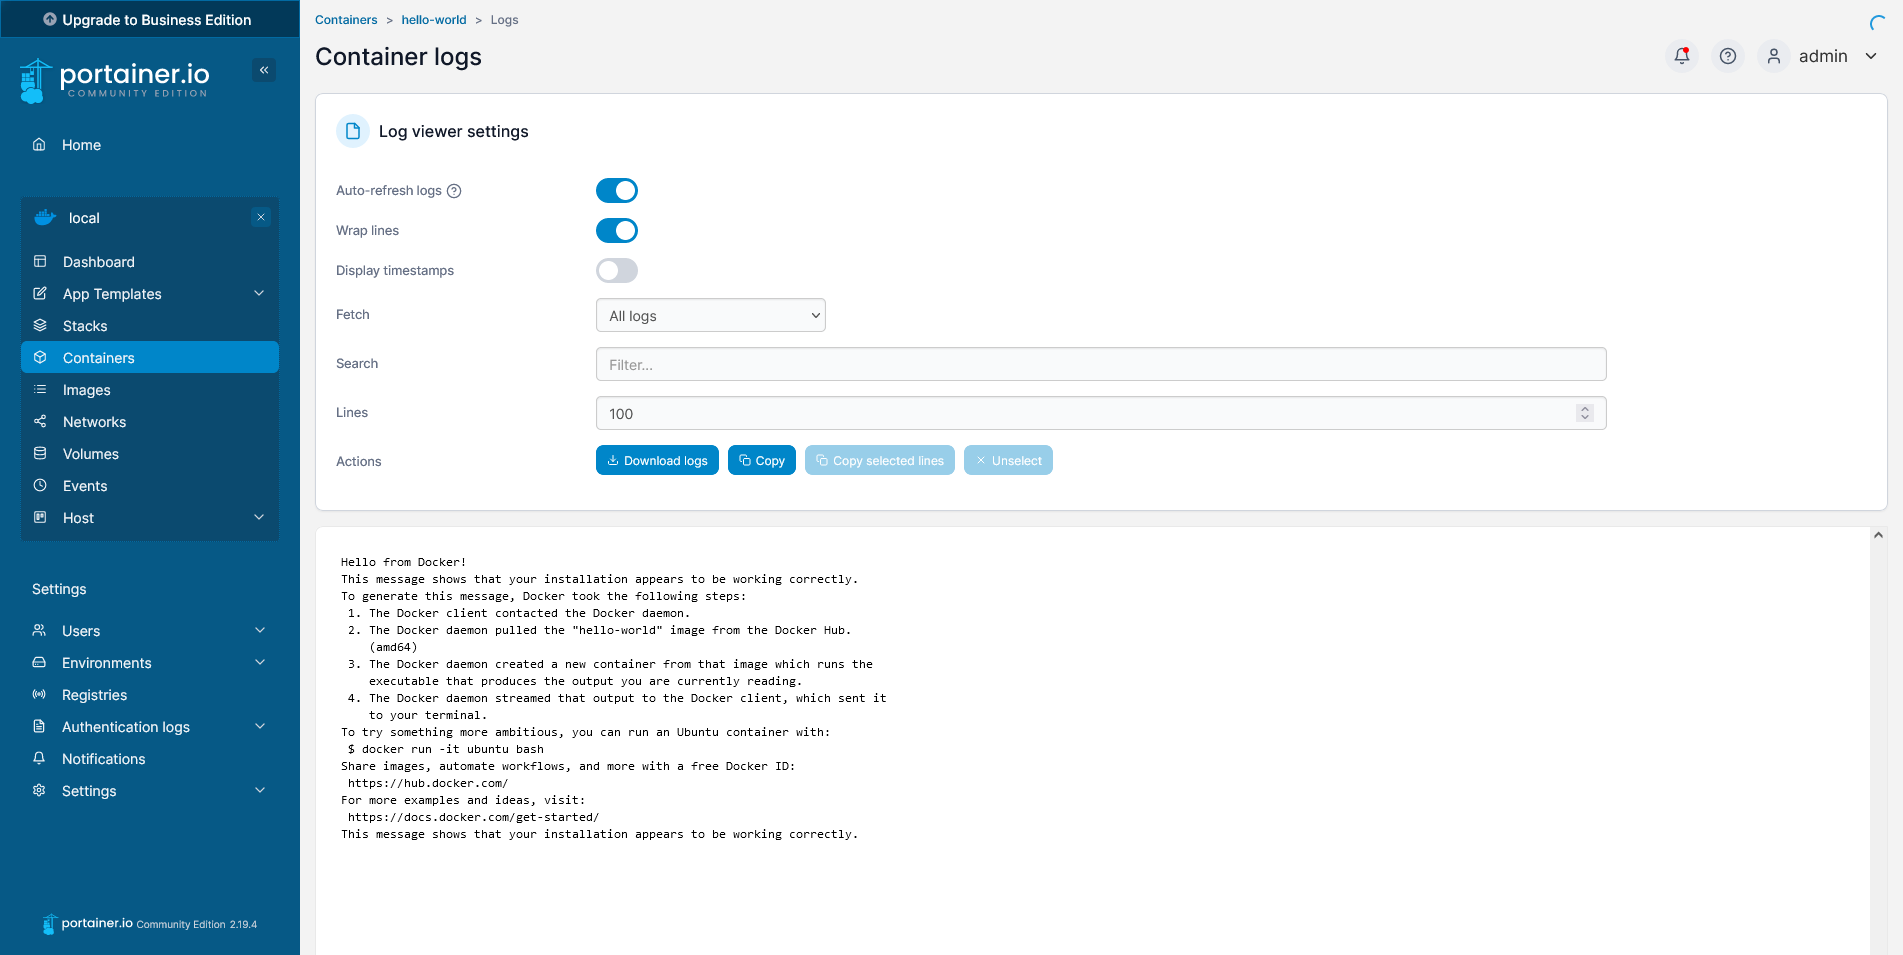
Here you can see the contents of the Docker logs for your container. As you can see the container printed some text to the standard output and then it automatically exited the container.
Having covered the basics of container management, let's now transition to the concept of stacks in Portainer, an equally crucial aspect that facilitates the management of multi-container applications.
Deployment of stacks
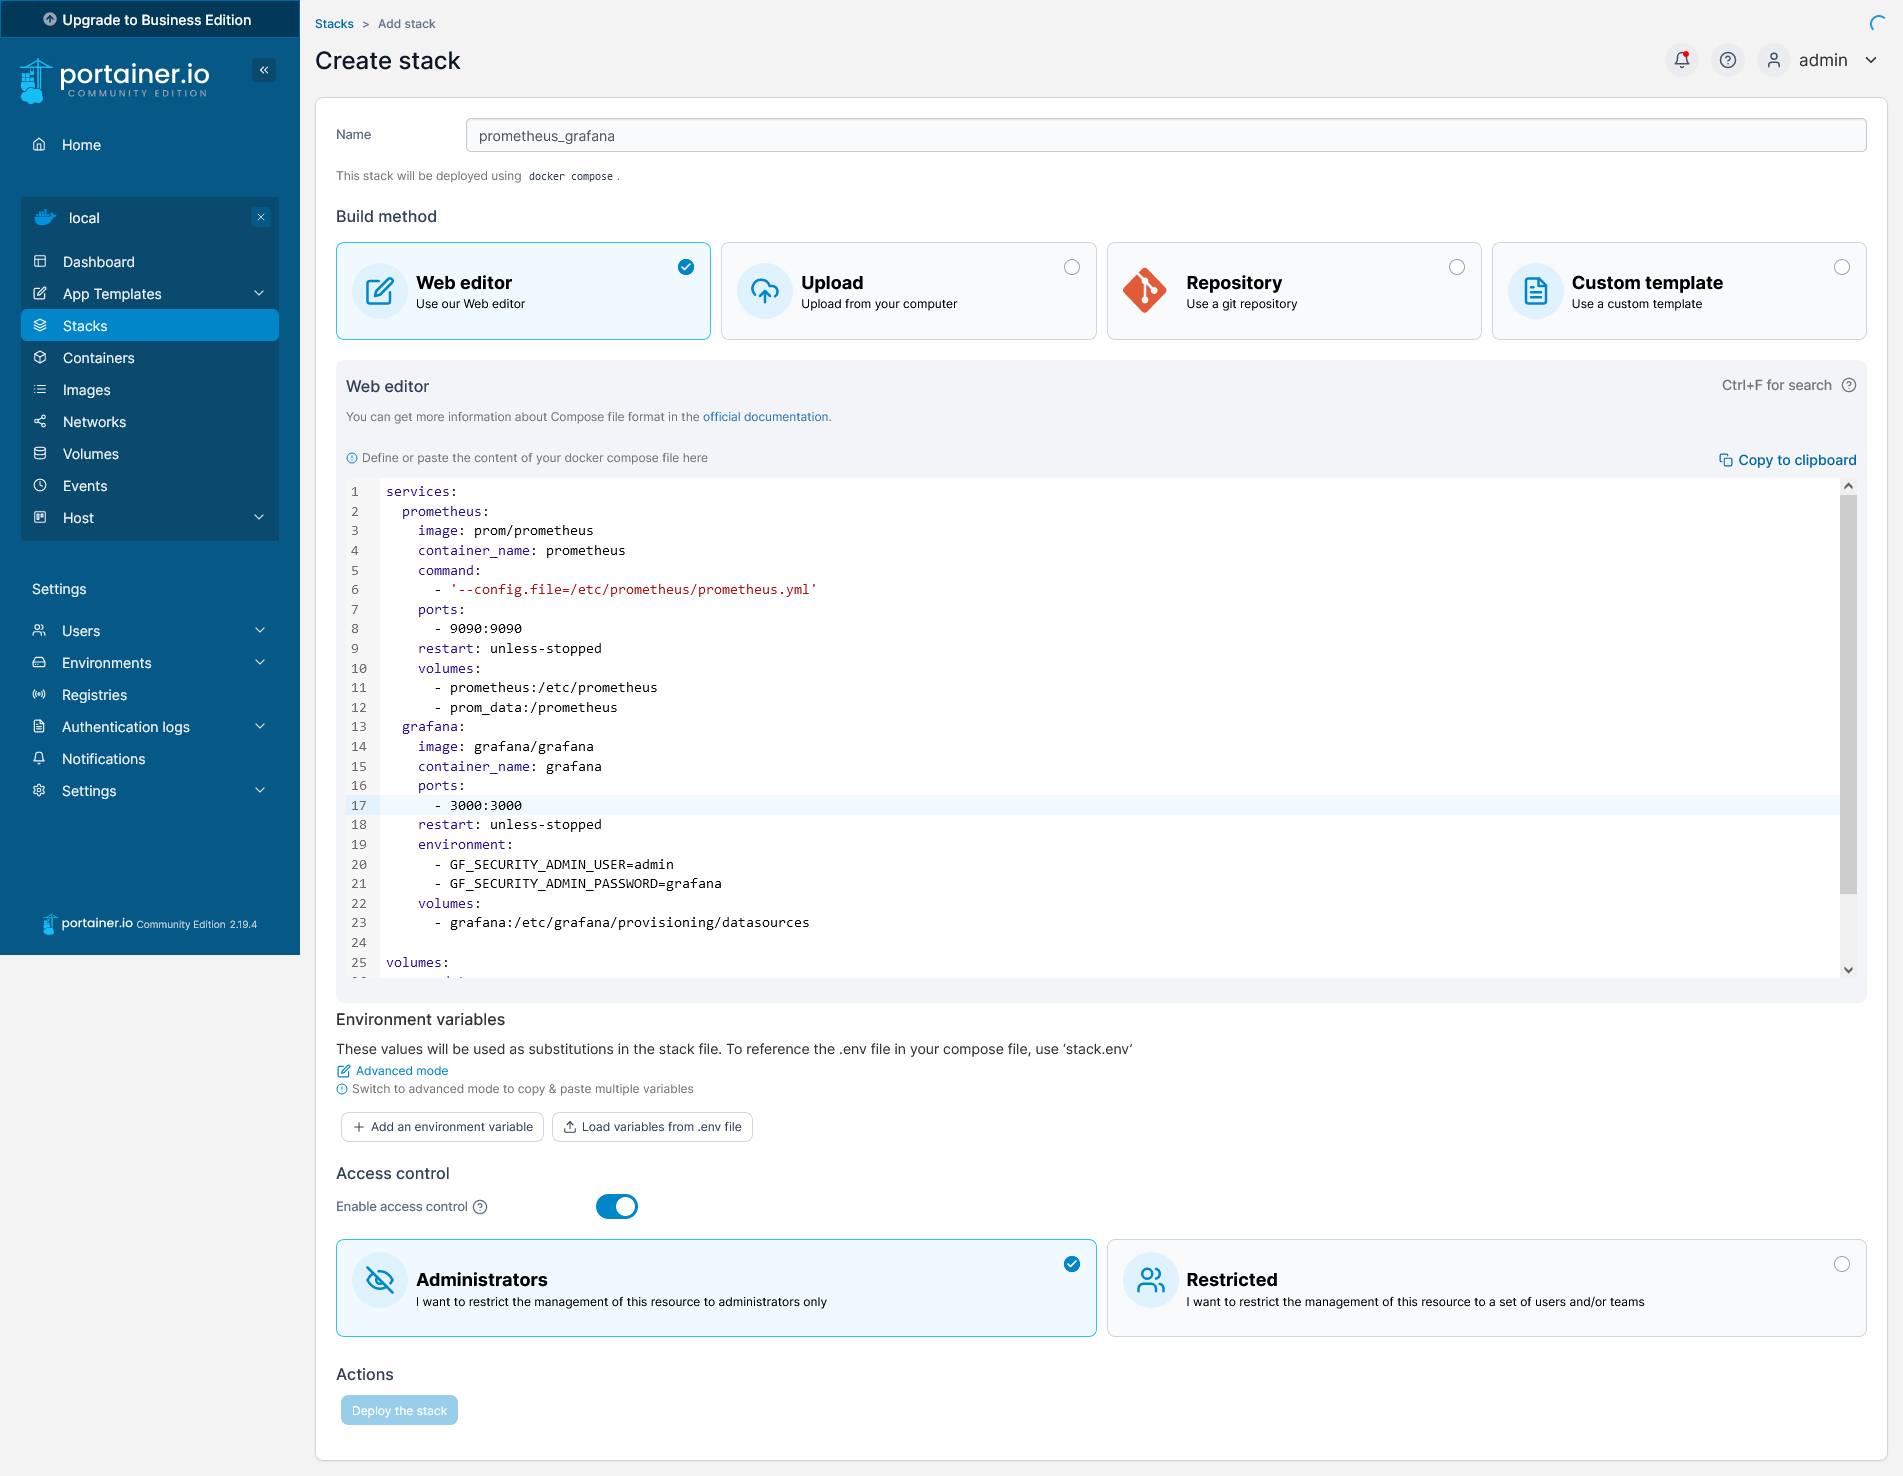
In Portainer, Stacks represent a powerful feature for orchestrating and managing collections of services, networks, and volumes. They allow you to manage multi-container applications as a single entity, simplifying deployment and configuration processes. Stacks in Portainer function similarly to Docker Compose, enabling you to define and run multi-container Docker applications using simple YAML configurations, much like a docker-compose file.
I will use the Prometheus & Grafana example from the official Docker Awesome Compose library. This stack consists of two containers and uses two volumes. To create the stack, you have to give the stack a unique name and you can copy the content of the docker-compose.yml inside the "Web editor". Next, click on the "Deploy the stack" button.
Note
Prometheus is an open source monitoring system for which Grafana provides out-of-the-box support. Although, Prometheus and Grafana are beyond the scope of this tutorial, you can read more about it in their documentation. Moreover, I will devote a follow-up blog post about this topic soon.
If the deployment is complete you will see a list with all Stacks running in your environment.
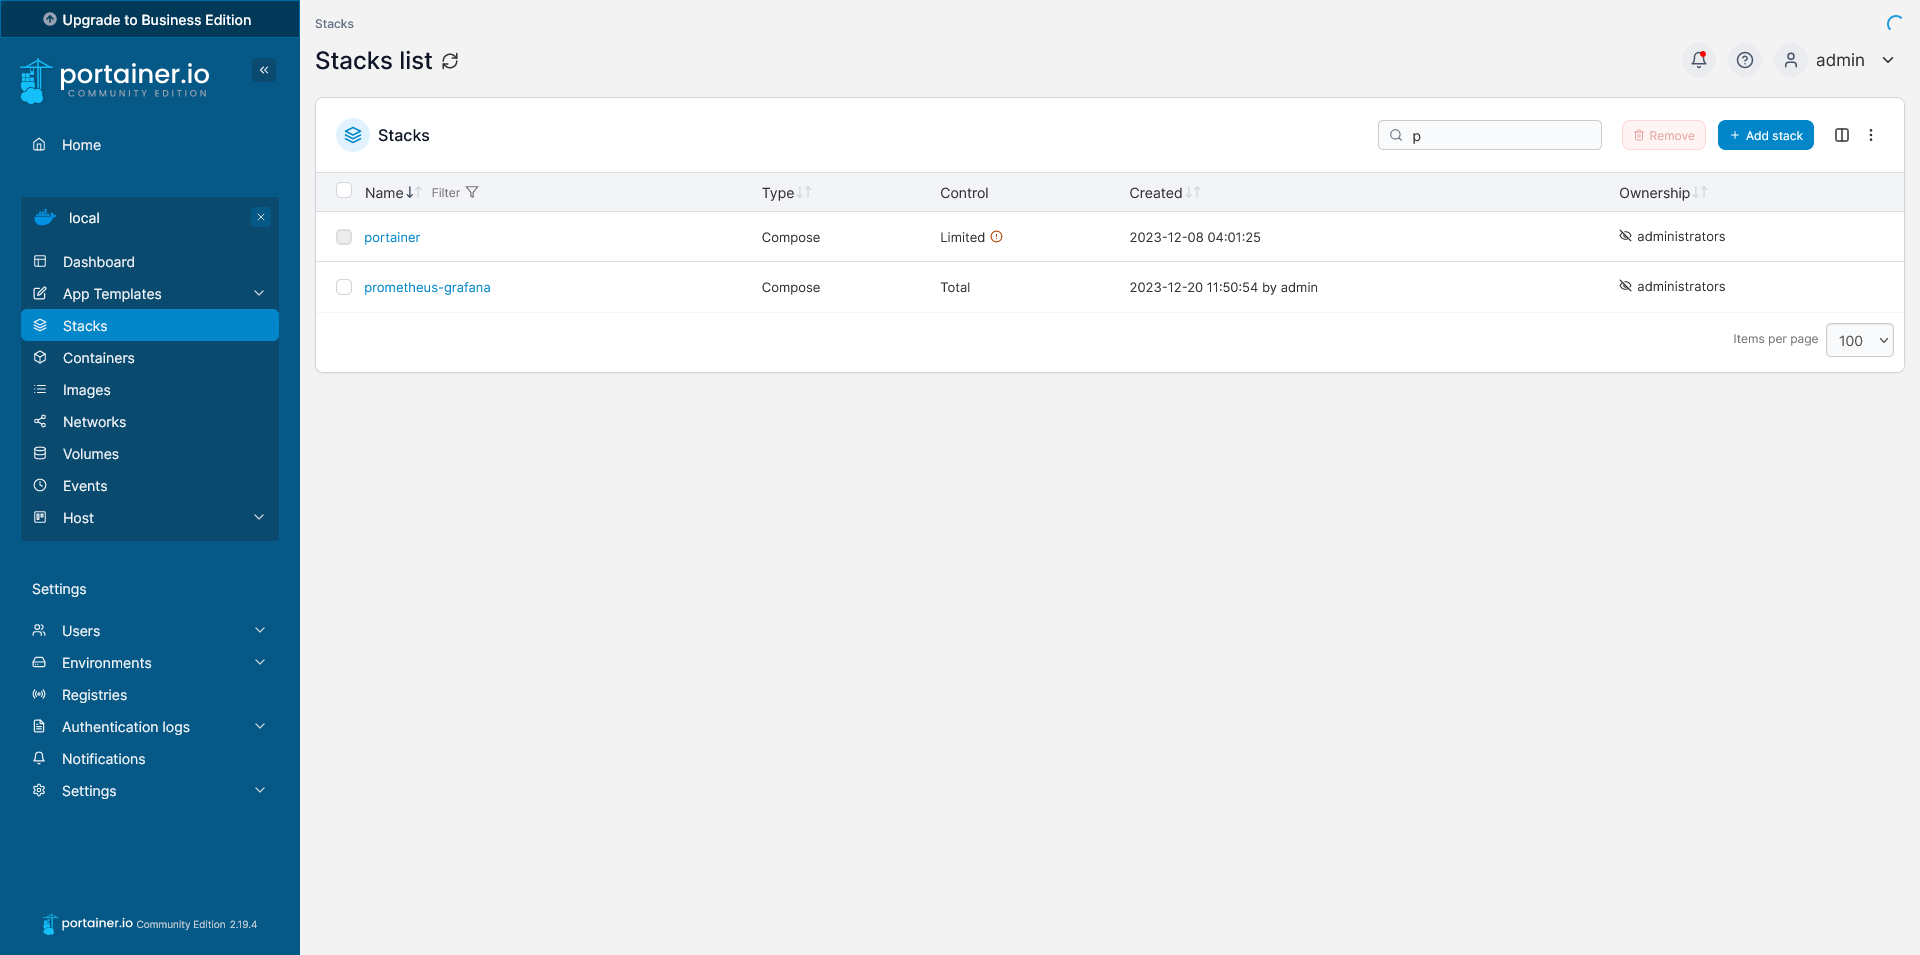
Note that in this list you will have stacks with full control and stacks with limited control. The stacks with limited control are created using docker-compose, whereas the stacks with full control are created with Portainer. If you click on the prometheus-grafana Stack you will see an overview of all containers that are used by this Stack.
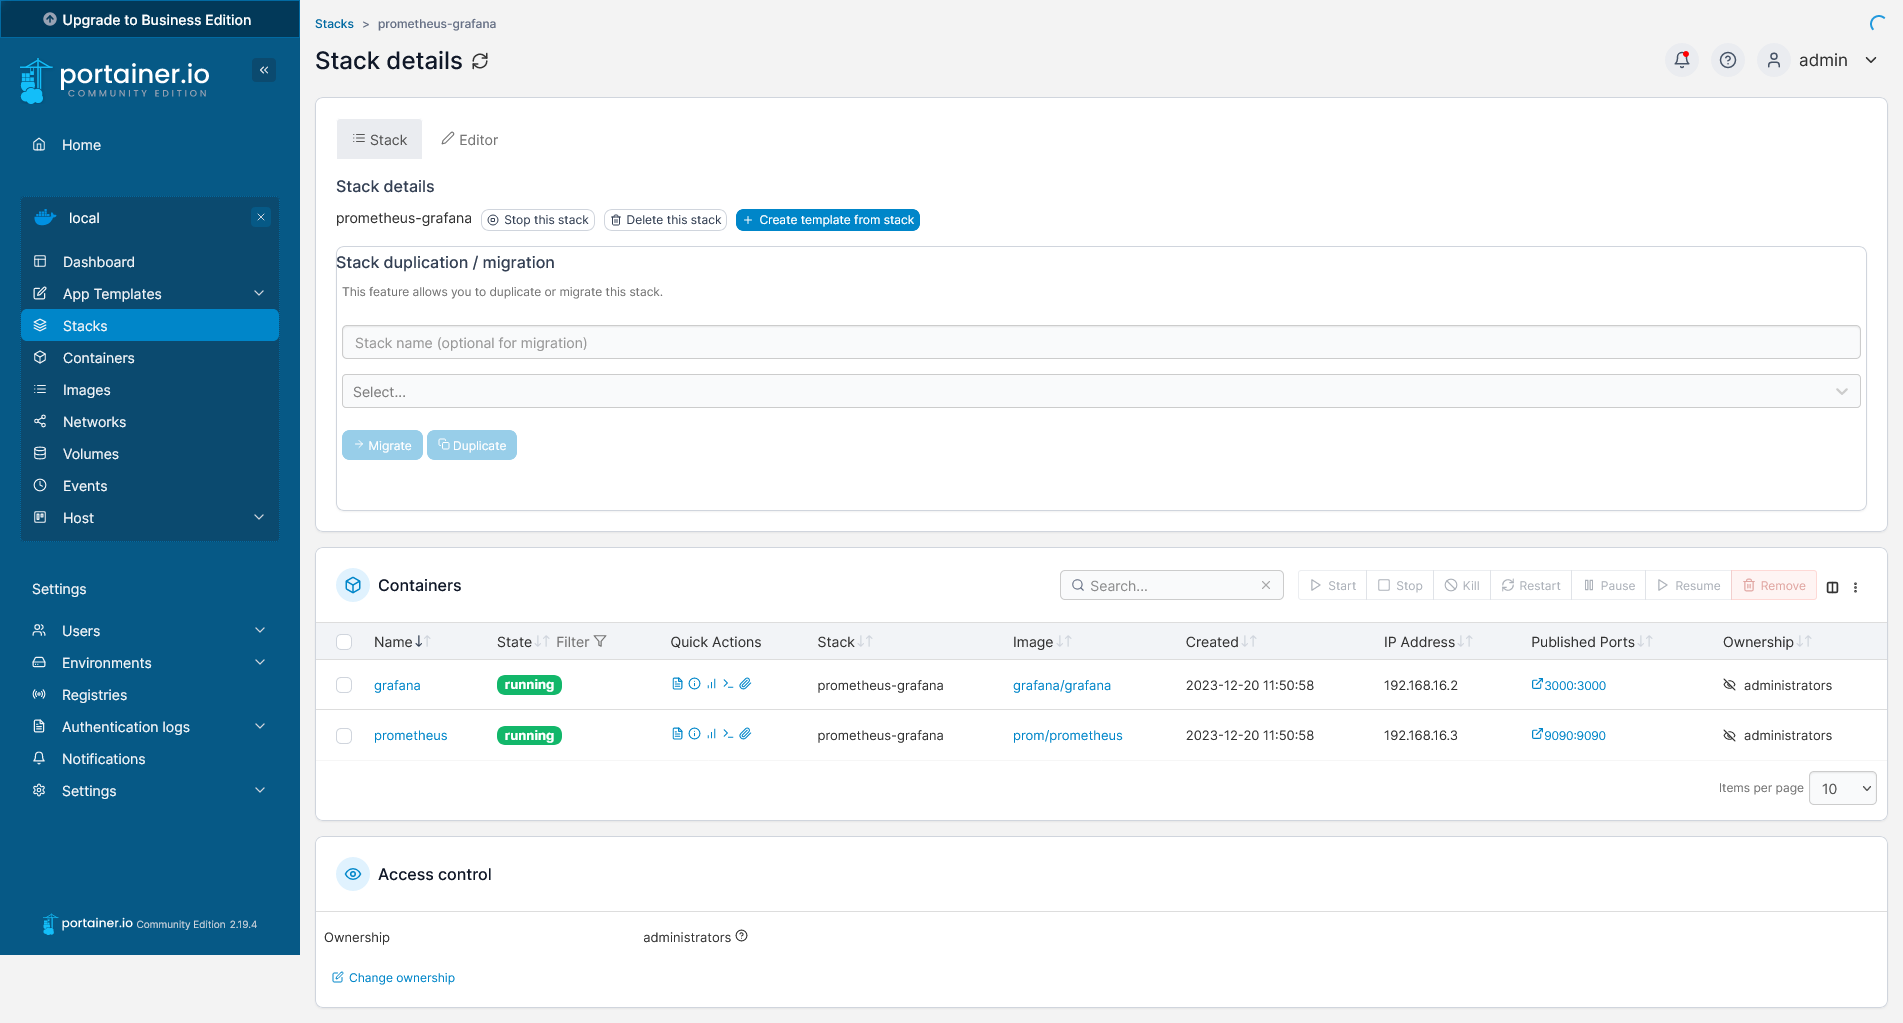
You can edit these containers as described above in the section "Container Management". If you navigate to http://localhost:3000 in your web browser and you can use the login credentials specified in the compose file to access Grafana.
Now that we have explored how Stacks function in Portainer, akin to Docker Compose, let's shift our focus to other vital aspects of container orchestration: image, network, and volume management.
Docker images
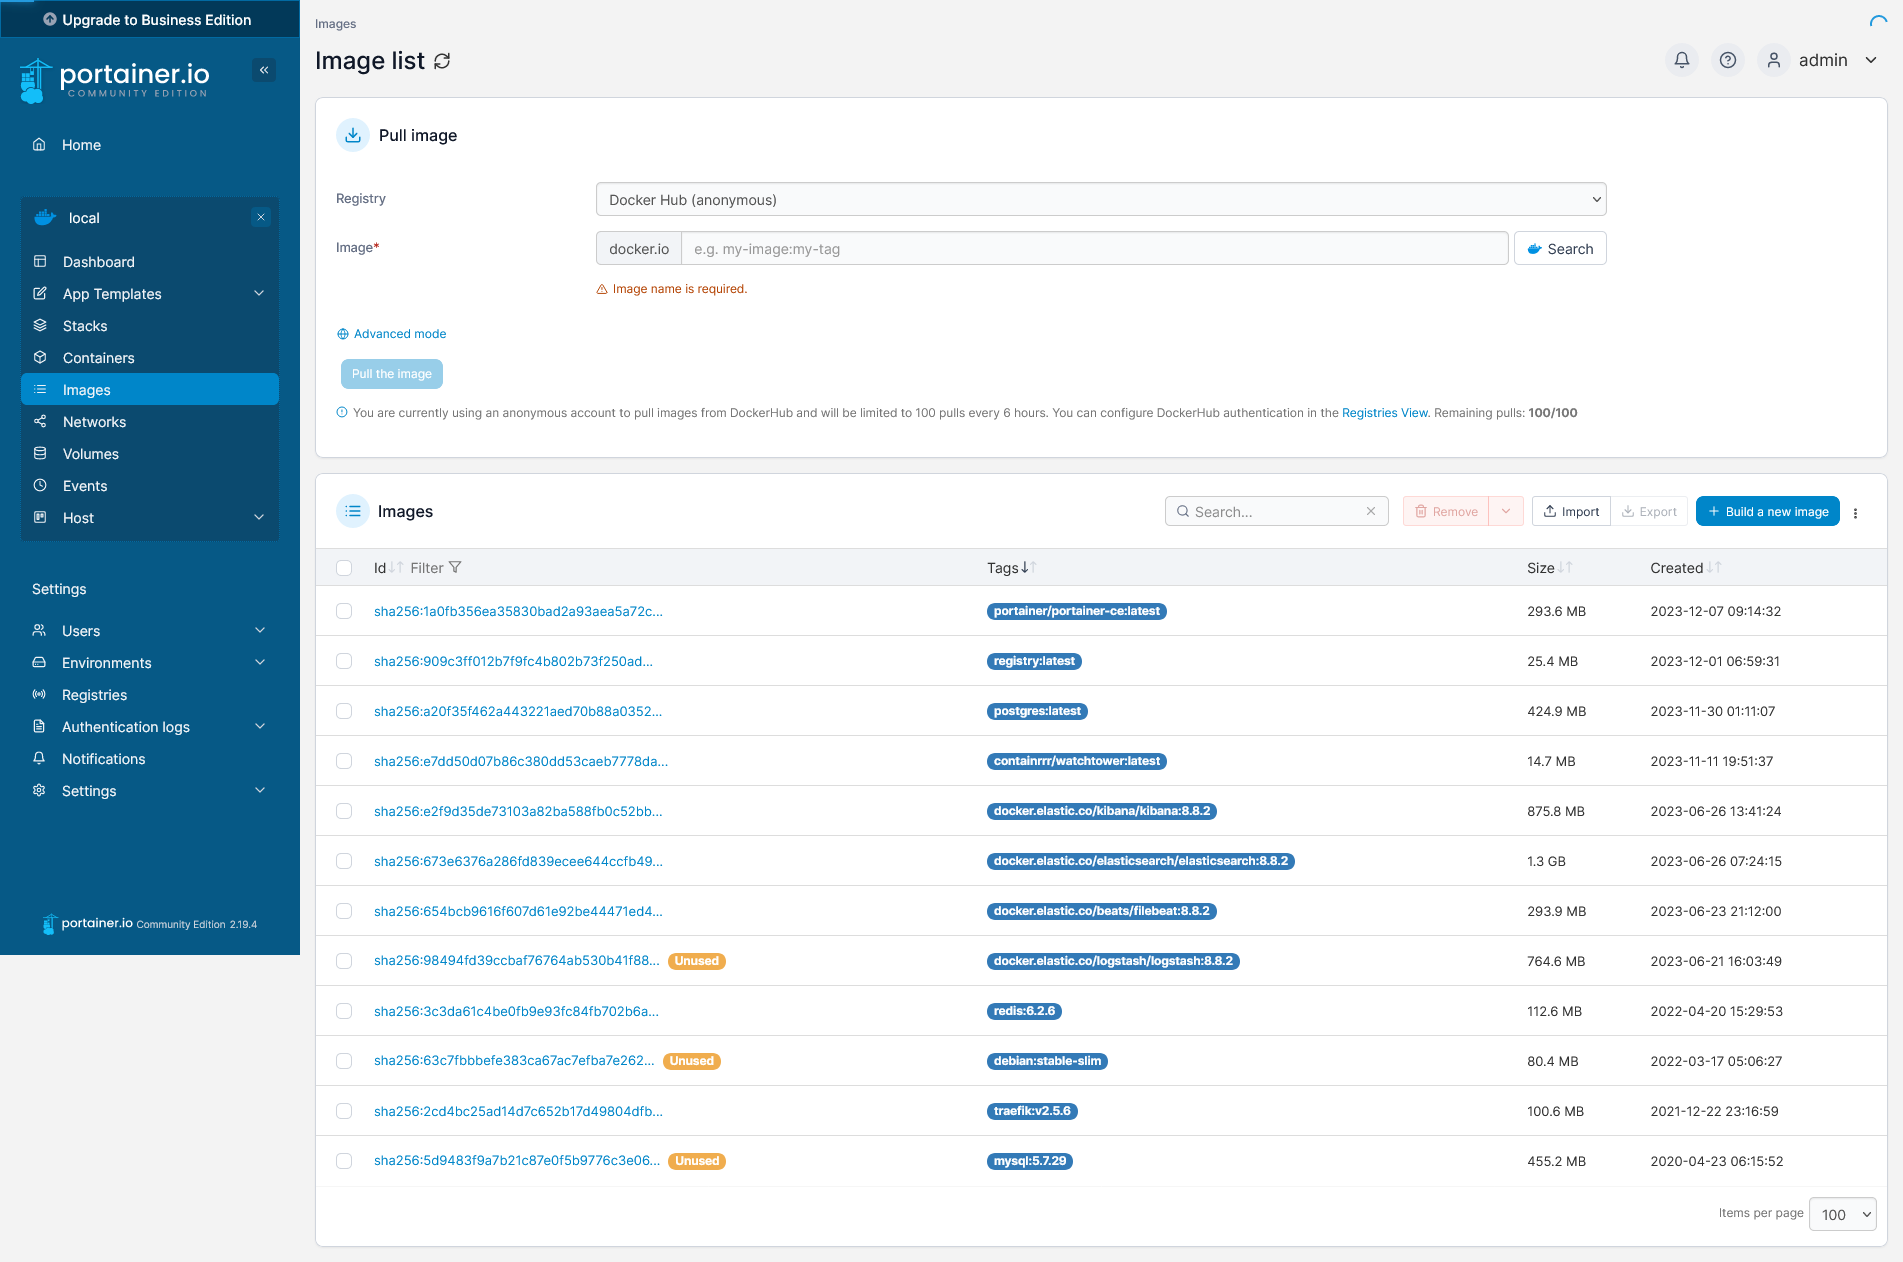
In Portainer, the image management feature allows you to easily handle Docker images, offering functionalities for pulling new images from registries, and viewing existing images. This simplifies the process of updating, deploying, and maintaining the various images required for your containerized applications. To start, select "Images" in the left menu. Here you find an overview of all images stored on your server.
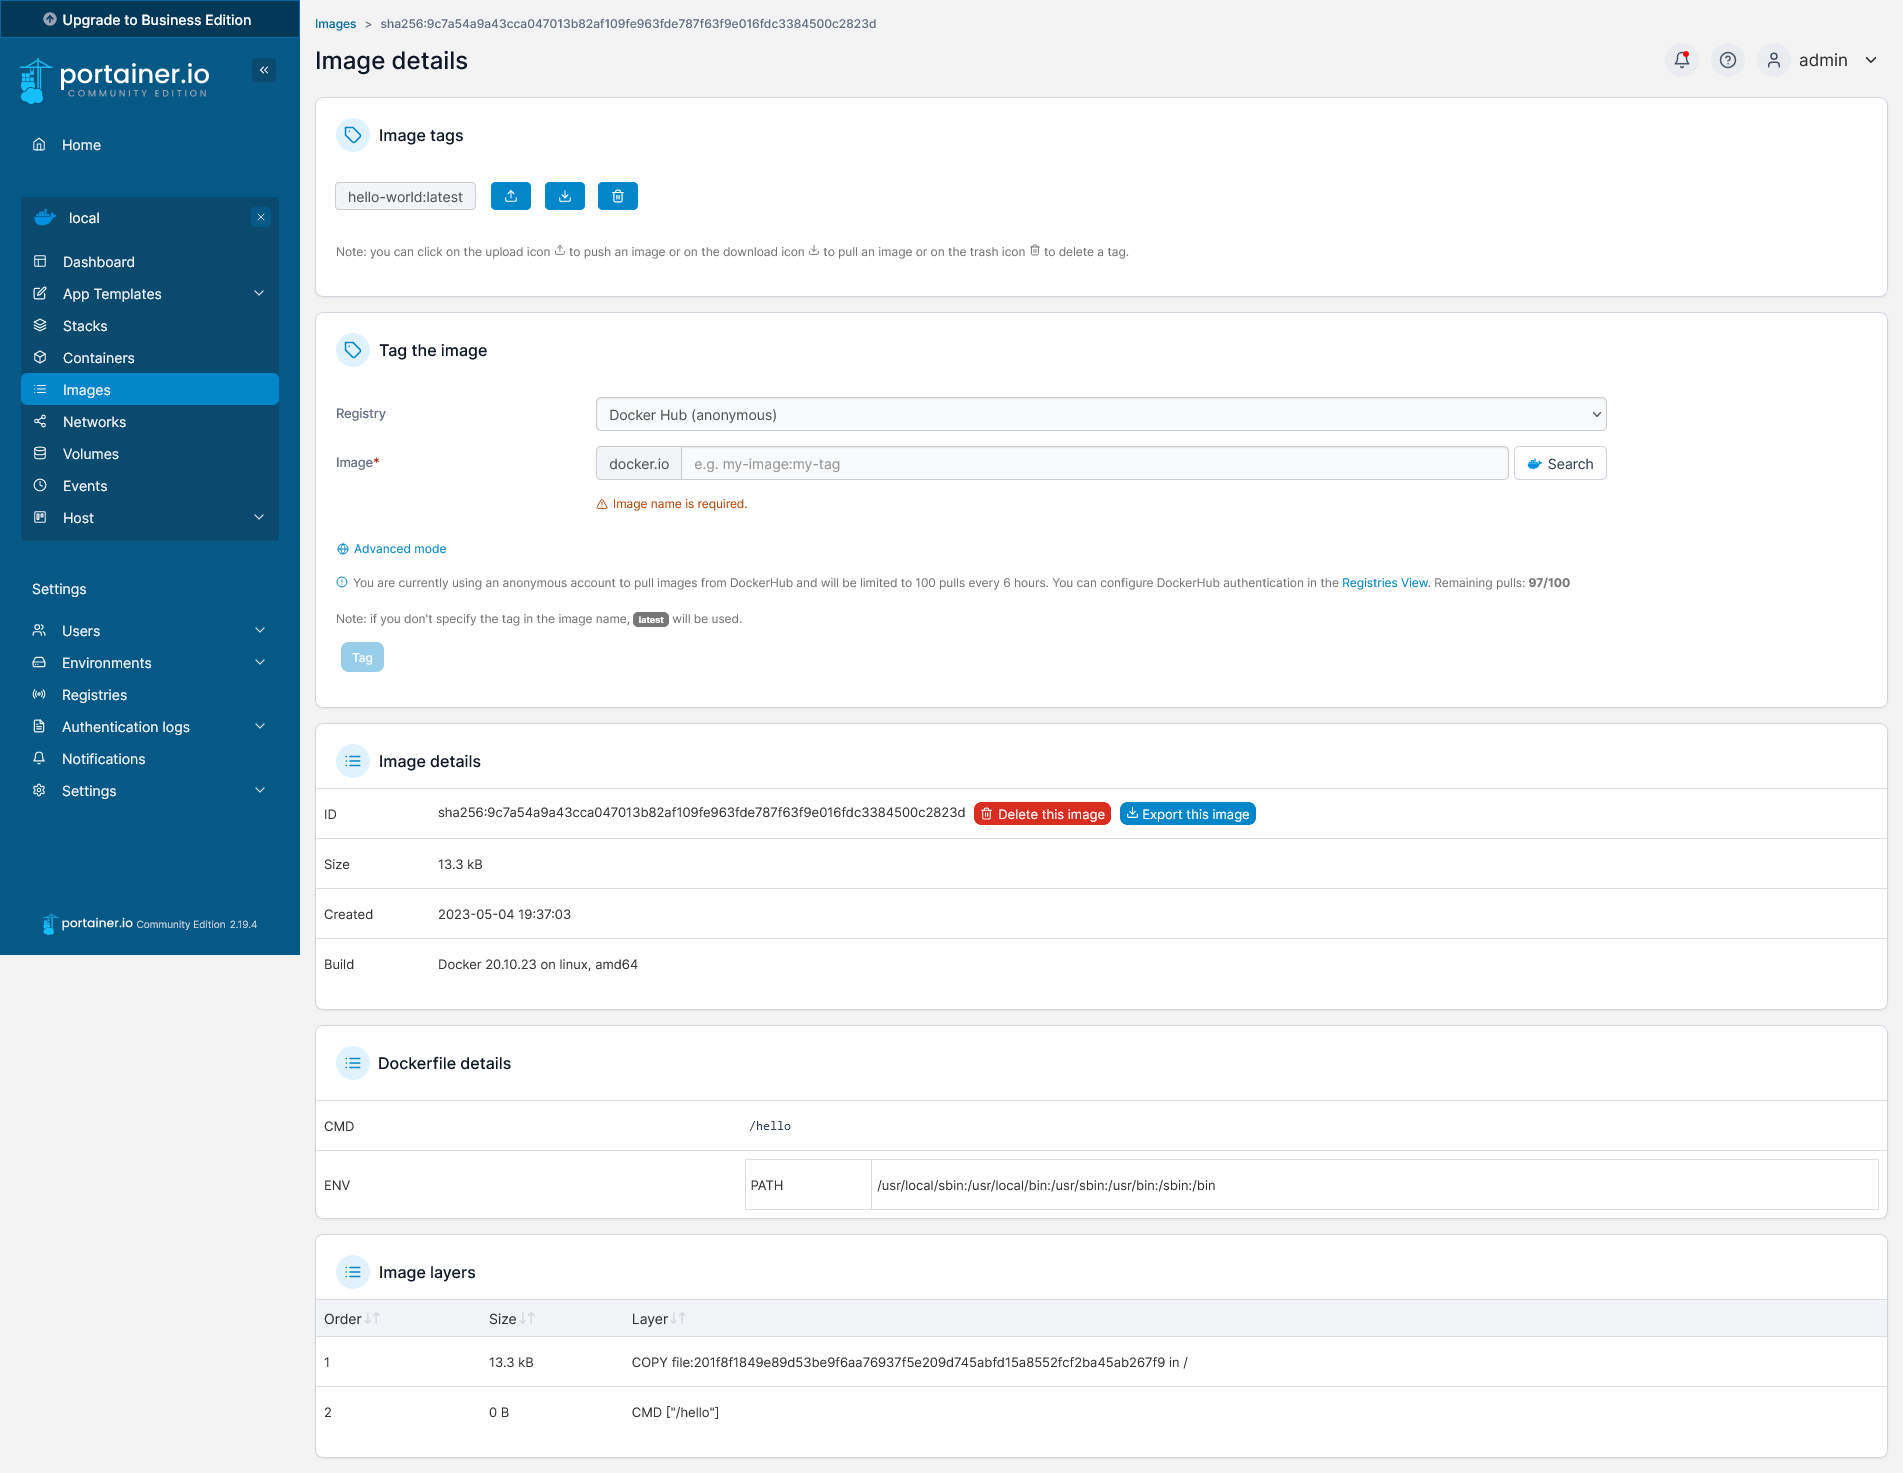
If you select one of the images in this list you see the details of this particular image.
You can also build your own images. For this blog post I will use a slightly modified Dockerfile from the Django example from the official Docker Awesome Compose library.
FROM python:3
ENV PYTHONDONTWRITEBYTECODE=1
ENV PYTHONUNBUFFERED=1
WORKDIR /code
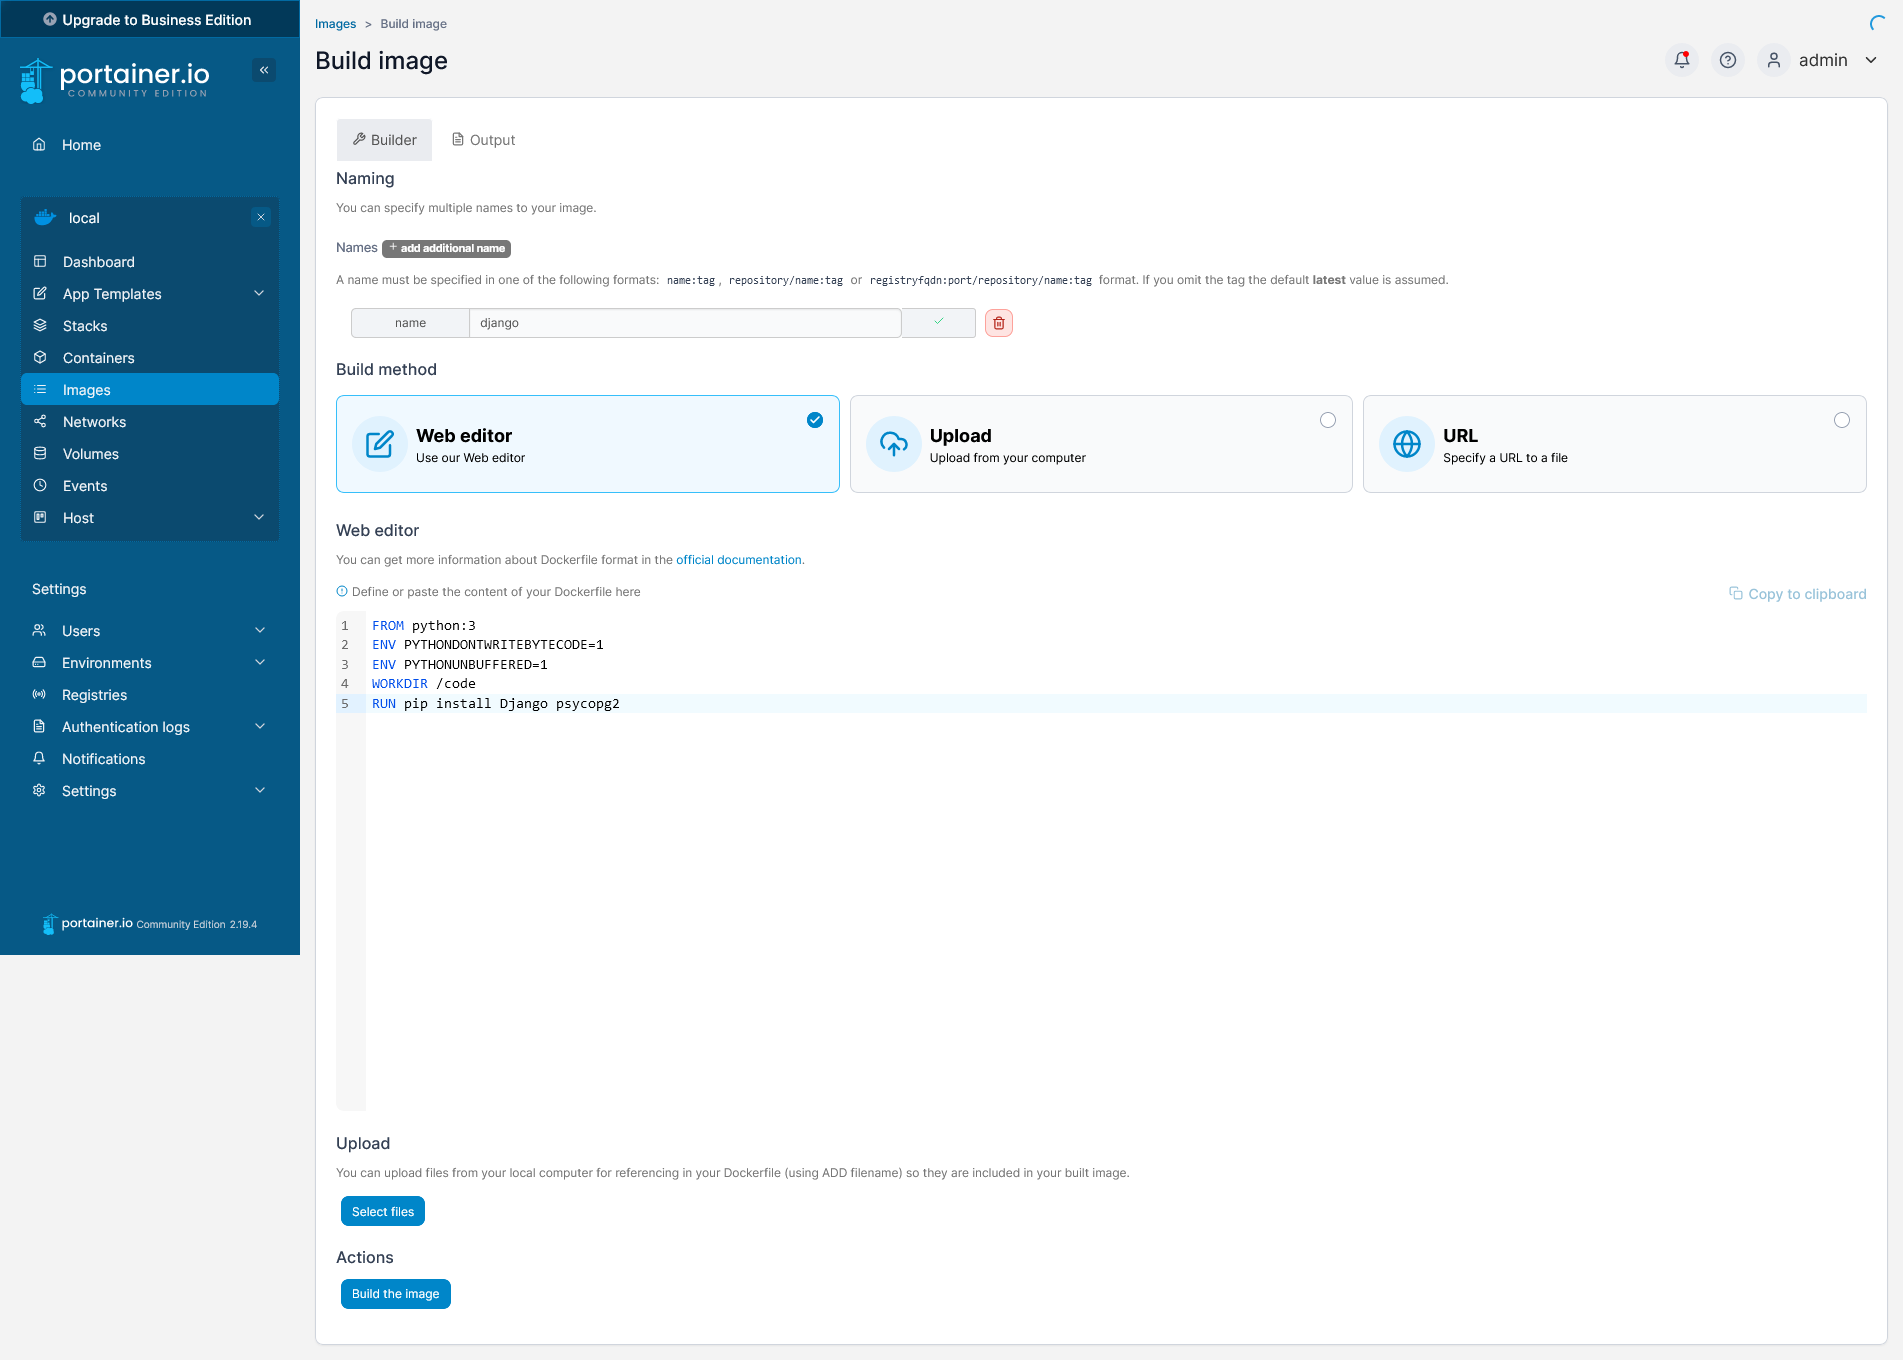
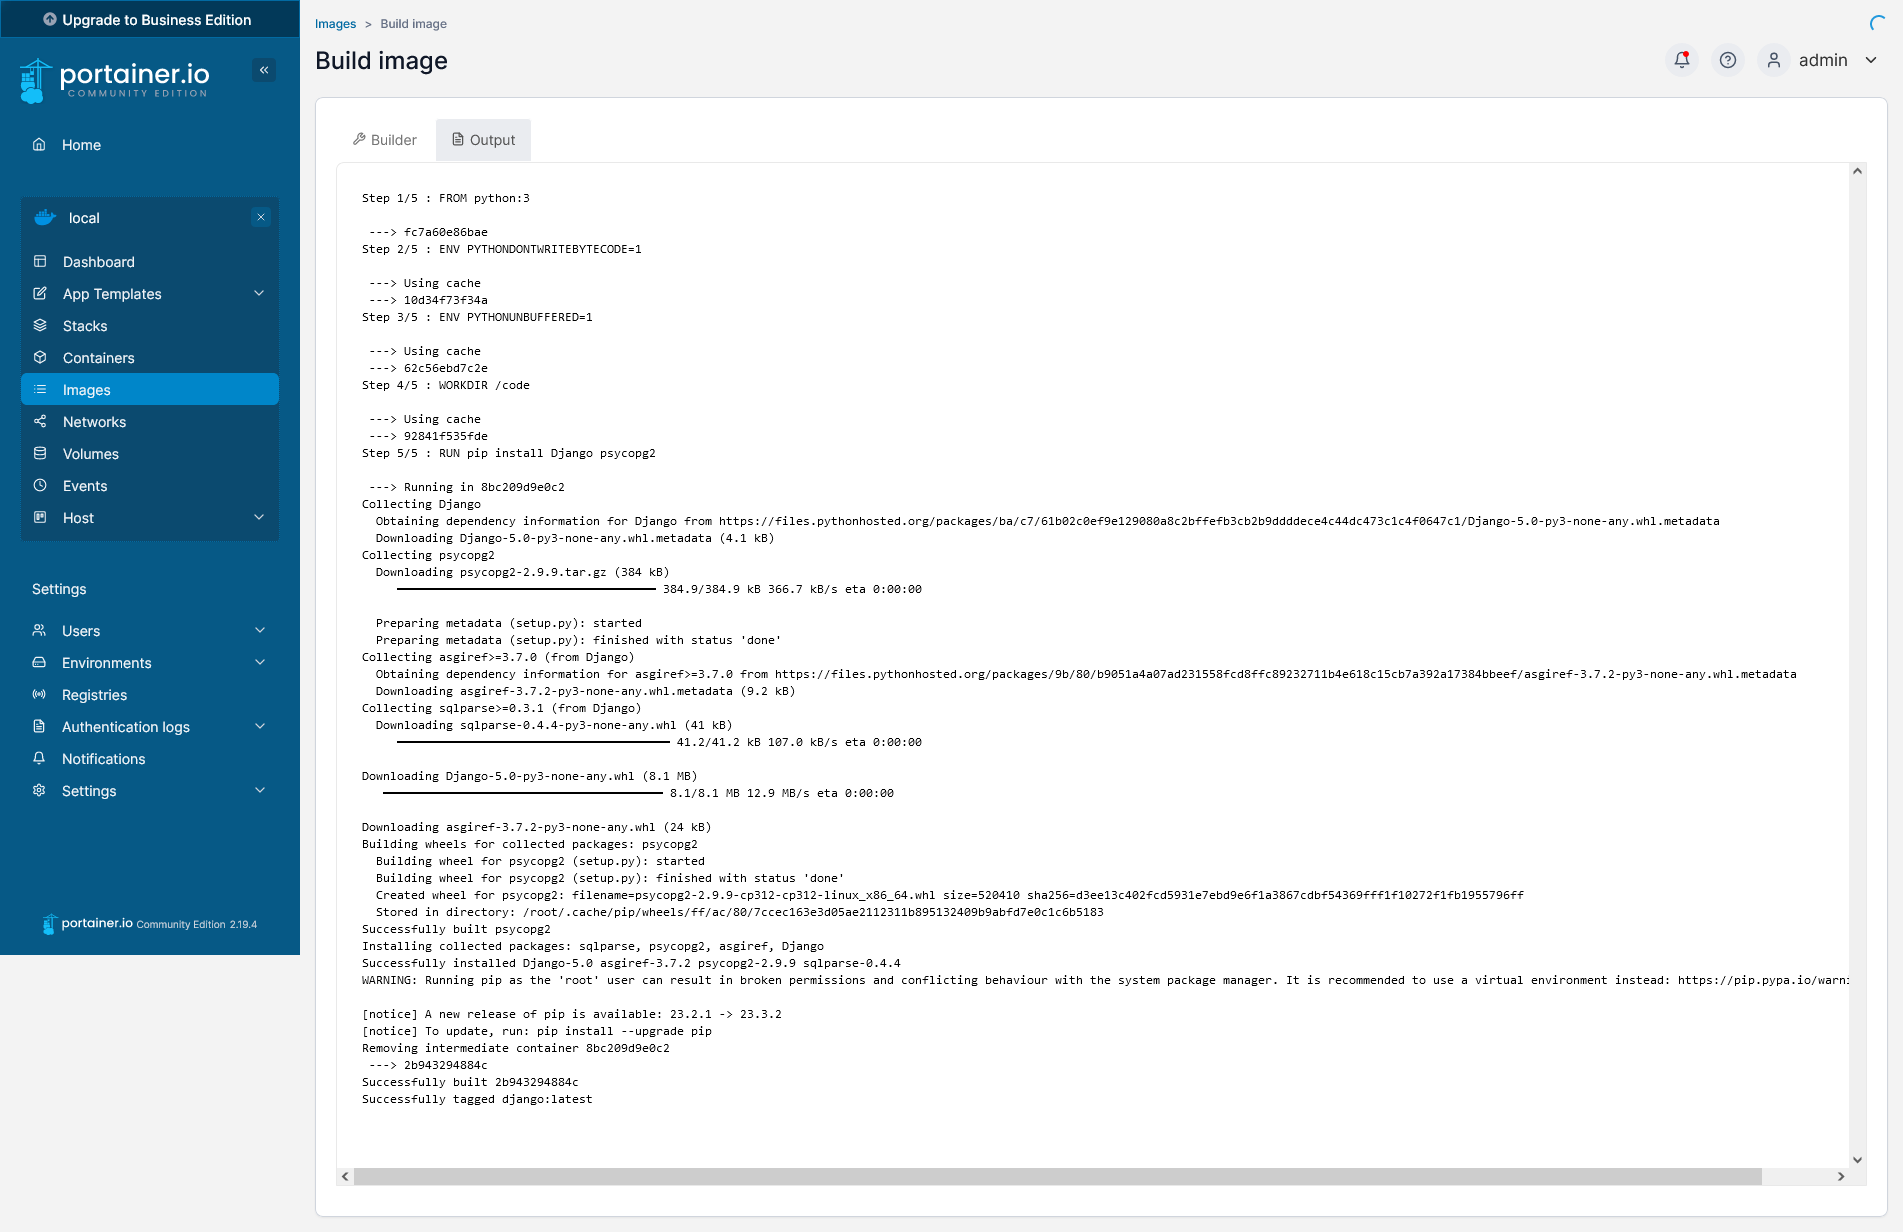
RUN pip install Django psycopg2From the left menu select "Images" then click "Build a new image". For this example, I will name the image django and I will not add a tag. Next, copy the contents of the Dockerfile in the web editor and click on "Build the image" to create your own Django image.
Note
For this example I explicitly installed two python packages with pip install Django psycopg2, but you can also upload the requirements.txt file and use this file to install all requirements with pip install -r requirements.txt.
When the build is finished, select the Output tab to view the build history and the result.
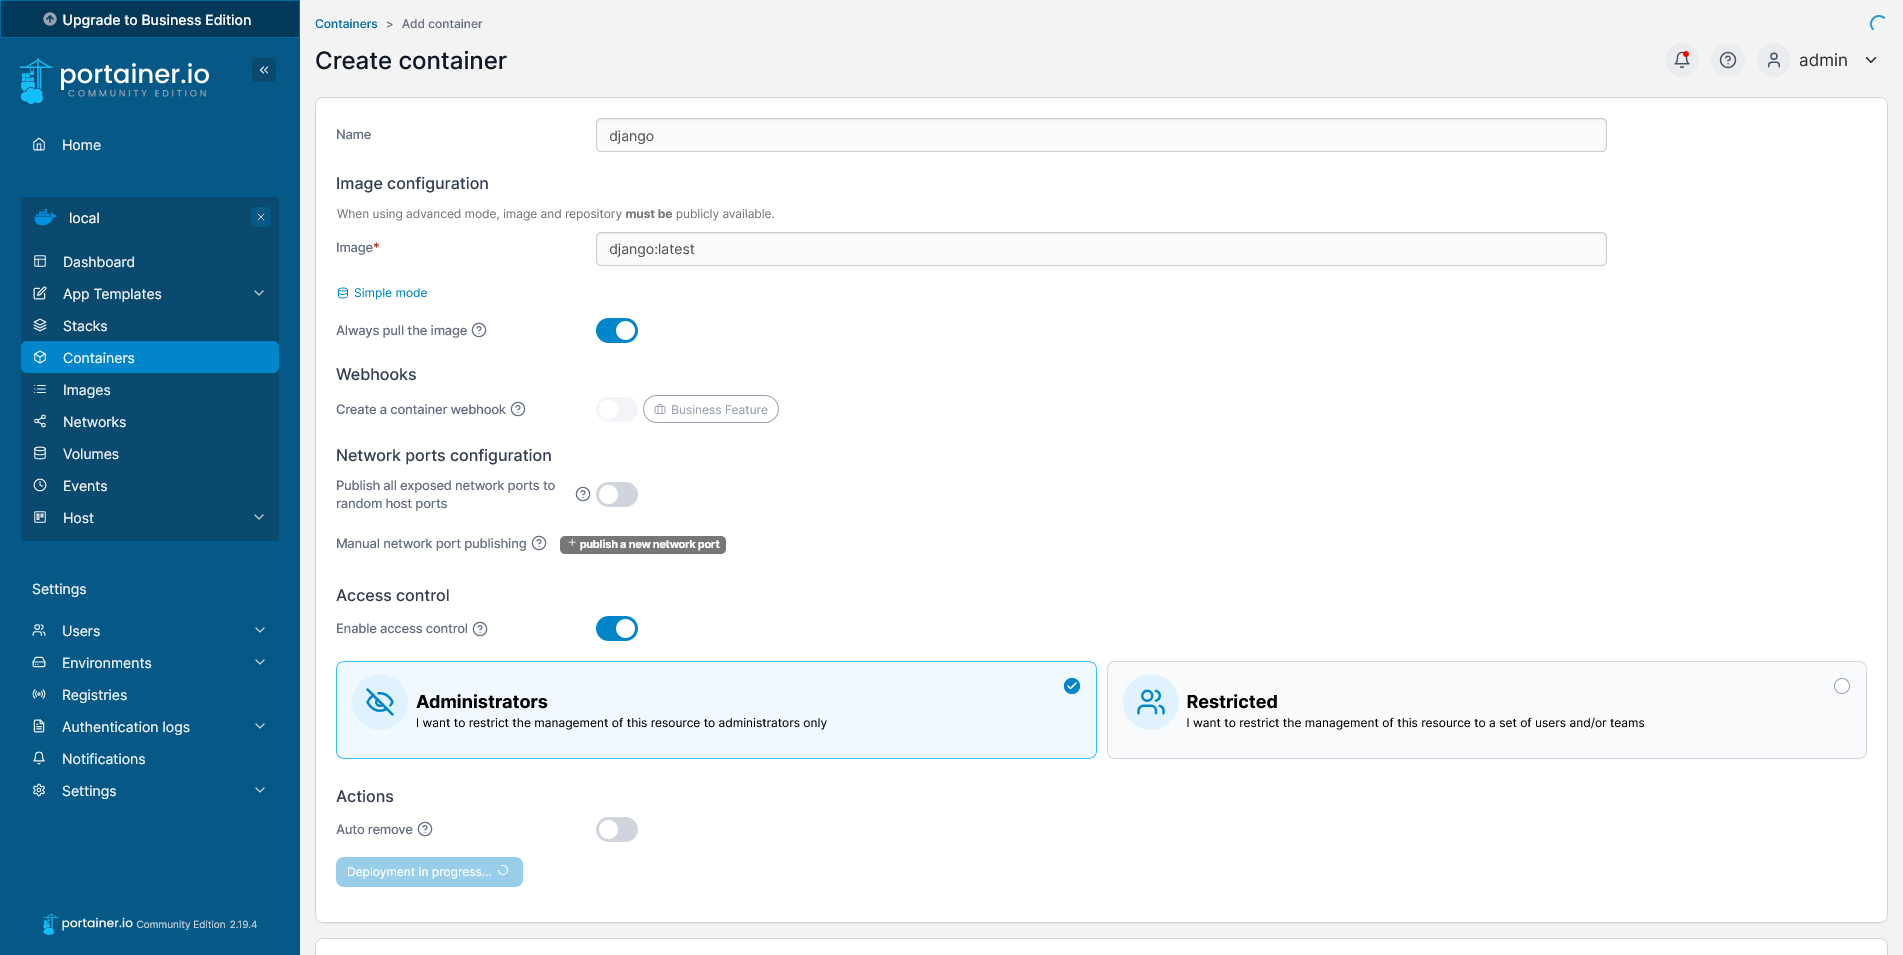
You can now start using your custom build image for your container. If you want to use this container you have to make sure to switch to advanced mode to manually enter registry and image details when building a container. To use the Django container we just created, you have to enter django:latest, without a registry prefix.
Having delved into the management of Docker images in Portainer, let's now turn our attention to the crucial aspects of network and volume management.
Docker networks, and volumes
Usually you want to configure your containers, or stacks to use specific predefined networks and volumes. In the Networks and Volumes section you will see an overview of both. Here you can also add, edit, or delete your own network or volume. Although the details about docker networks and volumes deserve their own blog post, I will create a basic network and volume to illustrate how you can use them for your containers or stack.
In the left menu, click on "Networks" and then "Add network". I will give my network the name "web" and I will use a Bridge network. Bridge networks are normally used when your applications run in standalone containers that need to communicate with each other.
Note
Please note that we already created a network called "web" when we deployed the Portainer container, so this is just for illustrative purposes only.

As you can see, you can specify the entire network, but for this example that's not required. Next click on "Create network" and you network is ready to use. When you create your container you can select new network under the "Network" section.
If you want to use this network in a Stack, just add it to the docker-compose.yml. Make sure you also assign this network to the required the containers.
networks:
  web:
    external: true
    name: web
To create a persistent volume, click on "Volumes" in the left menu and then "Add volume". I will create a volume called "hello-world-data". Next click on "Create the volume" to start using this volume.
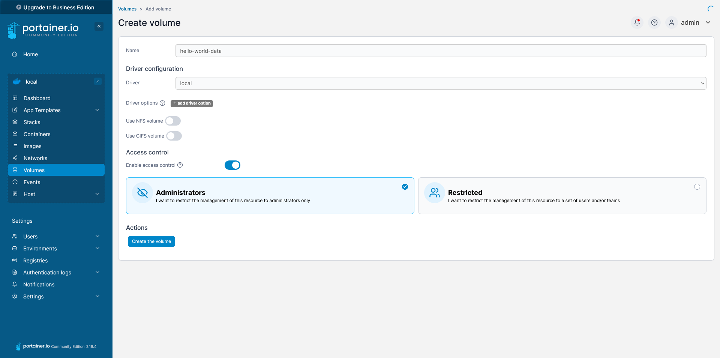
Just as with networks, when you create your container you can select new volume under the "Volumes" section. Point the created volume to the right path inside your container.
If you want to use this volume in a Stack, just add it to the docker-compose.yml. Make sure you also assign this volume to the required the containers.
volumes:
  hello-world-data:
    external: true
Conclusion
In conclusion, Portainer stands as a comprehensive tool that significantly simplifies and enhances the management of Docker environments. From its intuitive handling of container orchestration, image management, to the efficient control of networks and volumes, Portainer proves to be an indispensable asset for developers and system administrators. Its user-friendly interface, coupled with powerful features, ensures that managing Docker environments, regardless of their complexity, becomes a more streamlined and accessible task. This guide has aimed to illuminate the more common use cases of Portainer.