Odoo's vast ecosystem offers a plethora of tools and modules to enhance web design. Yet, despite its expansive toolkit, the default image snippet falls short by lacking a full-screen animated zoom-in feature. This blog post aims to remedy that. This tutorial will guide you step-by-step on how to create a Full-Screen Animated Image Snippet in Odoo. By adding this snippet, you can enable any image on your website to be clicked and viewed in an immersive, full-screen animated format. Not only does this provide added functionality beyond the default capabilities, but it also significantly enhances the user experience, making your Odoo website more engaging and dynamic. Let's embark on this journey to amplify your website's visual appeal.
The Snippet
For the 'Image Zoom' snippet we will develop a custom module. The module will use the file structure below:
custom_snippet/
├── static/
│   └── src/
│       ├── img/
│       │   └── snippets_thumbs/
│       │       └── s_image_zoom.svg
│       └── snippets/
│           └── s_image_zoom/
│               └── 000.js
├── views/
│   └── snippets/
|       ├── s_buy_coffee.xml
│       └── snippets.xml
└── __manifest__.py
Let's go through each file in our theme. The __manifest__.py in Odoo is a configuration file that defines module metadata, dependencies, and other essential information for module installation and execution.
{
	'name': "Custom Snippet",
    'summary': 'This module adds custom snippets to the website editor.',
    'author': 'Name',
    'category': 'Website',
    'version': '16.0.1.0.0',
	'depends': ['website'],
	'data': [
		'views/snippets/s_image_zoom.xml',
		'views/snippets/snippets.xml',
	],
	'assets': {
		'web.assets_frontend': [
			'custom_theme/static/src/snippets/s_image_zoom/000.js',
		],
	},
	'installable': True,
    'application' : False,
	'license': 'AGPL-3',
}
The 'data' section in the manifest lists XML files, indicating that the defined views and components in s_image_zoom.xml and snippets.xml should be loaded. The 'assets' section in the __manifest__.py specifies that the 000.js file should be loaded with the frontend assets bundle of the Odoo web module.
Note
In Odoo, the naming convention 000.js for JavaScript and 000.scss for SCSS files associated with website snippets is employed to prioritize the loading sequence of those files. This convention is based on the principle of ensuring dependencies and it makes sure that core features are loaded first, before other modular or optional features.
Another advantage is that by using numbers like 000, it leaves room for other developers to insert files in between, if ever there's a need. For example, if someone wants a file to load after 000 but before others, they could name it 001.
The s_image_zoom.xml file contains the structure for the 'image zoom' snippet, detailing its layout and behavior, while the snippets.xml file serves as a registry or collection of multiple snippets, ensuring they are recognized and accessible within the Odoo website editor. For a single snippet you could place everything in one XML file, but by separating functionalities or components into distinct files, it's easier to manage, update, or expand individual parts without affecting others. This is especially helpful for larger projects or modules.
<?xml version="1.0" encoding="UTF-8" ?>
<odoo>
    <template id="s_image_zoom" name="Zoomable Image">
        <section class="s_image_zoom">
            <div class="container py-2">
                <div class="row s_nb_column_fixed">
                    <div class="col" style="text-align: center;">
                        <figure class="figure">
                            <img src="/web/image/website.s_picture_default_image" class="s_image_zoom img img-fluid" alt=""/>
                            <figcaption class="figure-caption text-muted py-3">Add a caption to enhance the meaning of this image.</figcaption>
                        </figure>
                    </div>
                </div>
            </div>
        </section>
    </template>
</odoo>
The <section class="s_image_zoom"> represents the main container or wrapper of the snippet's content. The class is specific to this snippet. The 's_' prefix is commonly used in Odoo to identify website snippets. When styling the snippet with CSS or targeting it with JavaScript, this class can be used. The template layout is a copy of the s_picture snippet from the website module.
In the snippets.xml file we define our snippet by inheriting the website.snippets template, so that it appears as a snippet in the 'Blocks' section of the website editor. We add our snippet to the inner content section with the expr attribute. The position attribute is used to place this snippet after the last snippet in the inner content block. I used a copy of the already existing s_picture snippet as an image thumb, but you could also create your own image thumb.
<?xml version="1.0" encoding="utf-8"?>
<odoo>

    <template id="custom_snippets" inherit_id="website.snippets">
        <xpath expr="//div[@id='snippet_content']//t[@t-snippet][last()]" position="after">
            <t t-snippet="custom_snippet.s_image_zoom" t-thumbnail="/custom_snippet/static/src/img/snippet_thumbs/s_image_zoom.svg"/>
        </xpath>
    </template>

</odoo>
Finally, we need some JavaScript for the snippet, that is responsible for making the clicked image full screen. The snippet JavaScript will be placed in the 000.js.
odoo.define('custom_snippet.s_image_zoom', function (require) {
'use strict';
const publicWidget = require(web.public.widget);
const ImageZoomWidget = publicwidget.widget.extend({
selector: '.s_image_zoom',
disabledInEditableMode: false,
/**
* @override
*/
start: function () {
this._super.apply(this, arguments);
this.$el.off('click').on('click', this._onclick.bind(this);
},
destroy: function () {
this._super.apply(this, arguments);
this.$el.off('click');
},
_onClick: function () {
var src = this.$el.attr('src');
if(src) { // Check if src is not empty
$('<div>').css({
background: 'RGBA(0,0,0,.5) url('+src+') no-repeat center',
backgroundSize: 'contain',
width:'100%', height:'100%',
position:'fixed',
zIndex:'10000',
top:'0', left:'0',
cursor: 'zoom-out'
}).click(function(){
$(this).remove();
}).appendTo('body');
}
},
});
publicwidget.registry.imagezoom = ImageZoomWidget;
return ImageZoomWidget;
});
The selector: '.s_image_zoom' line dictates where this widget's behaviors will be applied within the webpage, targeting all elements that have the s_image_zoom class. For this snippet, it means that the widget's functionality (like the zooming effect) would be applied to the image with the class s_image_zoom. The disabledInEditableMode: false property ensures that the widget remains active and functional even when the website or page is in its editable mode.
In Odoo's JavaScript widget system, the start method is often used as an entry point to initialize widget behaviors once the widget is attached to the DOM. This is where you would usually set up event listeners, fetch initial data, or do other setup tasks. The start method ensures that any initialization logic from the parent class's start method is executed first. Then, it removes any existing click handlers from the widget's main element (to prevent multiple handlers) and attaches a new click handler that will execute the _onClick method when the element is clicked.
The destroy method is called whenever a widget instance is about to be removed or destroyed from memory. This is the appropriate place to clean up any resources or event listeners that the widget might have established to prevent memory leaks or unintended behavior. The destroy method first ensures that any parent class's destruction logic is executed. Then, it removes the click event handler from the widget's main element to prevent potential memory leaks and ensure that events aren't handled multiple times.
The _onClick method, when executed, will check if the clicked image has a valid source URL. If it does, a new full-screen div with the image centered and displayed against a semi-transparent black background is created. Clicking on this full screen display will close the view again.
Snippet in Action
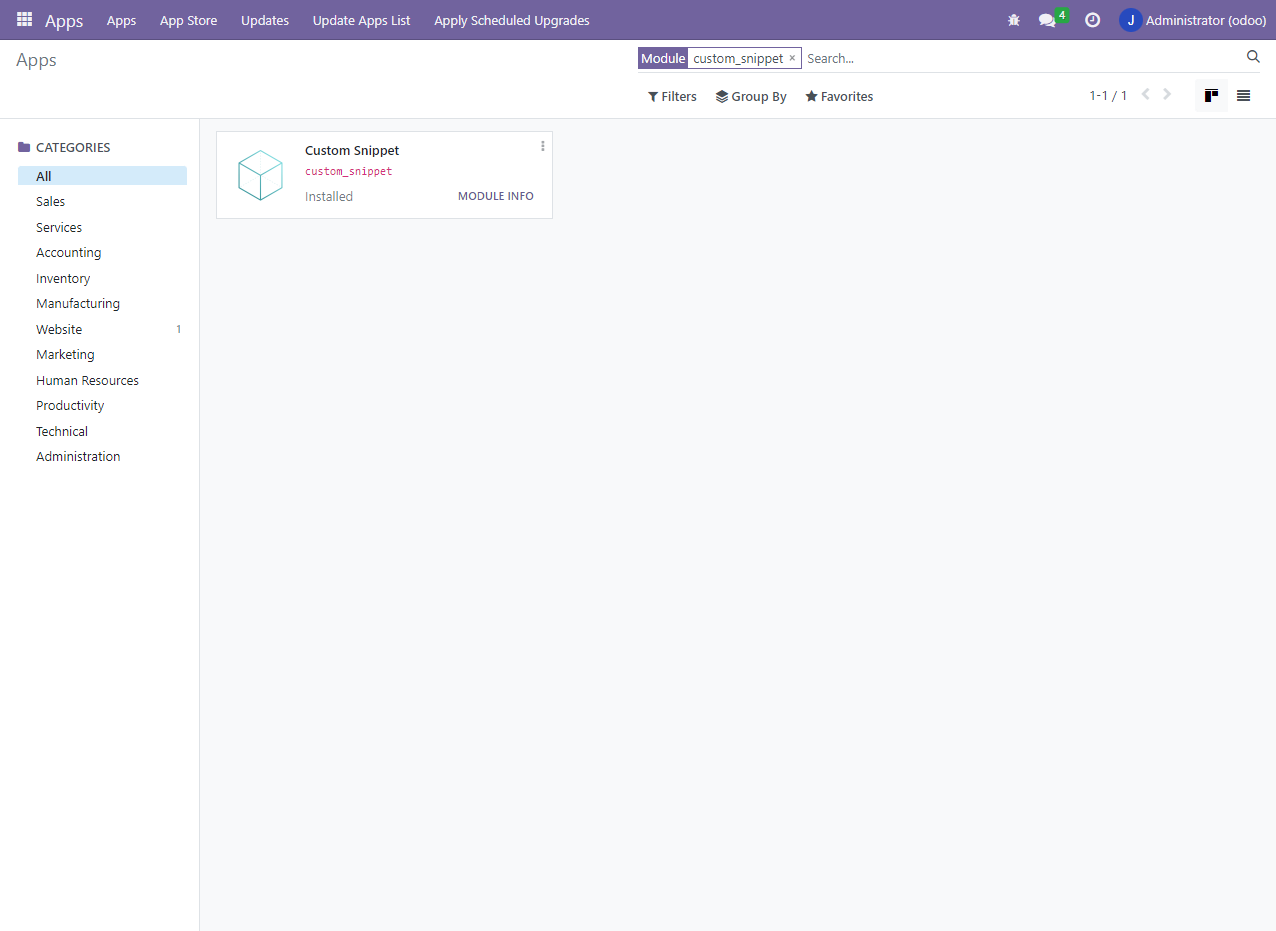
Now everything is in place we can install our snippet. First you have to restart Odoo. Next activate the 'developer mode' and update the app list in the App module. If you search for 'custom_snippet' you should see the new module in the search results. Click the 'activate' button and you should be able to use your custom snippet in the website editor.
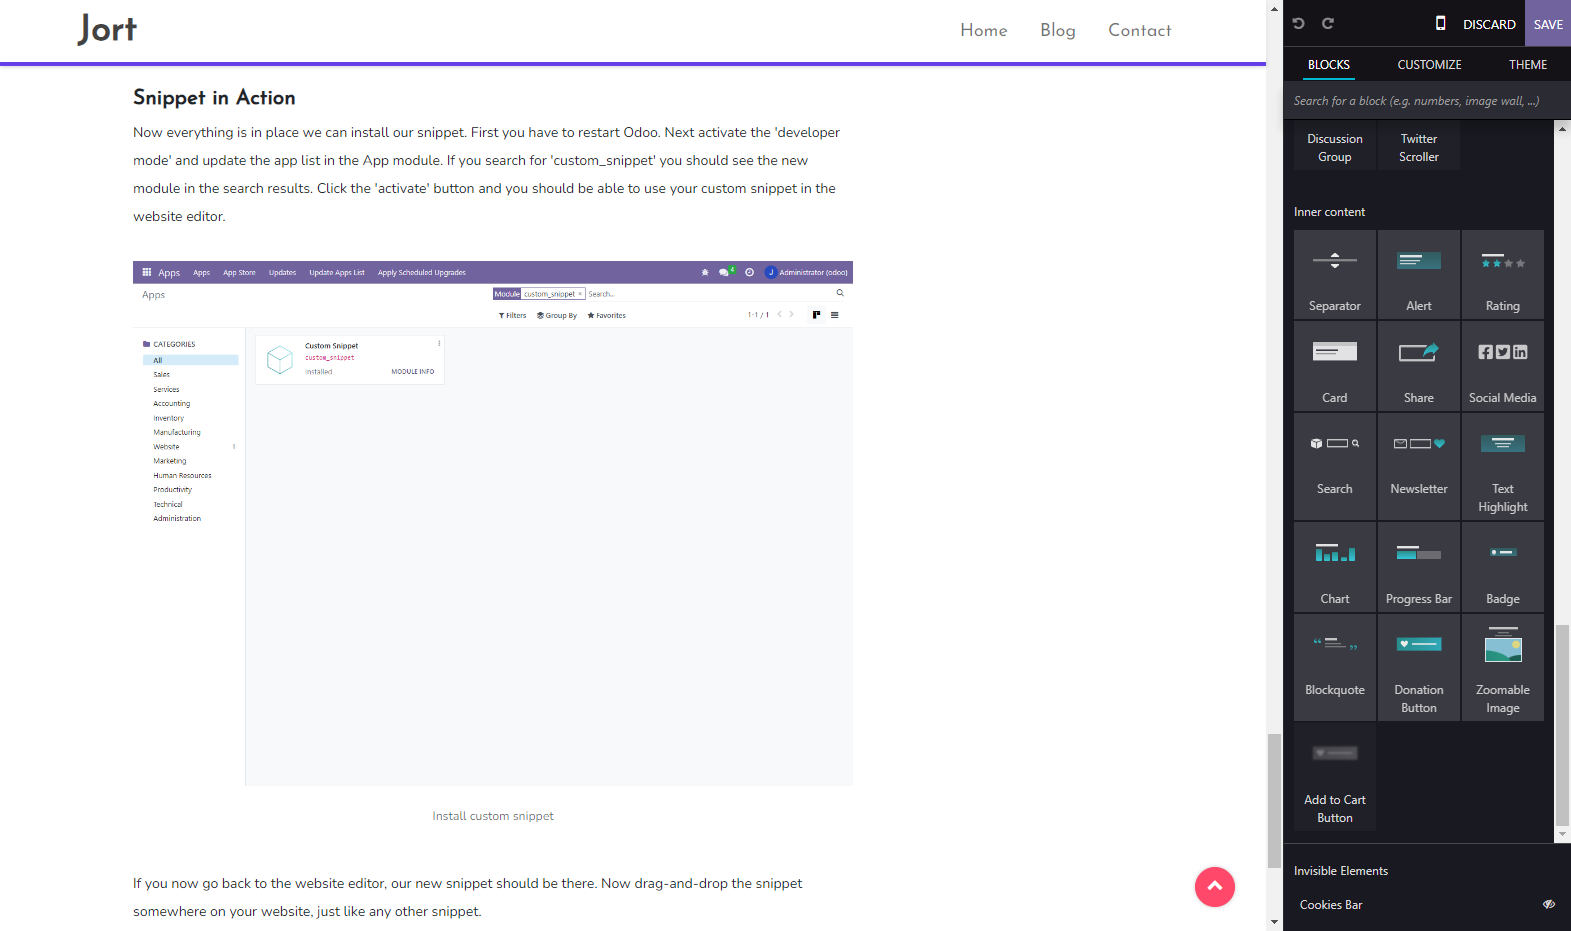
If you now go back to the website editor, our new snippet should be there. Now drag-and-drop the snippet somewhere on your website, just like any other snippet.
That's it! Having followed the steps to build and install such a snippet, you're good to go, ready to use the custom snippet allowing full-screen animated zooming for your images and enrich your Odoo website's user experience.