In today’s fast-moving digital landscape, businesses are under constant pressure to do more with less—automate processes, respond faster, and make smarter decisions. That’s where n8n comes in. It’s a powerful open-source workflow automation tool that lets you connect your favorite apps and services, automate repetitive tasks, and build custom workflows—all without needing to be a developer. But what really sets n8n apart is its ability to integrate with AI and large language models (LLMs), making it possible to not only automate tasks, but also to understand, generate, and act on human-like language and complex data.
Imagine receiving a new customer inquiry through a web form. n8n can automatically log the data into your CRM, send a personalized follow-up email, and notify your sales team in Slack. Or imagine a customer that submits a support ticket. n8n can classify the issue using an AI model, draft a personalized response, route it to the right team, and even flag it for escalation if needed. From marketing and customer support to internal operations and analytics, the possibilities are virtually endless. n8n with AI and agents enables smarter, faster, and more scalable automation across your entire company.
In this blog post, I’ll guide you through the step-by-step process of setting up n8n using Docker and Traefik as your reverse proxy. Getting n8n running in a secure and reliable way is the first step to start automating your business processes.
Docker is a platform that lets you run software in isolated containers, making deployment simple and consistent. Traefik, on the other hand, is a smart reverse proxy that automatically routes incoming traffic to the right container and takes care of SSL certificates using Let's Encrypt. By the end of this guide, you'll have a secure and scalable setup ready for building your first automations.
Prerequisites
Before diving into this tutorial, ensure that you have Docker and Docker Compose installed on your system:
This guide works across most operating systems—Windows, macOS, and Linux—but if you're planning to run n8n in a production environment, Linux is definitely the way to go. Whether you're hosting on-premises or in the cloud, Linux offers the best mix of stability, security, and performance, which is why it's the go-to choice for most server setups.
Traefik configuration for the reverse proxy and SSL
Traefik is a modern reverse proxy and load balancer built with containerized apps in mind. It helps manage incoming web traffic by automatically routing requests to the right service or container. What makes Traefik especially useful is its built-in support for things like automatic SSL certificate management, In this section, I’ll walk you through a docker-compose.yml setup that makes it easy to deploy Traefik as a reverse proxy with built-in SSL support. This setup helps keep n8n secure and running smoothly, and it includes automatic SSL certificate management through Let’s Encrypt, so you don’t have to worry about renewing certificates manually.
version: '3'

services:
  traefik:
    image: traefik:v2.5.6
    container_name: traefik
    restart: unless-stopped
    networks:
      - web
    command:
      - --log=true
      - --log.level=DEBUG
      - --accessLog=true
      - --accessLog.filePath=/logs/traefik.log
      - --accessLog.bufferingSize=100
      - --accessLog.filters.statusCodes=400-530
      - --api=true
      - --api.dashboard=true
      - --api.insecure=true
      - --providers.docker=true
      - --providers.docker.exposedbydefault=false
      - --providers.docker.watch=true
      - --entrypoints.http.address=:80
      - --entrypoints.https.address=:443
      - --certificatesresolvers.letsencrypt.acme.httpchallenge=true
      - --certificatesresolvers.letsencrypt.acme.httpchallenge.entrypoint=http
      - --certificatesResolvers.letsencrypt.acme.email=your@email.com
      - --certificatesResolvers.letsencrypt.acme.storage=/letsencrypt/acme.json
    volumes:
      - /etc/localtime:/etc/localtime:ro
      - /var/run/docker.sock:/var/run/docker.sock:ro
      - traefik2_letsencrypt:/letsencrypt
      - traefik2_logs:/logs
    labels:
      - "traefik.enable=true"
      # HTTP-to-HTTPS Redirect
      - "traefik.http.routers.http-catchall.entrypoints=http"
      - "traefik.http.routers.http-catchall.rule=HostRegexp(`{host:.+}`)"
      - "traefik.http.routers.http-catchall.middlewares=redirect-to-https"
      - "traefik.http.middlewares.redirect-to-https.redirectscheme.scheme=https"
    ports:
      - 80:80
      - 443:443
      - 8080:8080

volumes:
  traefik2_letsencrypt:
    external: true
  traefik2_logs:
    external: true

networks:
  web:
    external: true
    name: web
This docker-compose.yml file sets up Traefik as a reverse proxy with Let's Encrypt for SSL certificate management. If you want to know more about the configuration I suggest you check another blog post where I go into more detail about how to set up Traefik with Portainer.
The Traefik container will use two external volumes named "traefik2_letsencrypt" and "traefik2_logs" and it will connect to an external network named "web," which must both be created beforehand.
$ docker volume create traefik2_letsencrypt
$ docker volume create traefik2_logs
$ docker network create web
With this configuration in place, we can create out container.
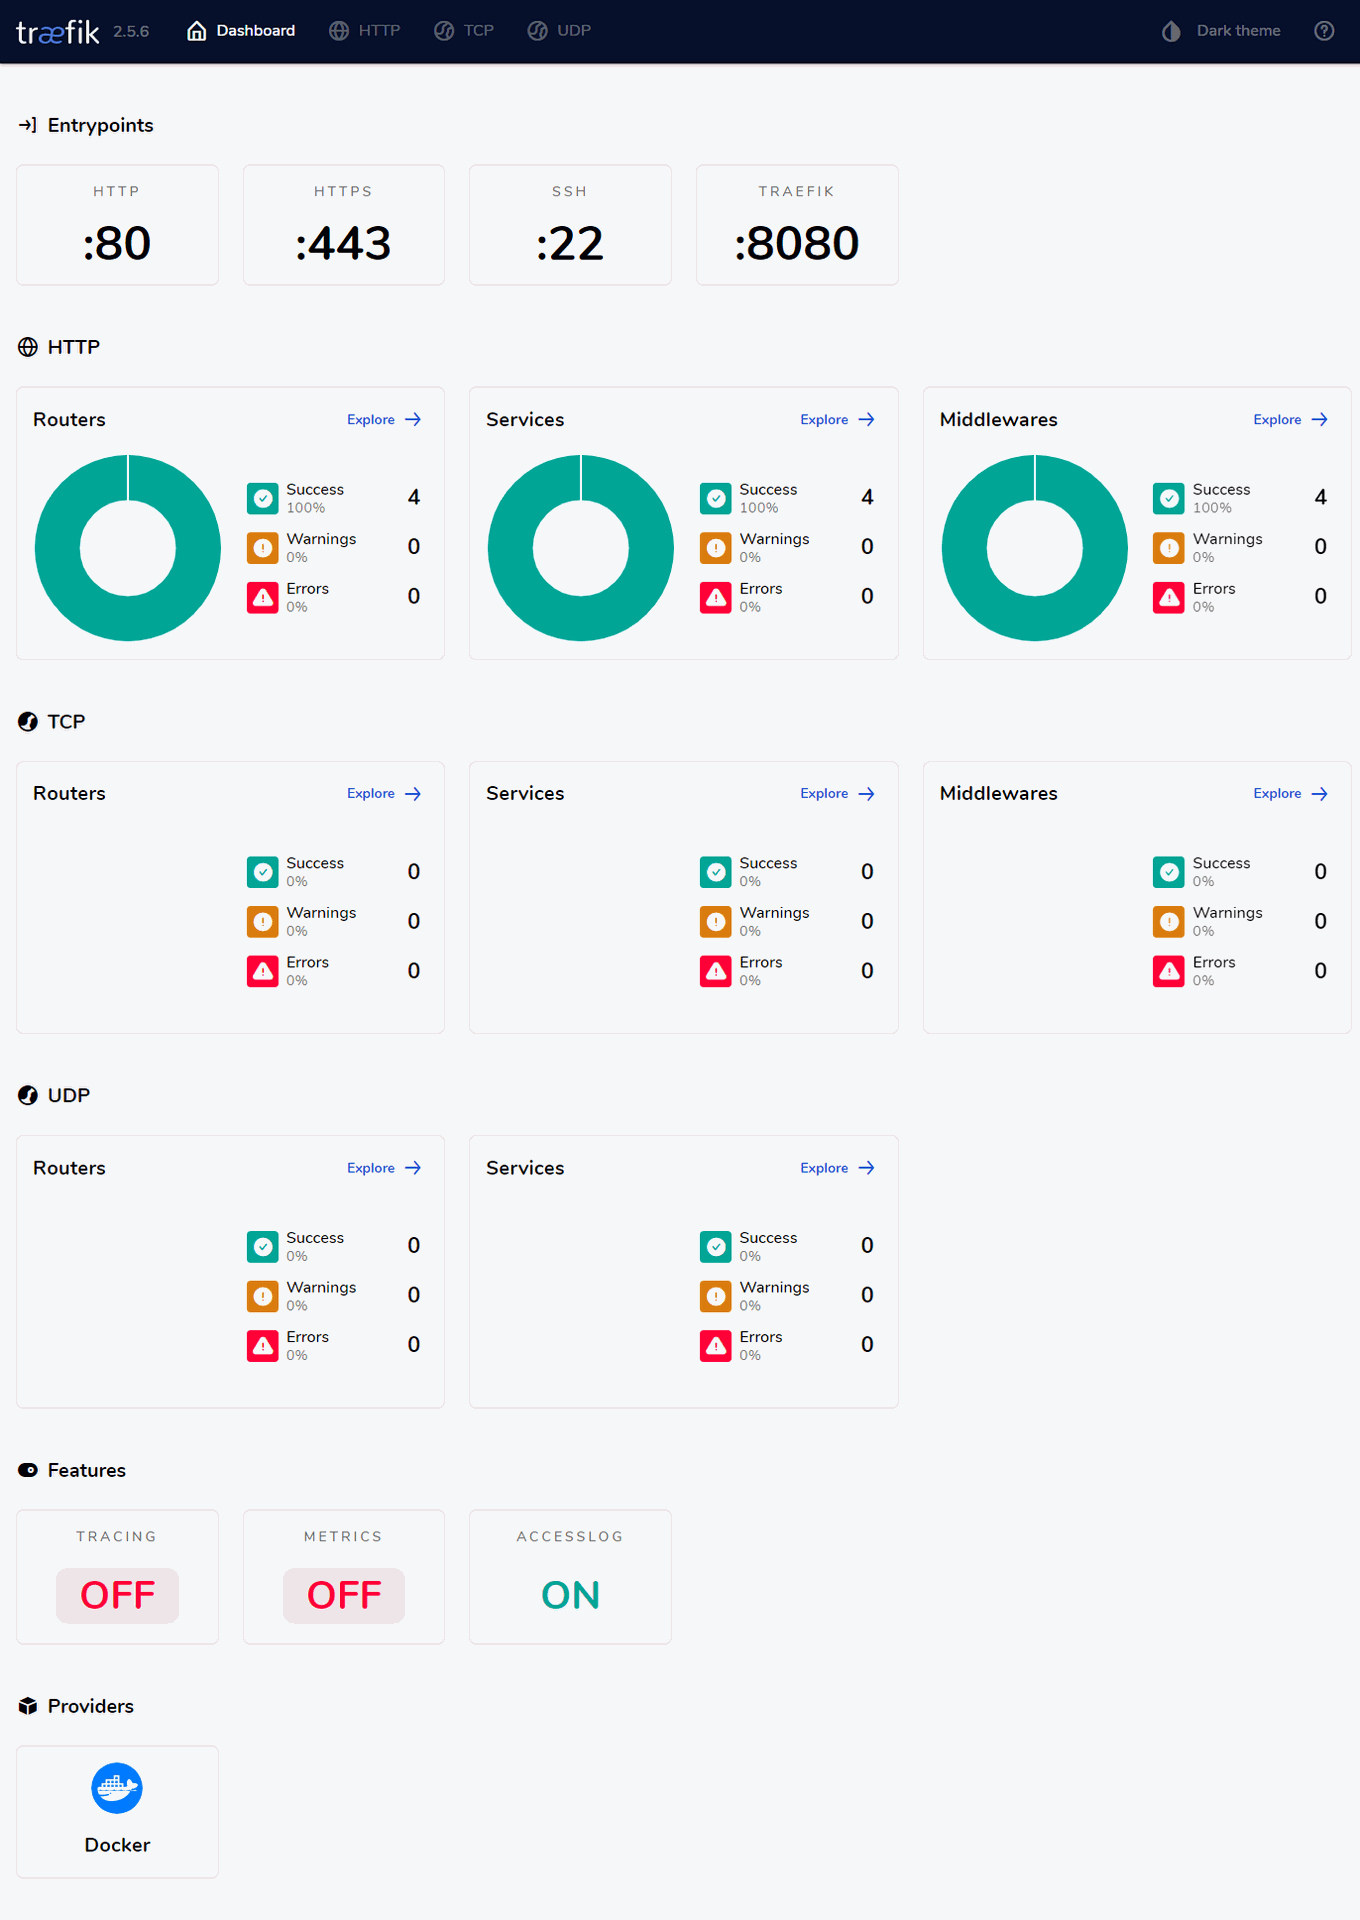
$ docker-compose up -dOnce your container is up and running, accessing the Traefik dashboard is quick and straightforward. Just open your web browser and head to the IP address or domain of the server where Traefik is running—add the dashboard port from your docker-compose.yml file (in our example, that’s port 8080).
So if you're testing locally, you’d simply go to http://localhost:8080. There, you'll find the Traefik dashboard, where you can easily keep an eye on your routers, services, middlewares, and everything Traefik is managing behind the scenes.
Note
You could also deploy Traefik and n8n using Portainer, an open-source container management tool that simplifies the process of deploying, monitoring, and maintaining containers. If you want to know more about Portainer, you can check out my dedicated blog post about Portainer.
Deploying n8n using Traefik as a reverse proxy
To get n8n up and running with Docker and Traefik, all you need to do is run the docker-compose.yml setup.
services:

  n8n:
    container_name: n8n
    image: docker.n8n.io/n8nio/n8n
    networks:
      - web
    ports:
        - 5678:5678
    labels:
      - traefik.enable=true
      - traefik.http.routers.n8n.rule=Host(`n8n.example.com`)
      - traefik.http.routers.n8n.entrypoints=https
      - traefik.http.routers.n8n.tls.certresolver=letsencrypt
      - traefik.http.routers.n8n.middlewares=n8n
      - traefik.http.middlewares.n8n.headers.SSLRedirect=true
      - traefik.http.middlewares.n8n.headers.STSSeconds=315360000
      - traefik.http.middlewares.n8n.headers.browserXSSFilter=true
      - traefik.http.middlewares.n8n.headers.contentTypeNosniff=true
      - traefik.http.middlewares.n8n.headers.forceSTSHeader=true
      - traefik.http.middlewares.n8n.headers.SSLHost=example.com
      - traefik.http.middlewares.n8n.headers.STSIncludeSubdomains=true
      - traefik.http.middlewares.n8n.headers.STSPreload=true
      - traefik.http.services.n8n.loadbalancer.server.port=5678
      - traefik.docker.network=web
    environment:
      - N8N_HOST=n8n.example.com
      - N8N_PORT=5678
      - N8N_PROTOCOL=https
      - NODE_ENV=production
      - WEBHOOK_URL=https://n8n.example.com/
      - GENERIC_TIMEZONE=Europe/Berlin
    volumes:
      - n8n_data:/home/node/.n8n
      - n8n_files:/files
    restart: always

volumes:
  n8n_data:
    external: true
  n8n_files:
    external: true

networks:
  web:
    external: true
    name: web
This configuration launches the official n8n container, connects it to your existing Traefik setup via the shared web network, and takes care of all the reverse proxy rules and HTTPS settings out of the box. The container exposes port 5678, which is the default port n8n runs on. Traefik listens for requests to n8n.example.com (you’ll want to replace this with your actual domain) and routes that traffic securely to the n8n container. Thanks to the built-in Traefik labels, SSL certificates will be automatically managed using Let’s Encrypt, and several security headers will be applied to harden your setup.
You’ll also notice a few environment variables preconfigured—like N8N_HOST, N8N_PROTOCOL, and WEBHOOK_URL—which help ensure n8n knows how to properly handle external requests. Two persistent volumes are also mounted: one for saving your workflow data, and one for any files n8n may need to store. These have to be created first.
$ docker volume create n8n_data
$ docker volume create n8n_files
With this configuration in place, we can create out container.
$ docker-compose up -dAfter a few seconds, n8n should be available at your chosen domain (e.g. https://n8n.example.com), ready for you to start building automations in a fully secured environment.
With n8n now running inside a Docker container and securely routed through Traefik, you can access your instance by opening a web browser and heading to https://n8n.example.com.
If this is your first time visiting, you’ll be guided through the initial setup where you can create your admin account. You also have to register for a free license key. Once you're in, the n8n dashboard will be ready and waiting for you to start building automations, connecting services, and designing custom workflows tailored to your business needs.
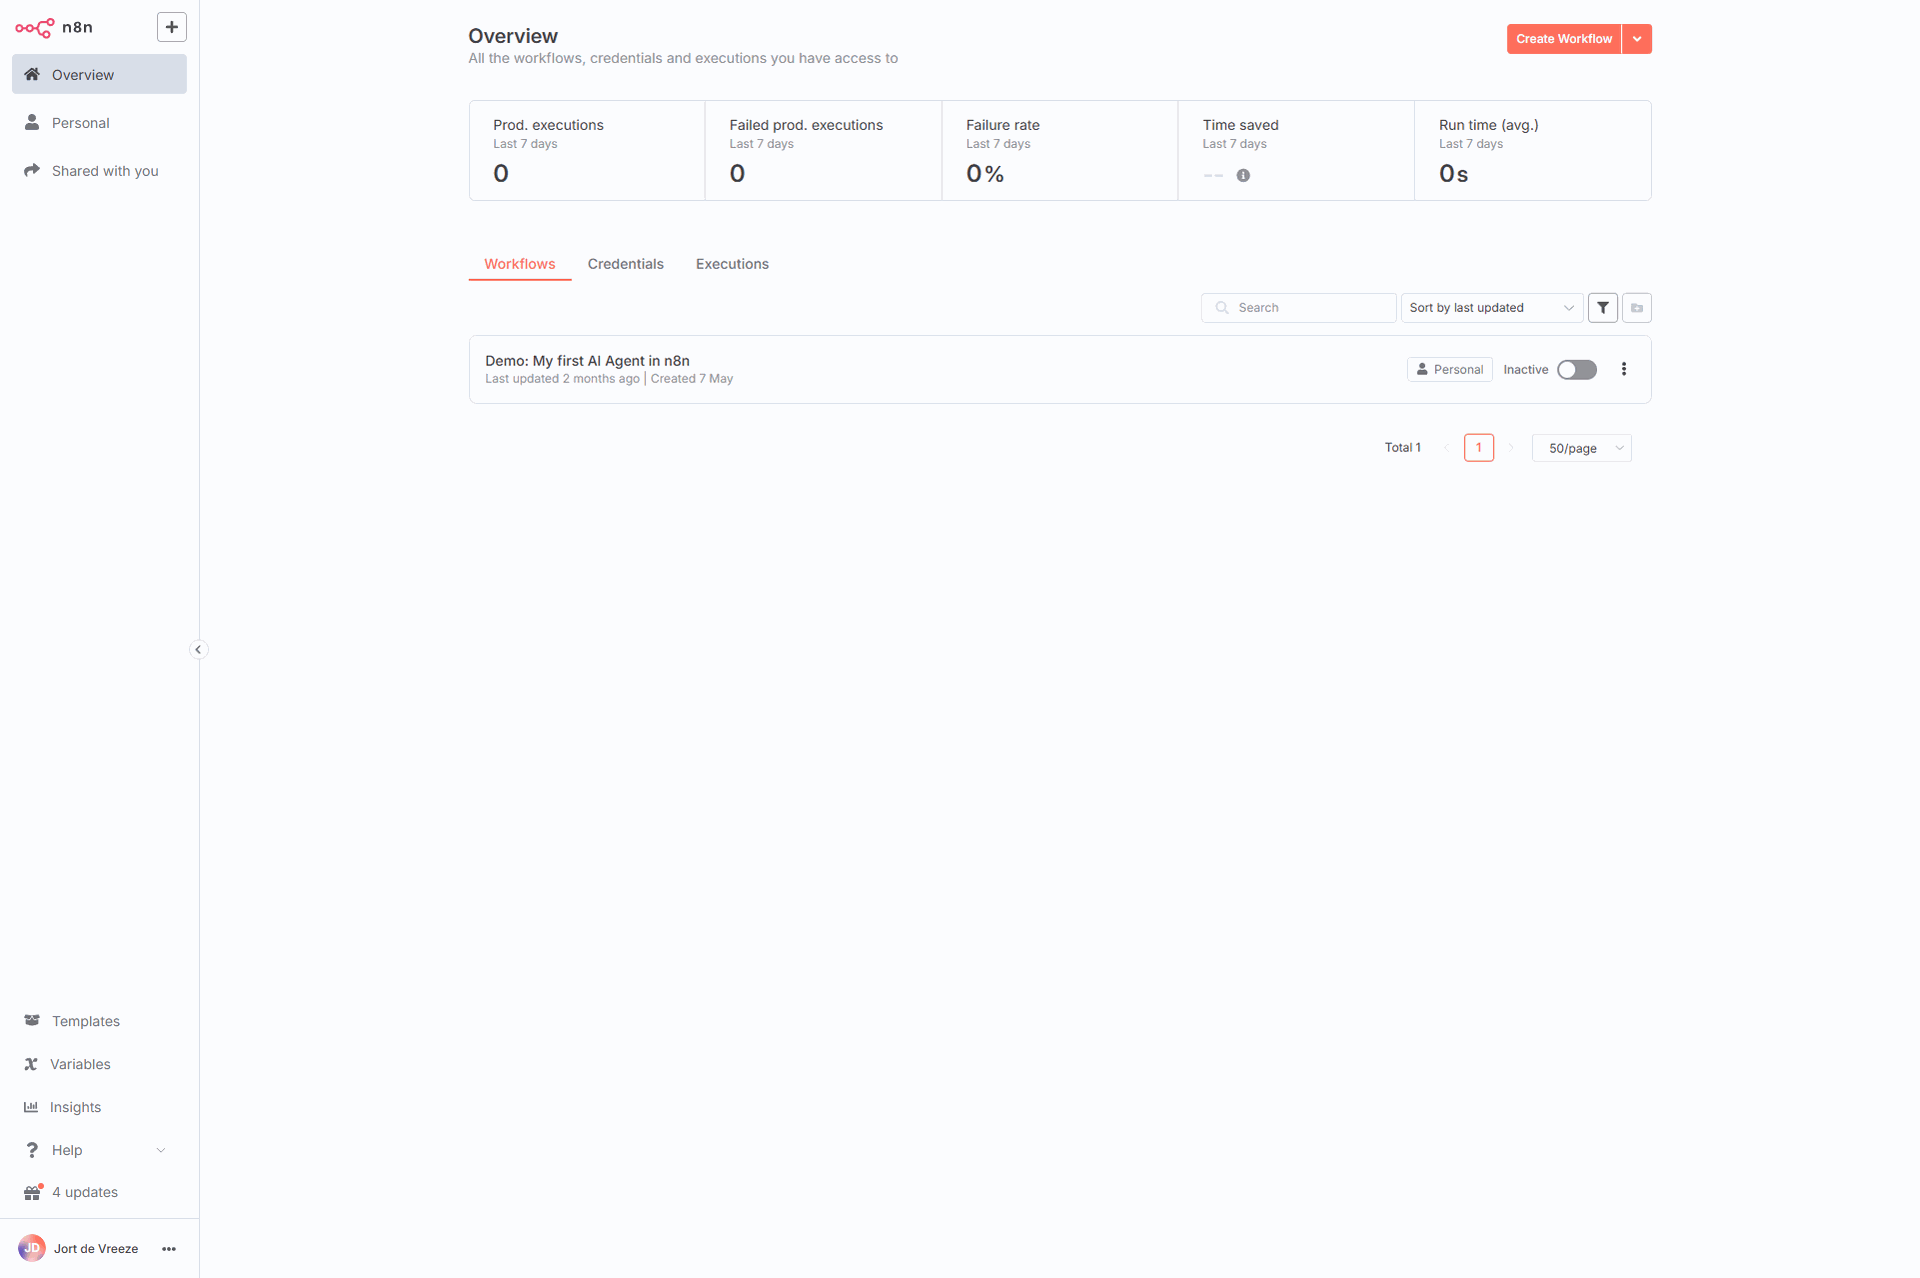
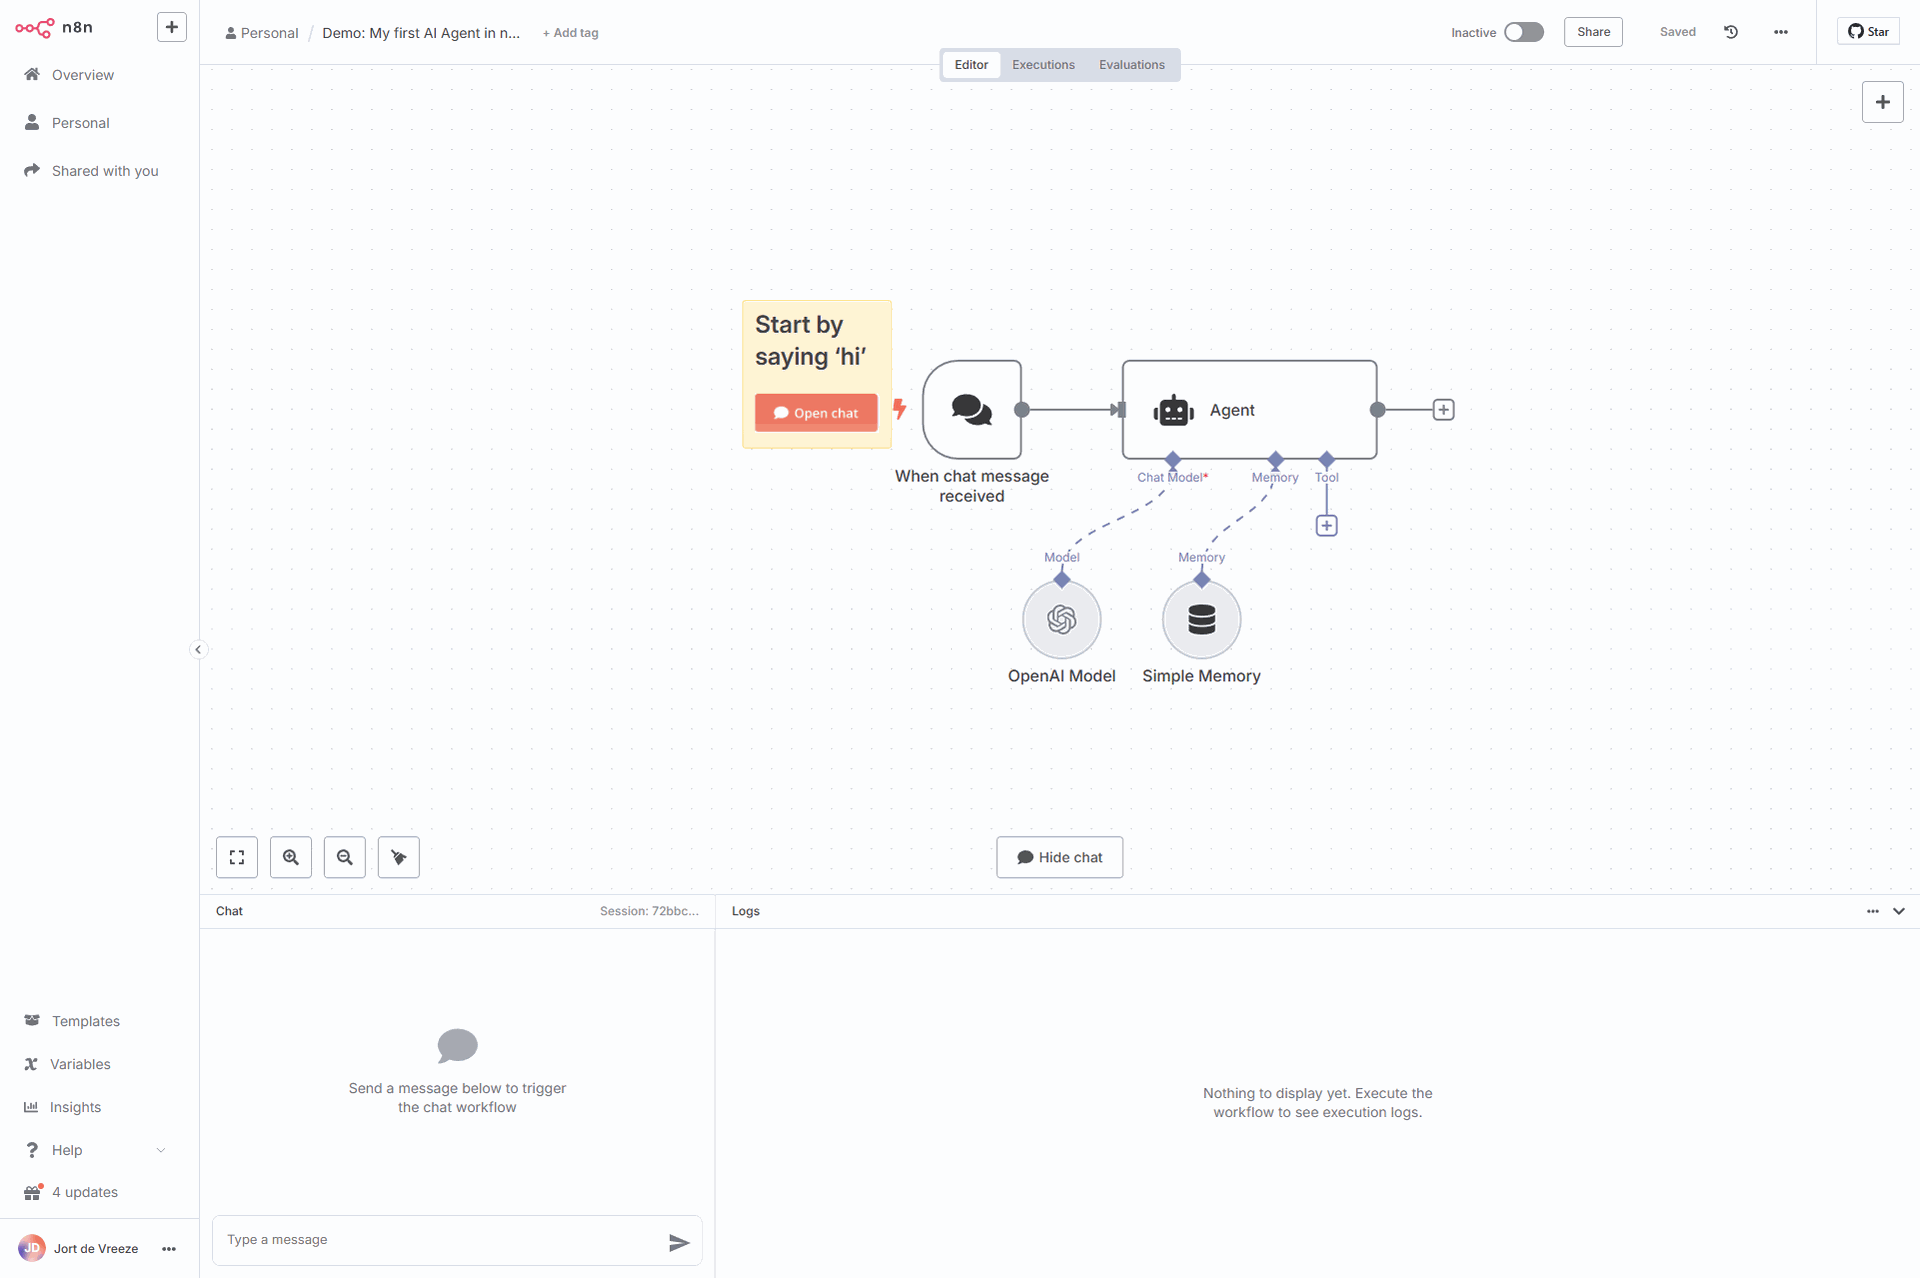
There's an example workflow that you can play around with.
That's it, you are now ready to start optimizing your company workflows. More blog posts on how to create n8n workflows are soon to follow.