Wouldn't it be great if you could just launch a new instance of Odoo on any cloud platform using just one command. Terraform and Packer are powerful tools developed by HashiCorp that play a crucial role in the automation of infrastructure management and deployment, catering to the needs of DevOps practices. Terraform, an open-source infrastructure as code software tool, enables users to define and provision data center infrastructure using a high-level configuration language. It supports a multitude of cloud providers such as Digital Ocean, AWS, Google Cloud, and Azure, allowing for the management of a wide array of services with ease. The key strength of Terraform lies in its ability to manage the complete lifecycle of infrastructure resources, from creation, updates, and scaling to destruction, all defined in configuration files that can be versioned, reused, and shared.
On the other hand, Packer is an open-source tool used for creating identical machine images for multiple platforms from a single source configuration. Packer automates the creation of any type of machine image, enabling highly customized, repeatable, and portable machine images to be generated on-the-fly. It integrates seamlessly with Terraform, allowing the images it creates to be immediately provisioned and managed. This synergy between Packer and Terraform streamlines the deployment process, making it faster and more efficient by eliminating manual errors and inconsistencies that can arise from manually configuring environments.
Together, Terraform and Packer embody the essence of infrastructure as code. Using Docker in combination with Terraform and Packer provides an even more efficient and streamlined workflow for creating, deploying, and managing containerized applications across various environments. With Packer, you can create Docker images as part of your machine image library, automating the installation and configuration of software within your Docker containers. These images can then be managed and provisioned by Terraform, which orchestrates the deployment of containers on any supported cloud platform.
For this blog post we will use Terraform, Packer, and Docker to create a workflow that allows you to easily deploy a new Odoo server on Digital Ocean. I will be using Digital Ocean because it is affordable, fast and easy to use. If you are new to Digital Ocean you can use my affiliate link to create an account and receive $200 in credit.
Prerequisites
You should have a basic understanding of networks and Docker. You don't have to be familiar with Digital Ocean (e.g., Droplets, VPC), because I will guide you through everything. If you have never worked with Digital Ocean, but with other cloud providers such as AWS, Azure, or Google Cloud, you should be able to follow and adapt everything to these requirements.
Installation of Terraform and Packer
First you have to install both Terraform and Packer. The download instructions for Terraform and Packer can be found here:
Just follow the instructions for your OS and install both Terraform and Packer.
Note
If you want to use Terraform and Packer in Windows, I suggest to use Chocolatey. Download and install Chocolatey, then run choco install terraform and choco install packer in your shell.
You can verify if the installation was successful by running terraform and packer in your shell. This should output something like this:
$ packer
Usage: packer [--version] [--help] <command> [<args>]

Available commands are:
    build           build image(s) from template
    console         creates a console for testing variable interpolation
    fix             fixes templates from old versions of packer
    fmt             Rewrites HCL2 config files to canonical format
    hcl2_upgrade    transform a JSON template into an HCL2 configuration
    init            Install missing plugins or upgrade plugins
    inspect         see components of a template
    validate        check that a template is valid
    version         Prints the Packer version
Generate a Digital Ocean API token
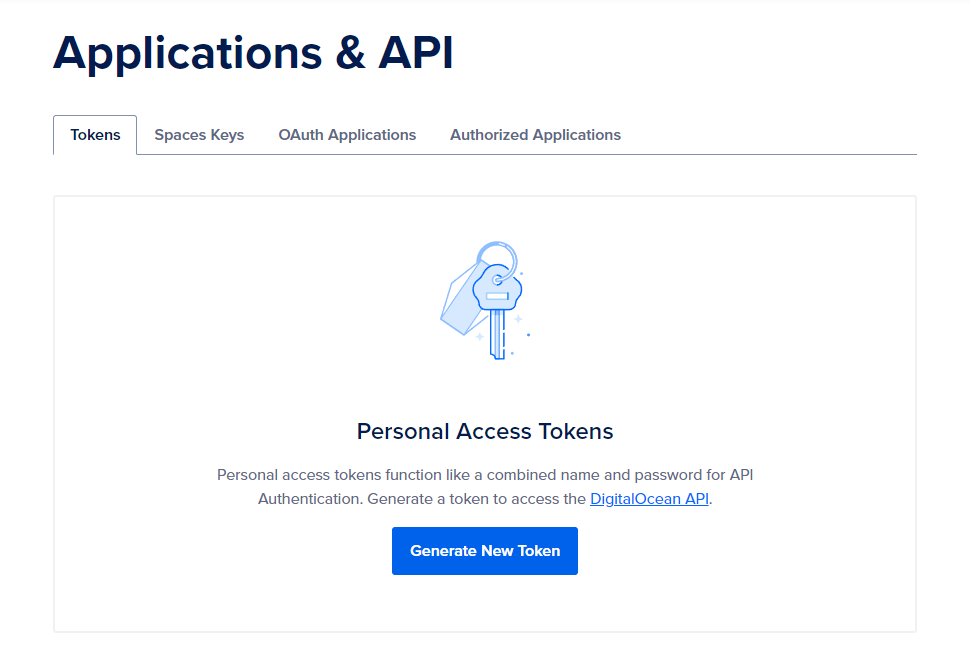
Next we need to generate a Digital Ocean API token. To generate an access token, log in to the Digital Ocean Control Panel and in the left menu, click API.
Here you can generate a new token by clicking the 'Generate New Token' button.
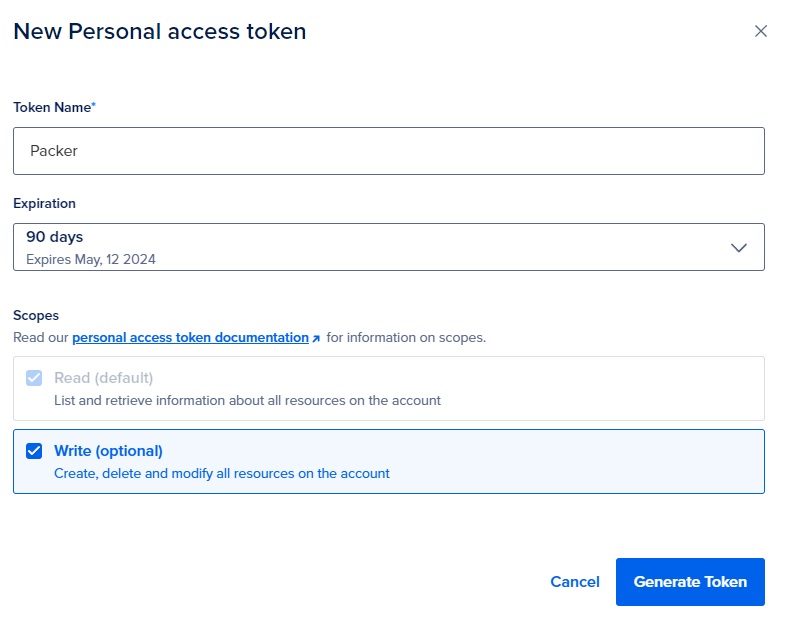
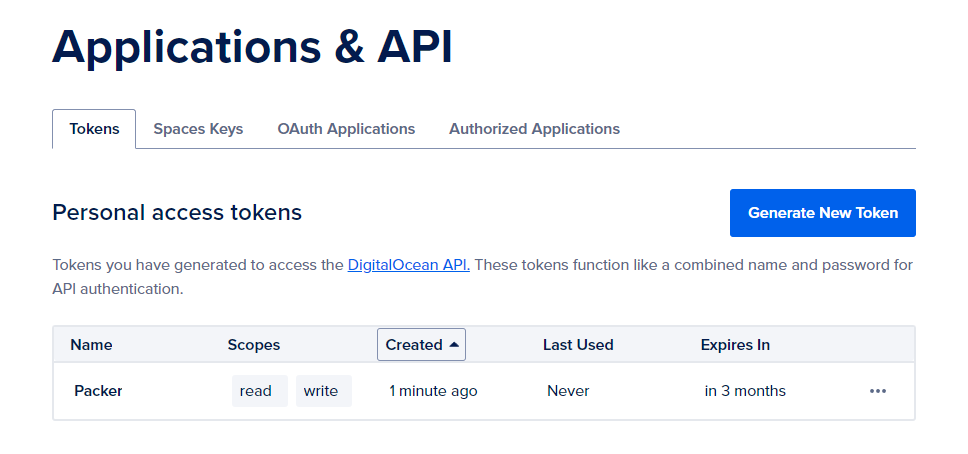
The token requires a token name, expiration date, and the token requires read and write access. When you click 'Generate Token', your token is generated and ready to use.
The Terraform and Packer scripts will access this token, but we’ll keep the actual values in the environment rather than hardcoding them. Packer searches the environment of its own process for environment variables named PKR_VAR_ followed by the name of a declared variable, whereas Terraform uses TF_VAR_ followed by the name of a declared variable. This is a security measure that restricts Packer and Terraform access to all your environmental variables. Because we need the API token for both Packer and Terraform, you should export the API token to an environment variable called PKR_VAR_DO_TOKEN and TF_VAR_DO_TOKEN by running:
$ export PKR_VAR_do_token="your_personal_access_token"
$ export TF_VAR_do_token=${PKR_VAR_do_token}
This will make using it in subsequent commands easier and keep it separate from your code, which is helpful if you're using version control.
Configuring your image with Packer for Digital Ocean
In this tutorial we will use Packer to create a Droplet, install all necessary dependencies and configuration files, and consequently turn the Droplet into an image that can be used to deploy new Droplets with Terraform. Create a directory called packer, and create a file called do-docker.pkr.hcl.
$ mkdir packer && cd packer
$ echo "" > do-docker.pkr.hcl
Packer uses a configuration file that contain all the instructions for Packer to build an image. This configuration is written in HCL, the preferred way to write Packer configuration.
packer {
    required_plugins {
        digitalocean = {
            version = ">= 1.0.4"
            source  = "github.com/digitalocean/digitalocean"
        }
    }
}

variable "DO_TOKEN" {
    type    = string
    default = false
    sensitive = true
}

variable "ODOO_USER" {
    type    = string
    default = "odoo"
    sensitive = true
}

variable "ODOO_PASSWORD" {
    type    = string
    default = "secret"
    sensitive = true
}

source "digitalocean" "odoo" {
    api_token    = "${var.DO_TOKEN}"
    image        = "ubuntu-22-04-x64"
    region       = "fra1"
    size         = "s-2vcpu-4gb"
    ssh_username = "root"
    droplet_name = "packer-odoo-s-2vcpu-4gb"
    snapshot_name = "packer-odoo-s-2vcpu-4gb"
}

build {

    name = "odoo"
    sources = [
        "source.digitalocean.odoo"
    ]

    provisioner "shell" {
        inline = [
            "mkdir -p /home/docker",
        ]
    }
    provisioner "file" {
        source = "odoo/docker-compose.yml"
        destination = "/home/docker/docker-compose.yml"
    }
    provisioner "shell" {
        script = "docker/docker.sh"
    }
    provisioner "shell" {
        inline = [
            "docker version",
            "docker info",
            "docker compose version"
        ]
    }
    provisioner "shell" {
        inline = [
            "echo ${var.ODOO_USER} > /home/docker/odoo_user.txt",
            "echo ${var.ODOO_PASSWORD} > /home/docker/odoo_password.txt",
            "docker network create web",
            "docker compose -f /home/docker/docker-compose.yml up -d"
        ]
    }
}
First you have to specify that you want to use the Digital Ocean plugin to build the image. In the next section we define the variables that are required to build the image. The first variable is the API token that you created to access the Digital Ocean API. The other two variables are required to build the Odoo container. Setting a variable as sensitive prevents Terraform and Packer from showing its value in output when building or deploying. The specified variables can later be used in the configuration file by referencing the the variable as var.variable_name. If you want to use this variable in another string you need to template it using the syntax ${}.
The configuration file contains a source block that contains the type of Droplet we want to build, which is then invoked by a build block. Here we tell Packer to take the Ubuntu 22.04 image and use that as the basis for the template we are building. I will use a Droplet with 2 vCPU's and 4GB of RAM. As I’m based in Europe, I’m also going to store the droplet in the Frankfurt region.
Note
If you want to know the different droplet images, sizes, and regions that you can configure, you can go to the web interface of Digital Ocean and specify your droplet and then choose the "Create via command line" option. Here you see a cURL command that includes the size, region, and image you can use. For example:
curl -X POST -H 'Content-Type: application/json' \
    -H 'Authorization: Bearer '$TOKEN'' \
    -d '{"name":"ubuntu-s-4vcpu-8gb-ams3-01",
        "size":"s-4vcpu-8gb",
        "region":"ams3",
        "image":"ubuntu-22-04-x64"}' \
    "https://api.digitalocean.com/v2/droplets"
The build block defines what Packer should do with the Droplet after it launches. The build block references the Droplet image defined by the source block above: source.digitalocean.odoo. The real power of Packer is automated provisioning that allows the installation and configuration of software in the machines prior to turning them into images. There are many different types of provisioners that you can use, but here we will only use shell and file provisioners.
The inline shell provisioner contains an array of commands to execute. We will use this to create the required path to store our secrets. The file provisioner uploads files to machines, and we use it to upload the docker-compose.yml file to the Droplet, which we will use later in this tutorial. The script shell provisioner contains a bash script that we will execute on the Droplet.
#! /bin/bash
sleep 15

# Wait until apt-get is ready
while ! sudo apt-get update; do
  sleep 1
done

# Add Docker's official GPG key:
sudo apt-get install ca-certificates curl
sudo install -m 0755 -d /etc/apt/keyrings
sudo curl -fsSL https://download.docker.com/linux/ubuntu/gpg -o /etc/apt/keyrings/docker.asc
sudo chmod a+r /etc/apt/keyrings/docker.asc

# Add the repository to Apt sources:
echo \
  "deb [arch=$(dpkg --print-architecture) signed-by=/etc/apt/keyrings/docker.asc] https://download.docker.com/linux/ubuntu \
  $(. /etc/os-release && echo "$VERSION_CODENAME") stable" | \
  sudo tee /etc/apt/sources.list.d/docker.list > /dev/null
sudo apt-get update

# Wait until apt-get is ready
while ! sudo apt-get update; do
  sleep 1
done

# Install Docker
sudo apt-get install -y docker-ce docker-ce-cli containerd.io docker-buildx-plugin docker-compose-plugin

# Add the current user to the docker group
sudo usermod -aG docker $USER
First we tell the script to wait 15 seconds to make sure the Droplet is up-and-running. It also checks whether apt is ready before we start with the installation. The remainder of the script scripts installs Docker on the Droplet following the official Docker installation instructions.
The next inline shell provisioner checks whether the installation was successful. Finally, we will configure and start an Odoo instance as a Docker container together with a Postgresql database. The Odoo username and password are copied to the Droplet so that they can be used as a secret in Docker Compose. We will create a network called web and we will use the docker-compose.yml file we copied to the Droplet earlier to start the Odoo container together with a Postgres container.
version: '3.8'

services:

  postgres:
    container_name: odoo-postgres
    image: postgres:14.1-alpine
    networks:
      - web
    ports:
      - 5432:5432
    environment:
      POSTGRES_DB: postgres
      POSTGRES_USER_FILE: /run/secrets/odoo_user
      POSTGRES_PASSWORD_FILE: /run/secrets/odoo_password
    volumes:
      - postgres_data:/var/lib/postgresql/data
    restart: always
    secrets:
      - odoo_user
      - odoo_password

  odoo:
    container_name: odoo
    image: odoo:17.0
    networks:
      - web
    environment:
      HOST: postgres
      USER_FILE: /run/secrets/odoo_user
      PASSWORD_FILE: /run/secrets/odoo_password
    depends_on:
      - postgres
    ports:
      - 8069:8069
    volumes:
      - odoo_config:/etc/odoo
      - odoo_extra-addons:/mnt/extra-addons
      - odoo_data:/var/lib/odoo
    restart: always
    links:
      - postgres
    secrets:
      - odoo_user
      - odoo_password

networks:
  web:
    external: true
    name: web

volumes:
  postgres_data:
  odoo_config:
  odoo_extra-addons:
  odoo_data:

secrets:
  odoo_user:
    file: ./odoo_user.txt
  odoo_password:
    file: ./odoo_password.txt
If you want to know more about how to use Odoo as a Docker container, you can check out my dedicated blog post about this: Dock, Stack & Launch: Odoo deployment with Docker and Portainer. The only difference to that blog post is that we will use secrets for this configuration. A secret is any piece of data, such as a password, certificate, or API key, that shouldn’t be transmitted over a network or stored unencrypted in a Dockerfile. The secrets block defines two secrets that are stored as a text file. Both containers will have access to these secrets and the environment variable is populated with the secret values using the _FILE suffix.
Note
Storing secrets in plain text files is generally not a secure practice. If you're using Docker Swarm, you can use Docker Secrets to securely transmit and store secrets. Alternatively you could use services like HashiCorp's Vault, AWS Secrets Manager, or Azure Key Vault where you can securely store and manage secrets.
Now that we have all the necessary components in place, we can run Packer to create our image. From the packer directory, run the following command:
$ packer validate -var ODOO_USER=odoo -var ODOO_PASSWORD=secret .
The configuration is valid.
This will check if the configuration template is valid. If the validation is successful then you can start building your image, by using the build command:
$ packer build -var ODOO_USER=odoo -var ODOO_PASSWORD=secret .This will take quite a while to finish (~10 minutes) and if the build is finished you should see something like this on your console:
==> <sensitive>.digitalocean.<sensitive>: Gracefully shutting down droplet...
==> <sensitive>.digitalocean.<sensitive>: Creating snapshot: packer-1708424491
==> <sensitive>.digitalocean.<sensitive>: Waiting for snapshot to complete...
==> <sensitive>.digitalocean.<sensitive>: Destroying droplet...
==> <sensitive>.digitalocean.<sensitive>: Deleting temporary ssh key...
Build '<sensitive>.digitalocean.<sensitive>' finished after 9 minutes 6 seconds.

==> Wait completed after 9 minutes 6 seconds

==> Builds finished. The artifacts of successful builds are:
--> <sensitive>.digitalocean.<sensitive>: A snapshot was created: 'packer-odoo-s-2vcpu-4gb' (ID: 150499074) in regions 'fra1'
Save the ID number given to you in the console, you will need it later to use with Terraform. To validate if your image was build successfully, log in to the Digital Ocean Control Panel and in the left menu, click images. Here you should be able to see the image you just created under the Snapshots tab. You can now use this image to automatically deploy a fresh instance of an Odoo server. If you no longer want to use this image you can remove them here.
Deploy your image with Terraform for Digital Ocean
The Terraform Digital Ocean provider allows you to deploy and manage your Droplets and other infrastructure as code. First create a folder outside of the packer directory called terraform, and create a file called main.tf.
$ mkdir -p ../terraform && cd ../terraform
$ echo "" > main.tf
Terraform also uses its own configuration language in a declarative fashion. Each .tf file describes the intended goal, i.e., deploy the Odoo image. Open the main.tf file.
terraform {
    required_version = "~> 1.7.3"

    required_providers {
        digitalocean = {
            source  = "digitalocean/digitalocean"
            version = "~> 2.0"
        }
    }
}

variable "DO_TOKEN" {
    description = "Digital Ocean API token"
    type = string
    sensitive = true
}

variable "NAME" {
    description = "Droplet Name"
    default = "droplet-odoo-s-2vcpu-4gb"
    type = string
}

provider "digitalocean" {
    token = "${var.DO_TOKEN}"
}

data "digitalocean_image" "docker-snapshot" {
    name = "packer-odoo-s-2vcpu-4gb"
}

resource "digitalocean_droplet" "odoo" {
    image     = data.digitalocean_image.docker-snapshot.image
    name      = "${var.NAME}"
    region    = "fra1"
    size      = "s-2vcpu-4gb"
}

output "ip" {
    value = "${digitalocean_droplet.odoo.ipv4_address}"
    description = "The public IP address of your Odoo Droplet."
}
First you have to specify that you want to use the Digital Ocean plugin to build the image. In the next section we define the input variables that are required to build the image. For Terraform we only need the API token that you created to access the Digital Ocean API. I also added an optional variable that allows you to give a custom name to your Droplet. This can be helpful if you are planning to create more Odoo Droplets.
The configuration file contains a provider block that tells Terraform to use the API token. Next we specify the droplet that we want to deploy using the resource block. This configuration file defines a digitalocean_droplet resource called odoo based on an the Odoo image we created with Packer. We tell Terraform to deploy a Droplet configured with two CPU's and 4 GB of RAM as defined by the size attribute. The region attribute instructs Terraform to deploy this resource to the fra1 region. Finally, there is an output variable defined that outputs the IP address of the Odoo Droplet.
Note
For this configuration we will use the credentials that will be send via email after the Droplet is deployed. However, it is recommended to have Terraform automatically add your SSH key to any new Droplets you create.
First we will initialize Terraform for this project. This will install the Digital Ocean provider after completion Terraform is properly configured and can be connected to your Digital Ocean account.
$ terraform init

Initializing the backend...

Initializing provider plugins...
- Finding digitalocean/digitalocean versions matching "~> 2.0"...
- Installing digitalocean/digitalocean v2.34.1...
- Installed digitalocean/digitalocean v2.34.1 (signed by a HashiCorp partner, key ID F82037E524B9C0E8)

Partner and community providers are signed by their developers.
If you'd like to know more about provider signing, you can read about it here:
https://www.terraform.io/docs/cli/plugins/signing.html

Terraform has created a lock file .terraform.lock.hcl to record the provider
selections it made above. Include this file in your version control repository
so that Terraform can guarantee to make the same selections by default when
you run "terraform init" in the future.

Terraform has been successfully initialized!
In the next step, you’ll use Terraform to define a Droplet that will run our Odoo image. Run the terraform plan command to see what Terraform will attempt to do to build the infrastructure you described.
$ terraform plan

data.digitalocean_image.docker-snapshot: Reading...
data.digitalocean_image.docker-snapshot: Read complete after 0s [name=packer-odoo-s-2vcpu-4gb]

Terraform used the selected providers to generate the following execution
plan. Resource actions are indicated with the following symbols:
  + create

Terraform will perform the following actions:

  # digitalocean_droplet.odoo will be created
  + resource "digitalocean_droplet" "odoo" {
      + backups              = false
      + created_at           = (known after apply)
      + disk                 = (known after apply)
      + graceful_shutdown    = false
      + id                   = (known after apply)
      + image                = "150952360"
      + ipv4_address         = (known after apply)
      + ipv4_address_private = (known after apply)
      + ipv6                 = false
      + ipv6_address         = (known after apply)
      + locked               = (known after apply)
      + memory               = (known after apply)
      + monitoring           = false
      + name                 = "droplet-odoo-s-2vcpu-4gb"
      + price_hourly         = (known after apply)
      + price_monthly        = (known after apply)
      + private_networking   = (known after apply)
      + region               = "fra1"
      + resize_disk          = true
      + size                 = "s-2vcpu-4gb"
      + status               = (known after apply)
      + urn                  = (known after apply)
      + vcpus                = (known after apply)
      + volume_ids           = (known after apply)
      + vpc_uuid             = (known after apply)
    }

Plan: 1 to add, 0 to change, 0 to destroy.

Changes to Outputs:
  + ip = (known after apply)
You can verify that Terraform uses the correct image by comparing the ID you wrote down earlier with the image value here. Now we are ready to deploy using the terraform apply command:
$ terraform applyNote
You can also use terraform apply -var NAME="your-custom-droplet-name" to specify the name for your Droplet. This is helpful in case you want to create more Odoo Droplets.
This will take about a minute to finish and if the deployment is finished you should see something like this on your console:
digitalocean_droplet.odoo: Creating...
digitalocean_droplet.odoo: Still creating... [10s elapsed]
digitalocean_droplet.odoo: Still creating... [20s elapsed]
digitalocean_droplet.odoo: Still creating... [30s elapsed]
digitalocean_droplet.odoo: Still creating... [40s elapsed]
digitalocean_droplet.odoo: Still creating... [50s elapsed]
digitalocean_droplet.odoo: Still creating... [1m0s elapsed]
digitalocean_droplet.odoo: Creation complete after 1m3s [id=403757586]

Apply complete! Resources: 1 added, 0 changed, 0 destroyed.

Outputs:

ip = "165.22.66.29"
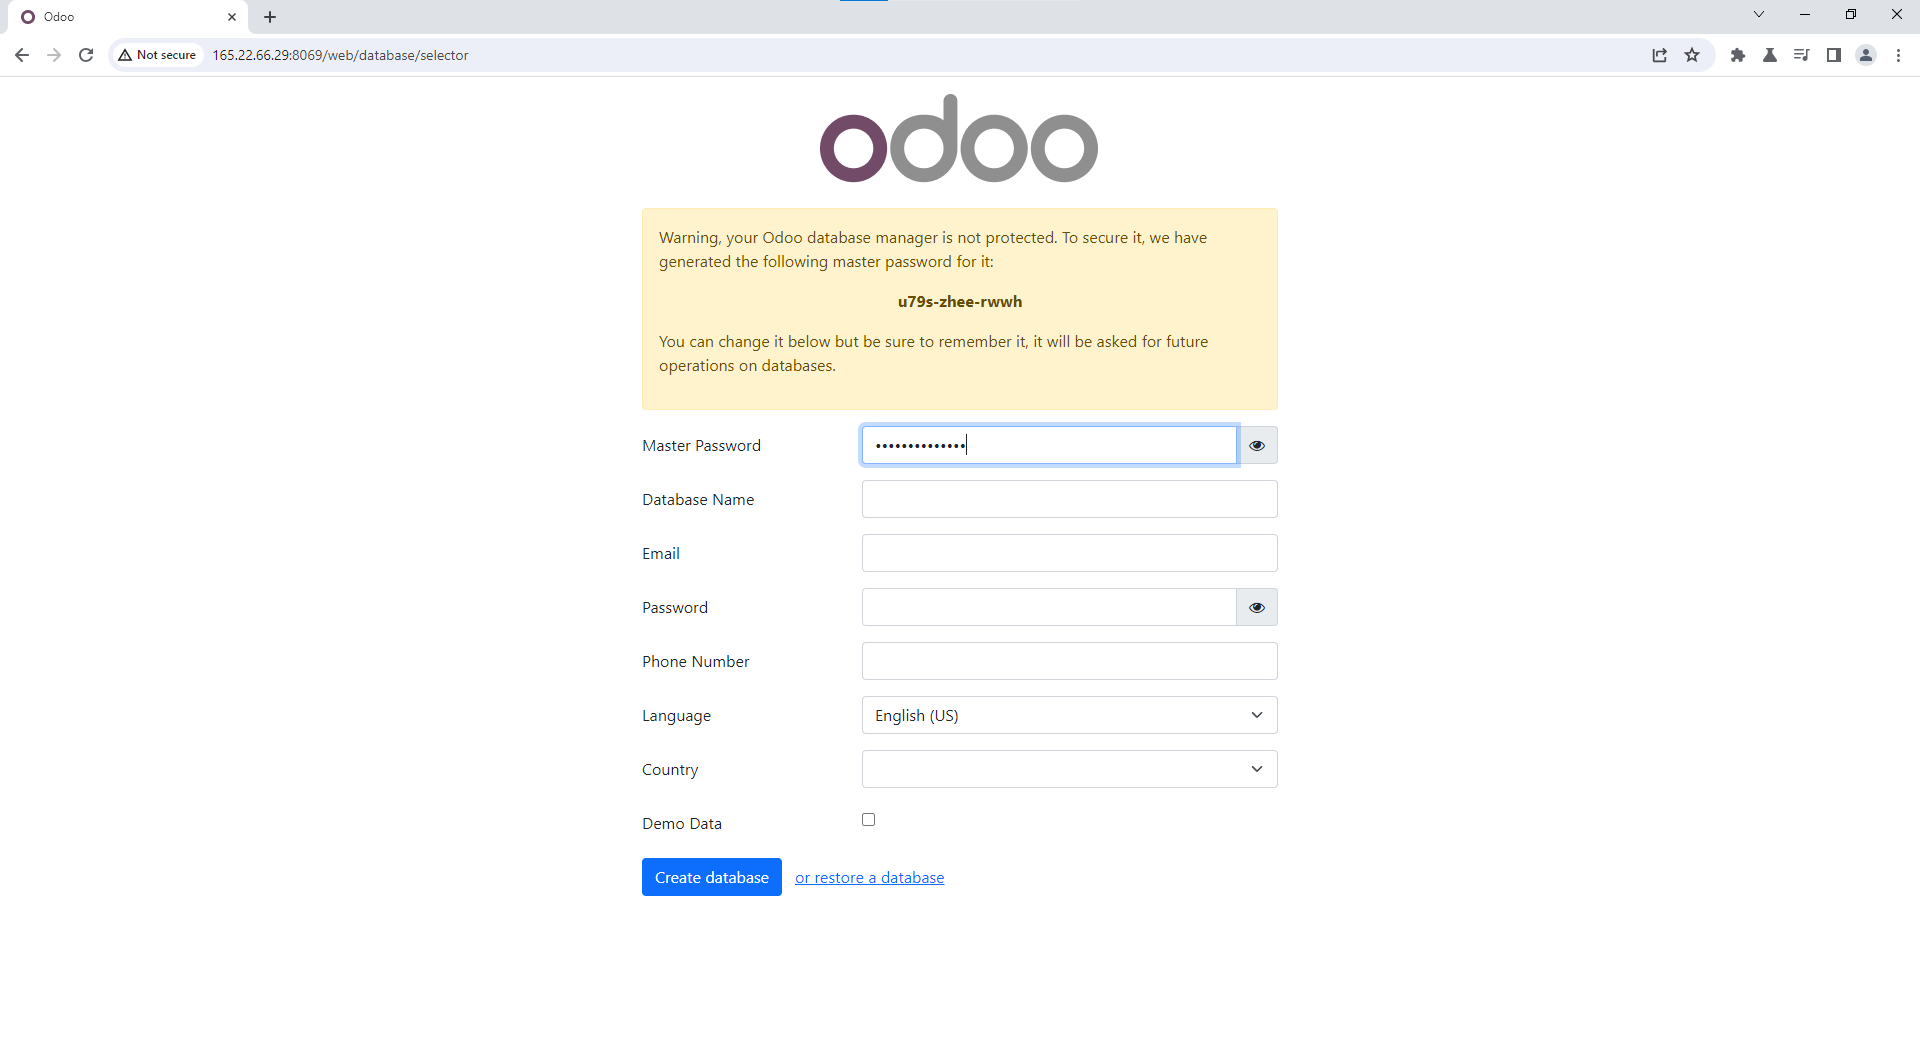
Your Odoo server should now be up and running. You will get a confirmation by email with your credentials. If you open your browser and go to 165.22.66.29:8069, you will see the Odoo installation screen. Note that your IP address will be different than the one listed here.
Although not commonly used in production environments, Terraform can also destroy infrastructure that it created. If you no longer want to use this Droplet you can destroy it by running:
$ terraform destroyTerraform will proceed to destroy the Droplet. Note that all the data on the Droplet will be lost, so make sure you back up your data before you do.
Conclusion
That's it! After you have successfully build your Odoo image, you can deploy a fresh instance of Odoo instantly, with just one command. Note that this example is very basic and you should consider configuring a reverse proxy on the image, so that you can use a domain instead of an IP address. More about this in my blog posts Unleash the power of Traefik: Securing your Odoo instance with SSL and Setting up a reverse proxy for Odoo with Nginx Proxy Manager in Docker. Also note, that in this example, I only deploy a single Droplet. But to take full advantage of Terraform, you could for instance configure Load Balancers with multiple Droplets to make sure your Odoo instance is always up-and-running. You can find all the configuration templates here.