The advantages of managing multiple websites for a business are numerous, and Odoo makes it easier than ever to harness their potential. By running several websites, a business can effectively target different markets, cater to diverse customer segments, and even personalize content to meet specific audience needs. This level of customization can lead to increased brand awareness, stronger customer relationships, and higher conversion rates. Additionally, managing multiple websites allows for easier tracking of individual site performance, enabling businesses to make data-driven decisions and optimize their online strategies.
However, there are also drawbacks to managing multiple websites. The increased complexity of managing various domains, hosting environments, and content strategies can consume significant time and resources. Moreover, it can be challenging to maintain brand consistency and high-quality user experiences across all websites, especially if a business lacks the necessary technical expertise. These challenges, though, can be mitigated by leveraging Odoo powerful multi-site management tools, which streamline the process and help businesses optimize their online presence without compromising quality.
In this blog post, I'll delve into the process of configuring Traefik and Odoo to effectively set up multiple websites, enabling businesses to harness the benefits of a diverse online presence. Traefik, a modern reverse proxy and load balancer, can be seamlessly integrated with Odoo to streamline the management of multiple websites. By following my step-by-step guide, you'll gain a thorough understanding of how to configure both Traefik and Odoo, making the process of running several websites an efficient and hassle-free experience.
Multiple websites in Odoo
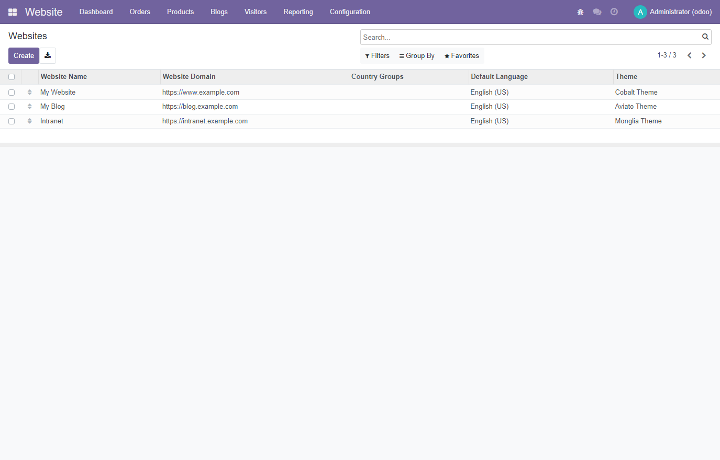
Setting up multiple websites in Odoo is a straightforward process. Here's a step-by-step guide to help you get started. First you need to install and setup the website module, the blog module, and the e-commerce module. In this tutorial, I'll be focusing on the Blog and E-commerce modules for your websites. However, it's important to note that the steps and principles covered in this guide are applicable to other website modules as well. Odoo offers a wide array of modules, such as Forums, Events, and eLearning, which can be easily integrated into your websites to expand their functionality. Once you have installed everything you can add more websites in the website settings section

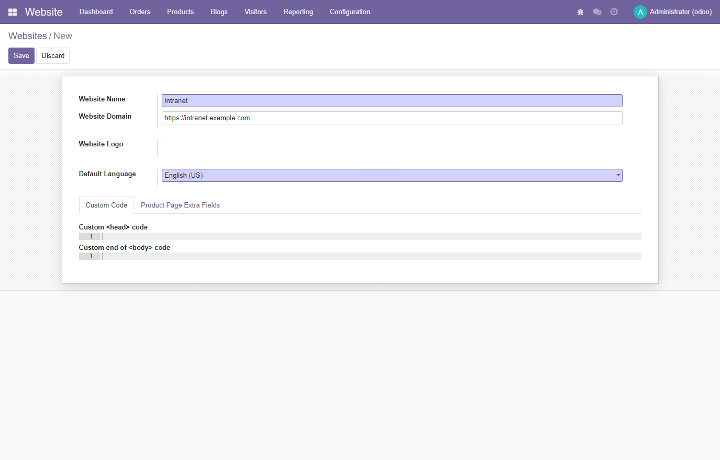
Here you can configure various settings such as the website name, domain name (e.g., "www.example.com"), the default language, the website theme. Once you've configured the necessary settings, click on "Save" to create your new website. Now you have configured your first website. To add a second website, you click the 'New' button under 'Settings' or in the 'Website' module head to 'Configuration' > 'Websites'. Here you can add more websites. Each website can have its own unique domain or subdomain (e.g., "blog.example.com"), theme, and settings.
By following this guide, you've successfully set up multiple websites. Odoo's powerful tools and modular architecture make managing various websites a streamlined and efficient process. In the next section of this blog, I'll explore how to use Traefik, a modern reverse proxy and load balancer, to configure multiple URLs for your websites. This will further enhance your ability to manage your online presence, allowing you to efficiently route traffic to each website.
Traefik Configuration
Traefik is a powerful and dynamic reverse proxy and load balancer designed to simplify the routing and management of network traffic in containerized environments. For the purpose of this tutorial, I'll assume that both Odoo and Traefik are running as Docker containers, which allows for greater flexibility and ease of deployment. If you need assistance setting up Odoo as a Docker container and configuring Traefik as a reverse proxy for Odoo, I recommend referring to my dedicated blog posts on this topic (Odoo deployment with Docker and Portainer and Securing your Odoo instance with SSL). This current blog post will provide you with step-by-step instructions to ensure a seamless integration of Odoo and Traefik, helping you achieve efficient management of multiple websites.
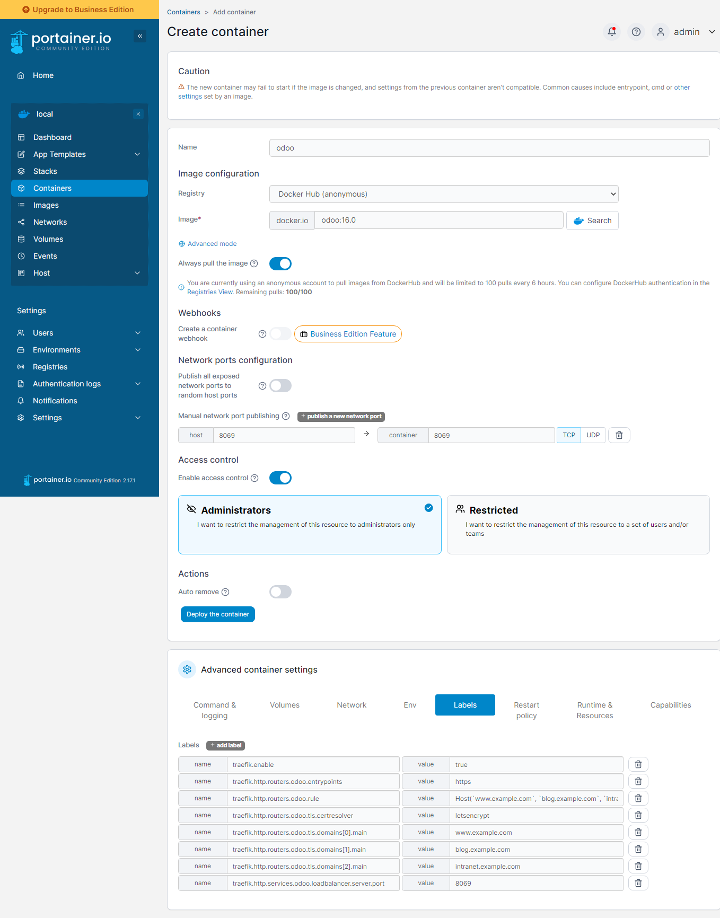
In this blog post, I will set up Traefik to handle multiple websites, enabling the domains "https://www.example.com", "https://blog.example.com", and "https://intranet.example.com" to be accessible over the internet. Setting up Traefik to function smoothly with an Odoo container can be accomplished by incorporating the required labels into your docker-compose.yml file or by modifying a pre-existing Odoo instance within Portainer.
labels:
  - "traefik.enable=true"
  - "traefik.http.routers.odoo.entrypoints=https"
  - "traefik.http.routers.odoo.rule=Host(`www.example.com`, `blog.example.com`, `intranet.example.com`)"
  - "traefik.http.routers.odoo.tls.certresolver=letsencrypt"
  - "traefik.http.routers.odoo.tls.domains[0].main=www.example.com"
  - "traefik.http.routers.odoo.tls.domains[1].main=blog.example.com"
  - "traefik.http.routers.odoo.tls.domains[2].main=intranet.example.com"
  - "traefik.http.services.odoo.loadbalancer.server.port=8069"
These Traefik labels define the configuration for an Odoo instance allowing for multiple websites to be routed to Odoo:
- The traefik.enable=true label activates Traefik for the specific container, ensuring that Traefik manages this instance.
- The traefik.http.routers.odoo.entrypoints=https label defines an HTTPS router named "odoo" that listens on the "https" entry point on port 443.
- The traefik.http.routers.odoo.rule=Host(`www.example.com`, `blog.example.com`, `intranet.example.com`) label sets the rule for the "odoo" router to match the specified hostnames: "www.example.com", "blog.example.com", and "intranet.example.com". The router will catch incoming requests for these domains.
- The traefik.http.routers.odoo.tls.certresolver=letsencrypt label specifies that the "odoo" router should use the "letsencrypt" certificate resolver for obtaining SSL certificates.
- The traefik.http.routers.odoo.tls.domains[0].main=www.example.com, traefik.http.routers.odoo.tls.domains[1].main=blog.example.com, and traefik.http.routers.odoo.tls.domains[2].main=intranet.example.com labels define the primary domain names for which the SSL certificates should be obtained: "www.example.com", "blog.example.com" and "intranet.example.com".
- The traefik.http.services.odoo.loadbalancer.server.port=8069 label configures the "odoo" service, setting the load balancer's target server port to 8069, which is the default port for Odoo instances.
For a more in-depth understanding of configuring Traefik for Odoo, please refer to my dedicated blog post on this topic. To integrate Traefik into your docker-compose.yml file, simply include the aforementioned labels in the 'labels' section of the Odoo service. Make sure that the domain names and other settings align with your specific needs. If you're utilizing Portainer, go to the details of the Odoo container, click "Duplicate/Edit," and insert the labels under the "Labels" tab. Save your modifications and recreate the container to implement the new configurations. With these labels established, Traefik will handle the routing to multiple websites, SSL certificates, and security settings for your Odoo container, fostering a secure and optimized environment for Odoo.
With Traefik now set up to work seamlessly with multiple websites, you can enjoy a more streamlined and efficient management of your online presence. A notable advantage of Traefik is the automatic creation of SSL certificates for each domain, ensuring a secure browsing experience for your visitors. This powerful reverse proxy not only simplifies routing but also enhances the overall security of your Odoo-based websites.
The next section describes how to implement rewrite rules in Odoo to further customize your websites by disabling specific modules, such as e-commerce, for certain domains. By harnessing Odoo's flexibility, you can tailor your websites to meet the unique needs of different audiences, providing a more targeted and engaging user experience.
Customize your websites by disabling specific Odoo modules
In this tutorial, I'll be focusing on the Blog and E-commerce modules for your multiple websites. However, it's important to note that the steps and principles covered in this guide are applicable to other website modules as well. By default, if you install a website addon module, such as the Blog module, this module is accessible for all websites.
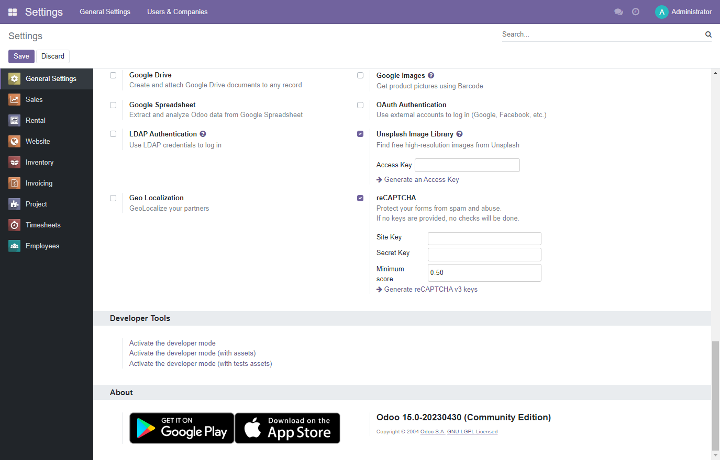
Occasionally, you may wish to limit the modules available for use on each website. For instance, if you want to disable the blog module on "www.example.com", simply removing the blog item from the menu would not be enough. Instead, you would need to create a rewrite rule that redirects users to a 404 page when attempting to access the blog module. Odoo enables the addition of rewrite rules, but first, you must activate developer mode. To do so, navigate to "Settings," scroll to the bottom of the page, and click on "Activate the developer mode."
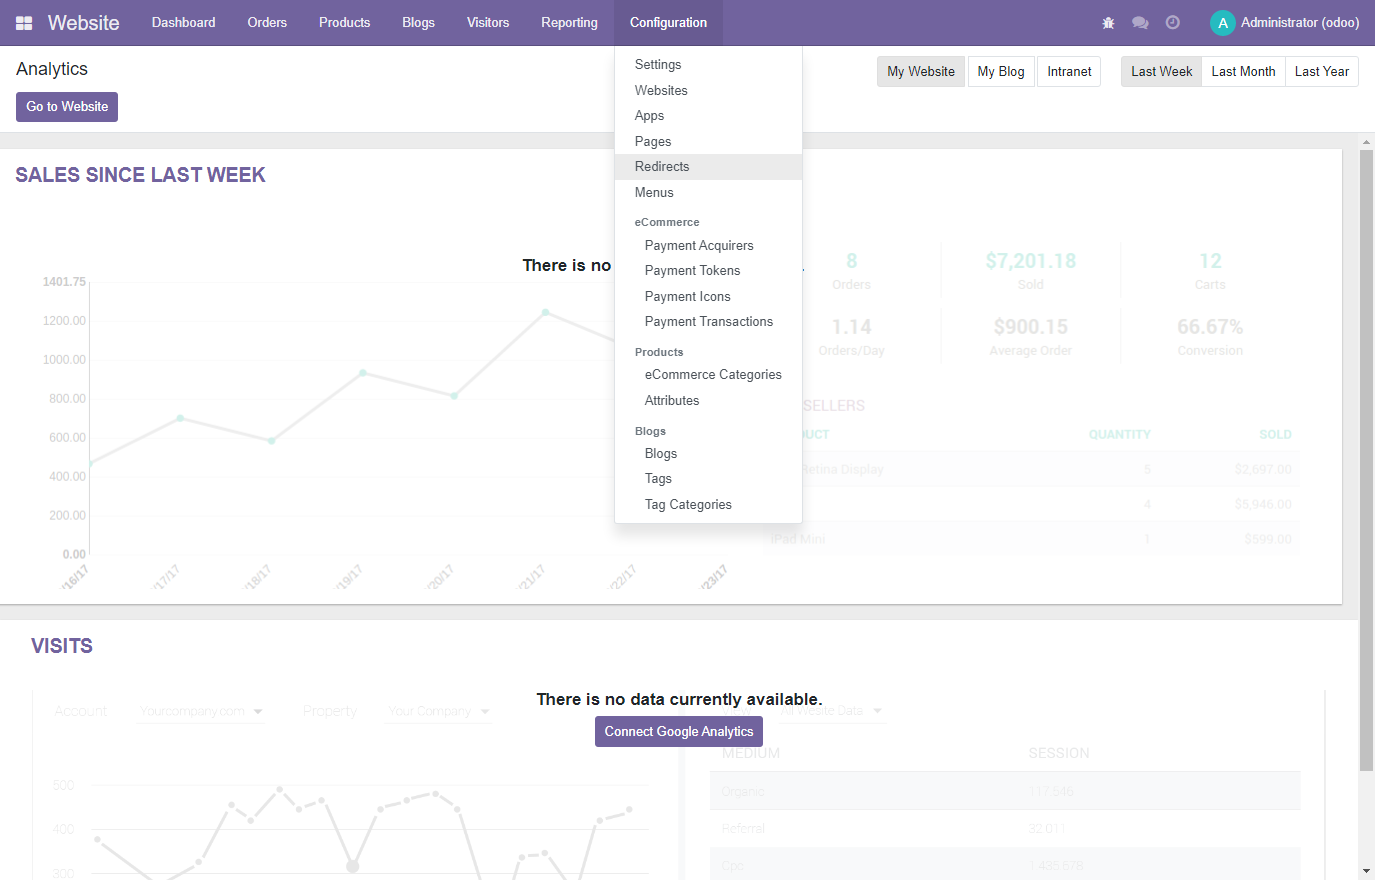
Now you can go to the "Website" module and then "Configuration" > "Redirects".
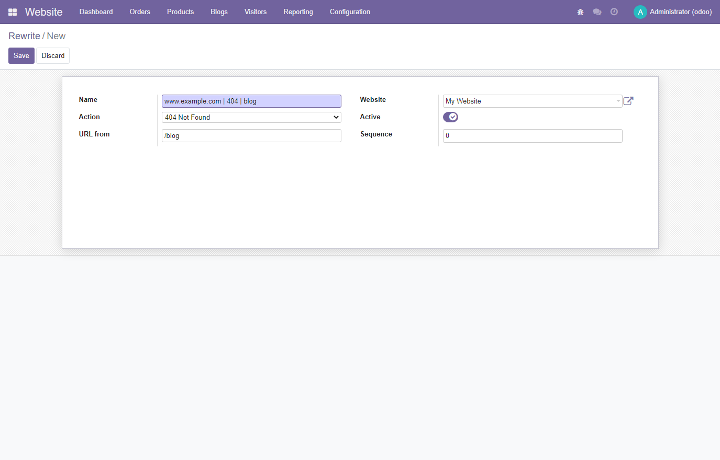
To configure a rewrite rule in Odoo that disables the blog module for the "www.example.com" website, click on "Create" to set up a new rewrite rule. In the form, provide a name for the rule (e.g., "Disable Blog Module") and set the "URL From" field to the path of the blog module, such as "/blog". Set the "Action" field to "404 Not Found" to redirect users attempting to access the blog module to a 404 page. Finally, choose the appropriate website on which you want to apply this rule under the "Website" field. Click "Save" to implement the rewrite rule, effectively disabling the blog module for the specified website.
Note
This rewrite rule will only redirect https://www.example.com/blog to a 404 page. But all sub pages, like individual blog posts will still be available. Moreover, these pages will also show up in the Odoo generated sitemap. To make sure that these pages are no longer available you should inspect all @http.route decorators in the BlogController located in website_blog/controllers/main.py. You should create a rewrite rule for all routes where type=http, auth=public, website=True and sitemap=True. For example:
@http.route([
        '/blog',
        '/blog/page/<int:page>',
        '/blog/tag/<string:tag>',
        '/blog/tag/<string:tag>/page/<int:page>',
        '''/blog/<model("blog.blog"):blog>''',
        '''/blog/<model("blog.blog"):blog>/page/<int:page>''',
        '''/blog/<model("blog.blog"):blog>/tag/<string:tag>''',
        '''/blog/<model("blog.blog"):blog>/tag/<string:tag>/page/<int:page>''',
], type='http', auth="public", website=True, sitemap=True)
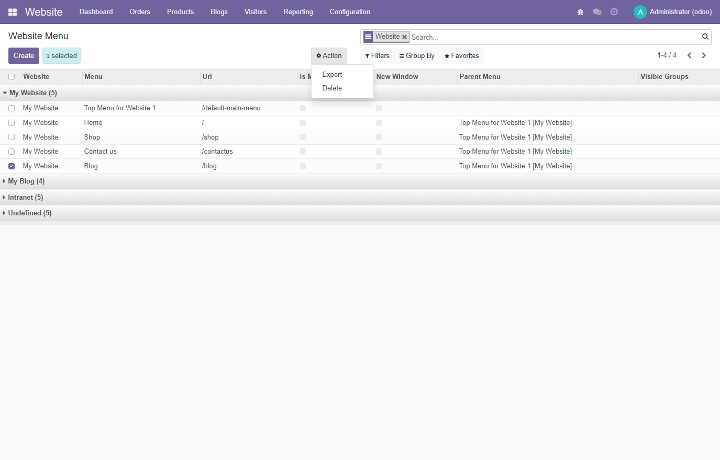
Create a rewrite rule for all records, to make sure that they no longer show up in the generated sitemap and are properly redirected to a 404 page.Now that the rewrite rule is in effect you must still remove the "Blog" menu item. To remove a menu item, first ensure that the developer mode is still activated. Then, navigate to the Website module and click on "Configuration," followed by "Menus". Select the "Blog" item for the website that belongs to the domain "www.example.com", and under "Action" click on the "Delete button.
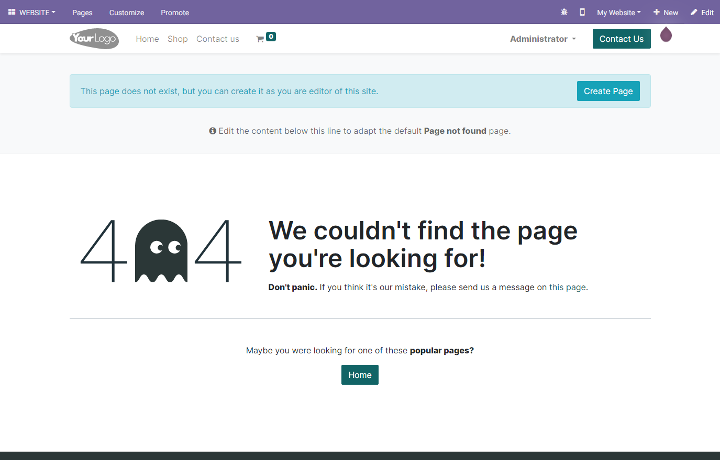
Now you have disabled the "Blog" module for the website "www.example.com". The menu item is no longer visible and if you try to visit the blog page ("www.example.com/blog") you get automatically redirected to a 404 page.
Leveraging Odoo's URL rewriting and redirect settings to disable a module, such as the blog, offers a robust way to tailor your website to the unique needs of your target audience. By implementing rewrite rules and customizing menu items, you can exercise fine control over the features and functionalities available to your users. This level of customization enables you to optimize the user experience and ensure that your website aligns with your strategic goals.
Conclusion
By following the steps outlined in this blog, you've learned how to efficiently set up multiple websites, utilize Traefik for seamless traffic routing and SSL certificate management, and fine-tune redirect rules to customize each website's functionality. With this knowledge, you can now harness the full potential of Odoo and Traefik to create an engaging, secure, and optimized digital presence, catering to the diverse needs of your audience and driving your business's success.